HP dx2100 HP Compaq dx2100 MT Business PC Service Reference Guide (1st Edition - Page 56
Removing a 3.5 Diskette Drive, Preparation for Disassembly, Access Panel
 |
View all HP dx2100 manuals
Add to My Manuals
Save this manual to your list of manuals |
Page 56 highlights
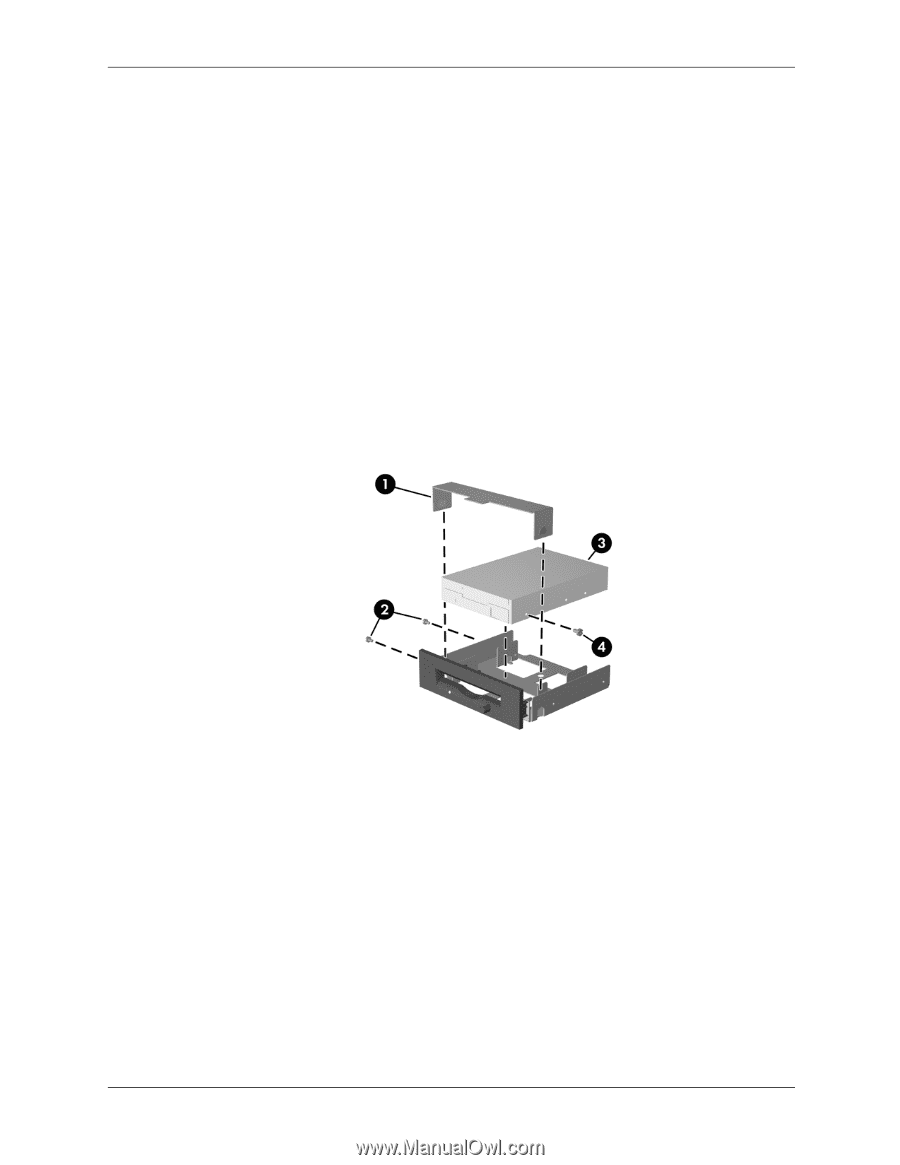
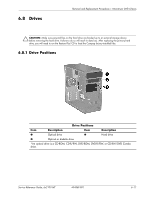
Removal and Replacement Procedures- Microtower (MT) Chassis 6.8.4 Removing a 3.5" Diskette Drive 1. Prepare the computer for disassembly (Section 6.1, "Preparation for Disassembly"). 2. Remove the access panel (Section 6.2, "Access Panel"). 3. Remove the front bezel (Section 6.3, "Front Bezel"). 4. Remove the diskette drive (Section 6.8.3, "Removing a Hard Drive"). 5. Disconnect the power, and data cables from the back the drive. 6. Remove the two screws that secure the drive cage adapter in the drivebay. 7. Remove the bracket brace 1 from the top of the drive adapter by squeezing inward on both sides. 8. Remove the two screws that secure the drive to the side of the drive adapter 2. 9. Slide the drive 3 to the rear of the drive adapter about 10 cm (3/8 in) then, lift the drive from the adapter. 10. Remove the guide screw from the drive 4 for transfer to the replacement drive. To replace the drive cage, reverse the removal procedure. 6-14 404569-001 Service Reference Guide, dx2100 MT
-
 1
1 -
2
-
3
-
4
-
5
-
6
-
7
-
8
-
9
-
10
-
11
-
12
-
13
-
14
-
15
-
16
-
17
-
18
-
19
-
20
-
21
-
22
-
23
-
24
-
25
-
26
-
27
-
28
-
29
-
30
-
31
-
32
-
33
-
34
-
35
-
36
-
37
-
38
-
39
-
40
-
41
-
42
-
43
-
44
-
45
-
46
-
47
-
48
-
49
-
50
-
 51
51 -
 52
52 -
 53
53 -
 54
54 -
 55
55 -
 56
56 -
 57
57 -
 58
58 -
 59
59 -
 60
60 -
 61
61 -
62
-
63
-
64
-
65
-
66
-
67
-
68
-
69
-
70
-
71
-
72
-
73
-
74
-
75
-
76
-
77
-
78
-
79
-
80
-
81
-
82
-
83
-
84
-
85
-
86
-
87
-
88
-
89
-
90
-
91
-
92
-
93
-
94
-
95
-
96
-
97
-
98
-
99
-
100
-
101
-
102
-
103
-
104
-
105
-
106
-
107
-
108
-
109
-
110
-
111
-
112
-
113
-
114
-
115
-
116
 |
 |