HP mt20 Maintenance and Service Guide
HP mt20 Manual
 |
View all HP mt20 manuals
Add to My Manuals
Save this manual to your list of manuals |
HP mt20 manual content summary:
- HP mt20 | Maintenance and Service Guide - Page 1
HP mt20 Mobile Thin Client Maintenance and Service Guide - HP mt20 | Maintenance and Service Guide - Page 2
services. Nothing herein should be construed as constituting an additional warranty. HP shall not be liable for technical or editorial errors or omissions contained herein. First Edition: February 2017 Document Part Number: 915603-001 Product notice This user guide 7 drivers on http://support.hp.com - HP mt20 | Maintenance and Service Guide - Page 3
Self-Repair Parts CAUTION: Your computer includes Customer Self-Repair parts and parts that should only be accessed by an authorized service provider. See Chapter 5, "Removal and replacement procedures for Customer Self-Repair parts," for details. Accessing parts described in Chapter 6, "Removal and - HP mt20 | Maintenance and Service Guide - Page 4
iv Important Notice about Customer Self-Repair Parts - HP mt20 | Maintenance and Service Guide - Page 5
Safety warning notice WARNING! To reduce the possibility of heat-related injuries or of overheating the computer, do not place the computer directly on your lap or obstruct the computer air vents. Use the computer only on a hard, flat surface. Do not allow another hard surface, such as an adjoining - HP mt20 | Maintenance and Service Guide - Page 6
vi Safety warning notice - HP mt20 | Maintenance and Service Guide - Page 7
...17 Plastics Kit ...18 Miscellaneous parts ...19 4 Removal and replacement procedures preliminary requirements 21 Tools required ...21 Service considerations ...21 Plastic parts ...21 Cables and connectors ...21 Grounding guidelines ...22 Electrostatic discharge damage 22 Packaging and - HP mt20 | Maintenance and Service Guide - Page 8
for Authorized Service Provider parts BIOS settings (select products only) ...70 Using HP Sure Start (select products only) ...70 8 Using HP PC Hardware Diagnostics (UEFI) (Windows only 71 Downloading HP PC Hardware Diagnostics (UEFI) to a USB device 71 9 Diagnostics and troubleshooting - HP mt20 | Maintenance and Service Guide - Page 9
LEDs and audible codes 75 POST numeric codes and text messages ...77 Troubleshooting ...79 Basic troubleshooting ...79 Diskless (No-Flash) unit troubleshooting 80 Configuring a PXE server ...81 10 HP ThinUpdate ...82 11 Device management ...83 12 Specifications ...84 Computer specifications ...84 - HP mt20 | Maintenance and Service Guide - Page 10
x - HP mt20 | Maintenance and Service Guide - Page 11
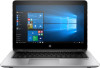
Wireless networking External media card Ports Description HP mt20 Mobile Thin Client Intel® Celeron Dual-Core 3865U processor (1.8 battery mode) Wireless Personal Area Network (PAN) Bluetooth Bluetooth 4.2 supported using combo card Wireless Local Area Network (WLAN) Integrated WLAN options - HP mt20 | Maintenance and Service Guide - Page 12
down) Operating system version Windows 10 IoT Enterprise 2015 LTSB for Retail and Thin Clients HP ThinPro 6 HP Smart Zero Preinstalled Windows 10 IoT Enterprise 2015 LTSB for Retail and Thin Clients HP ThinPro 6 HP Smart Zero End-user replaceable parts AC adapter 2 Chapter 1 Product description - HP mt20 | Maintenance and Service Guide - Page 13
Category Description M.2 solid-state drive Memory module WLAN module Keyboard 3 - HP mt20 | Maintenance and Service Guide - Page 14
) jack/status lights (6) Power connector Description Connects any USB device with a Type-C connector and can charge products such as cell phones, laptops, tablets, and MP3 players. Connects an optional USB device, such as a keyboard, mouse, external drive, printer, scanner or USB hub. Connects - HP mt20 | Maintenance and Service Guide - Page 15
as cell phones, laptops, tablets, and not support optional Guides. NOTE: When a device is connected to the jack, the computer speakers are disabled. Reads optional memory cards that store, manage, share, or access information. Drive light ● Blinking white: The drive is being accessed. ● Amber: HP - HP mt20 | Maintenance and Service Guide - Page 16
obstructions. For wireless regulatory notices, see the section of the Regulatory, Safety, and Environmental Notices that applies to your country or region. To access this guide in Windows: ▲ Select My PC, select the Specifications tab, and then select User - HP mt20 | Maintenance and Service Guide - Page 17
Top TouchPad Component (1) (2) (3) TouchPad zone Left TouchPad button Right TouchPad button Description Reads your finger gestures to move the pointer or activate items on the screen. Functions like the left button on an external mouse. Functions like the right button on an external mouse. Top 7 - HP mt20 | Maintenance and Service Guide - Page 18
Lights Component (1) Power light (2) Caps lock light (3) Microphone mute light (4) Num lock light (5) Wireless light (6) Mute light Description ● On: The computer is on. ● Blinking: The computer is in the Sleep state, a power-saving state. The computer shuts off power to the display and - HP mt20 | Maintenance and Service Guide - Page 19
Buttons and speakers Component (1) Power button (2) Speakers (2) (3) Wireless button Description ● When the computer is off, press the button to turn on the computer. ● (Windows) When the computer is on, press the button briefly to initiate sleep. ● (ThinPro/Smart Zero) When the computer is - HP mt20 | Maintenance and Service Guide - Page 20
Component (4) Volume mute button Special function keys Description A wireless network must be set up before a wireless connection is possible. Mutes and restores speaker sound. Component (1) esc key (2) fn key (3) Windows key (4) Embedded numeric keypad (5) Windows application key (6) - HP mt20 | Maintenance and Service Guide - Page 21
Using the hot keys To use a hot key: ▲ Press the fn key, and then press the correct function key represented by the icons below. Press fn+function key Description Initiates Sleep, which saves your information in system memory. The display and other system components turn off and power is conserved. - HP mt20 | Maintenance and Service Guide - Page 22
Bottom Component (1) Service door (2) Vents (2) Description Provides access to the WLAN module receive a warning message, remove the module to restore computer functionality, and then contact support. Enable airflow to cool internal components. NOTE: The computer fan starts up automatically to - HP mt20 | Maintenance and Service Guide - Page 23
provide information you may need when you troubleshoot system problems or travel internationally with the computer. IMPORTANT: Check the following locations for the labels described in this section: the bottom of the computer, inside the battery bay, under the service door, or on the back of the - HP mt20 | Maintenance and Service Guide - Page 24
current information on supported parts for your computer, go to http://partsurfer.hp.com, select your country or region, and then follow the on-screen instructions. NOTE: Details about your computer, including model, serial number, product key, and length of warranty, are on the service tag at the - HP mt20 | Maintenance and Service Guide - Page 25
module, 4 GB (PC4-2133) (15) Battery, Li-ion (4-cell, 48 WHr, 4.21 Ah) (16) Power connector cable (17) Base enclosure (18) Main service door NOTE: The main service door is included in the Plastic Kit. Spare part number not spared 906764-xxx 906763-xxx 905712-001 905702-001 905710-001 905705-001 - HP mt20 | Maintenance and Service Guide - Page 26
Cable Kit Item (1) (2) (3) (4) Description Cable Kit Function board cable USB board cable Power button board cable TouchPad cable Spare part number 905707-001 16 Chapter 3 Illustrated parts catalog - HP mt20 | Maintenance and Service Guide - Page 27
Display components Item Description (1) Display bezel Models without a webcam Models with a webcam (2) Webcam module (3) Hinge covers (left and right) (4) Display/webcam cable assembly Spare part number 905693-001 905692-001 826271-002 905699-001 905696-001 Display components 17 - HP mt20 | Maintenance and Service Guide - Page 28
antennas) Plastics Kit Spare part number not spared 905698-001 839668-002 905694-001 Item (1) (2) (3) Description Plastics Kit Main service door Fingerprint reader bracket (fingerprint reader not available on this product) Fingerprint reader insert 18 Chapter 3 Illustrated parts catalog Spare - HP mt20 | Maintenance and Service Guide - Page 29
Miscellaneous parts Description AC adapters 65-W Smart AC power adapter, 4.5 mm barrel connector (for use in India and the People's Republic of China) 45-W Smart AC power adapter, 4.5 mm barrel connector 45-W Smart AC power adapter, 4.5 mm barrel connector, 2 prong Power cord (3-pin, C5, black, 1.83 - HP mt20 | Maintenance and Service Guide - Page 30
Switzerland Taiwan Thailand United Kingdom and Singapore Power cord (3-pin, C7, black, 1.00-m), for use in: Japan Screw Kit HP keyed cable lock HP Smart AC Adapter dongle, 7.4 mm HP USB-C to USB 3.0 Adapter Spare part number 213349-009 286497-008 361240-002 267836-008 213354-008 393313-003 285096 - HP mt20 | Maintenance and Service Guide - Page 31
plastic parts. Use care when handling the plastic parts. Apply pressure only at the points designated in the maintenance instructions. Cables and connectors CAUTION: When servicing the computer, be sure that cables are placed in their proper locations during the reassembly process. Improper cable - HP mt20 | Maintenance and Service Guide - Page 32
Grounding guidelines Electrostatic discharge damage Electronic components are sensitive to electrostatic discharge (ESD). Circuitry design and structure determine the degree of sensitivity. Networks built into many integrated circuits provide some protection, but in many cases, ESD contains enough - HP mt20 | Maintenance and Service Guide - Page 33
material. ● Use a wrist strap connected to a properly grounded work surface and use properly grounded tools and equipment. ● Use conductive field service tools, such as cutters, screwdrivers, and vacuums. ● When fixtures must directly contact dissipative surfaces, use fixtures made only of static - HP mt20 | Maintenance and Service Guide - Page 34
with ground cords of one megohm resistance ● Static-dissipative tables or floor mats with hard ties to the ground ● Field service kits ● Static awareness labels ● Material-handling packages ● Nonconductive plastic bags, tubes, or boxes ● Metal tote boxes ● Electrostatic voltage levels and - HP mt20 | Maintenance and Service Guide - Page 35
on supported parts for your computer, go to http://partsurfer.hp.com, select your country or region, and then follow the on-screen instructions. many as 14 screws that must be removed, replaced, or loosened when servicing Customer SelfRepair parts. Make special note of each screw size and location - HP mt20 | Maintenance and Service Guide - Page 36
from the computer by first unplugging the power cord from the AC outlet, and then unplugging the AC adapter from the computer. Remove the service door: 1. Main service door Loosen the captive Phillips screw (1). 2. Lift the bottom of the door upward (2), and then remove the door from the computer - HP mt20 | Maintenance and Service Guide - Page 37
BIOS. CAUTION: Failure to update the computer to the latest BIOS prior to installing new memory may result in various system problems. To update BIOS: 1. Navigate to www.hp.com. 2. Click Support & Drivers > click Drivers computer. 5. Remove the main service door (see Service door on page 26). Remove - HP mt20 | Maintenance and Service Guide - Page 38
2. Remove the memory module (2) by pulling the module away from the slot at an angle. NOTE: Memory modules are designed with a notch to prevent incorrect insertion into the memory module slot. Reverse this procedure to install a memory module. 28 Chapter 5 Removal and replacement procedures for - HP mt20 | Maintenance and Service Guide - Page 39
computer by first unplugging the power cord from the AC outlet, and then unplugging the AC adapter from the computer. 5. Remove the main service door (see Service door on page 26). Remove the WLAN module: 1. Disconnect the WLAN antenna cables (1) from the terminals on the WLAN module. NOTE: The WLAN - HP mt20 | Maintenance and Service Guide - Page 40
3. Remove the WLAN module (3) by pulling the module away from the slot at an angle. NOTE: WLAN modules are designed with a notch to prevent incorrect insertion. NOTE: If the WLAN antennas are not connected to the terminals on the WLAN module, the protective sleeves must be installed on the antenna - HP mt20 | Maintenance and Service Guide - Page 41
from the computer by first unplugging the power cord from the AC outlet, and then unplugging the AC adapter from the computer. 5. Remove the service door (see Service door on page 26). Remove the solid-state drive: 1. Remove the Phillips PM2.0×4.0 screw (1) that secures the solid-state drive to the - HP mt20 | Maintenance and Service Guide - Page 42
by first unplugging the power cord from the AC outlet, and then unplugging the AC adapter from the computer. 5. Remove the main service door (see Service door on page 26). Remove the keyboard: 1. Remove the 2 Phillips PM2.5×5.0 screws that secure the keyboard to the computer (1). 32 Chapter - HP mt20 | Maintenance and Service Guide - Page 43
2. Insert a tool into the access hole in the bottom of the computer and push to disengage the keyboard from the top cover (2). 3. Lift the top of the keyboard upward (1), and then rotate the keyboard until it rests on the palm rest (2). NOTE: A cable (or cables) connect the bottom of the keyboard to - HP mt20 | Maintenance and Service Guide - Page 44
5. If applicable, disconnect the backlight cable by lifting the connector latch (3), and then disconnect the cable from the system board (4). 6. Remove the keyboard (5). Reverse this procedure to install the keyboard. 34 Chapter 5 Removal and replacement procedures for Customer Self-Repair parts - HP mt20 | Maintenance and Service Guide - Page 45
supported parts for your computer, go to http://partsurfer.hp.com, select your country or region, and then follow the on-screen instructions as 57 screws that must be removed, replaced, or loosened when servicing Authorized Service Provider only parts. Make special note of each screw size and - HP mt20 | Maintenance and Service Guide - Page 46
edge toward you. b. Lift to disengage the adhesive that secures the webcam/microphone module to the display (1). 36 Chapter 6 Removal and replacement procedures for Authorized Service Provider parts - HP mt20 | Maintenance and Service Guide - Page 47
c. Disconnect the cable (2) from the module. 5. To remove the display panel: a. Remove the 4 Phillips PM2.0×3.0 screws (1) that secure the display panel to the enclosure. b. Rotate the display panel onto the keyboard (2) to gain access to the display cable connection on the back of the panel. c. On - HP mt20 | Maintenance and Service Guide - Page 48
d. Remove the display panel from the computer (3). Reverse this procedure to reassemble and install the display bezel, webcam/microphone module, and display panel. 38 Chapter 6 Removal and replacement procedures for Authorized Service Provider parts - HP mt20 | Maintenance and Service Guide - Page 49
first unplugging the power cord from the AC outlet, and then unplugging the AC adapter from the computer. 5. Remove the following components: a. Service door (see Service door on page 26). b. Keyboard (see Keyboard on page 32) Remove the top cover: 1. Position the computer upside-down with the front - HP mt20 | Maintenance and Service Guide - Page 50
cables from the system board: (1) Speaker cable (2) Function board cable (3) Power button board cable (4) Touchpad board cable 40 Chapter 6 Removal and replacement procedures for Authorized Service Provider parts - HP mt20 | Maintenance and Service Guide - Page 51
7. Rotate the bottom of the top cover upward (1), and then lift the top cover off the computer (2). Reverse this procedure to install the top cover. Component replacement procedures 41 - HP mt20 | Maintenance and Service Guide - Page 52
by first unplugging the power cord from the AC outlet, and then unplugging the AC adapter from the computer. 5. Remove the following components: a. Service door (see Service door on page 26) b. Keyboard (see Keyboard on page 32) c. Top cover (see Top cover on page 39) Remove the power button board - HP mt20 | Maintenance and Service Guide - Page 53
5. If you need to replace the cable, note the cable routing path inside of the top cover (5). Reverse this procedure to install the power button board. Component replacement procedures 43 - HP mt20 | Maintenance and Service Guide - Page 54
by first unplugging the power cord from the AC outlet, and then unplugging the AC adapter from the computer. 5. Remove the following components: a. Service door (see Service door on page 26) b. Keyboard (see Keyboard on page 32) c. Top cover (see Top cover on page 39) Remove the function board - HP mt20 | Maintenance and Service Guide - Page 55
4. Lift the right side of the board (3), and then slide the board to the right to remove it from the top cover (4). Reverse this procedure to install the function board. Component replacement procedures 45 - HP mt20 | Maintenance and Service Guide - Page 56
by first unplugging the power cord from the AC outlet, and then unplugging the AC adapter from the computer. 5. Remove the following components: a. Service door (see Service door on page 26). b. Keyboard (see Keyboard on page 32) c. Top cover (see Top cover on page 39) Remove the speaker assembly - HP mt20 | Maintenance and Service Guide - Page 57
by first unplugging the power cord from the AC outlet, and then unplugging the AC adapter from the computer. 5. Remove the following components: a. Service door (see Service door on page 26). b. Keyboard (see Keyboard on page 32) c. Top cover (see Top cover on page 39) Remove the TouchPad assembly - HP mt20 | Maintenance and Service Guide - Page 58
5. If you need to replace the TouchPad assembly cable, note how it is routed in the top cover (5). Reverse this procedure to install the TouchPad assembly. 48 Chapter 6 Removal and replacement procedures for Authorized Service Provider parts - HP mt20 | Maintenance and Service Guide - Page 59
by first unplugging the power cord from the AC outlet, and then unplugging the AC adapter from the computer. 4. Remove the following components: a. Service door (see Service door on page 26). b. Keyboard (see Keyboard on page 32) c. Top cover (see Top cover on page 39) Remove the USB/audio board - HP mt20 | Maintenance and Service Guide - Page 60
by first unplugging the power cord from the AC outlet, and then unplugging the AC adapter from the computer. 5. Remove the following components: a. Service door (see Service door on page 26). b. Keyboard (see Keyboard on page 32) c. Top cover (see Top cover on page 39) d. USB/audio board (see USB - HP mt20 | Maintenance and Service Guide - Page 61
3. Rotate the top of the battery upward (2), and then lift the battery out of the computer (3). Reverse this procedure to install the battery. Component replacement procedures 51 - HP mt20 | Maintenance and Service Guide - Page 62
and then unplugging the AC adapter from the computer. 4. Remove the battery (see Battery on page 50), and then remove the following components: a. Service door (see Service door on page 26). b. Keyboard (see Keyboard on page 32) c. Top cover (see Top cover on page 39) d. USB/audio board (see USB - HP mt20 | Maintenance and Service Guide - Page 63
4. Lift the fan from the computer (3). Reverse this procedure to install the fan. Component replacement procedures 53 - HP mt20 | Maintenance and Service Guide - Page 64
by first unplugging the power cord from the AC outlet, and then unplugging the AC adapter from the computer. 4. Remove the following components: a. Service door (see Service door on page 26). b. Keyboard (see Keyboard on page 32) c. Top cover (see Top cover on page 39) d. USB/audio board (see USB - HP mt20 | Maintenance and Service Guide - Page 65
2. Disconnect the following cables from the system board: (1) Display cable (2) Power connector cable 3. Remove the 3 Phillips PM2.5×5.0 screws (1) that secure the system board to the computer. 4. Lift the bracket from atop the USB-Type C port (2). 5. Rotate the left side of the system board upward - HP mt20 | Maintenance and Service Guide - Page 66
7. Pull the system board away from the connectors on the side of the chassis to remove it from the computer (5). Reverse this procedure to install the system board. 56 Chapter 6 Removal and replacement procedures for Authorized Service Provider parts - HP mt20 | Maintenance and Service Guide - Page 67
by first unplugging the power cord from the AC outlet, and then unplugging the AC adapter from the computer. 4. Remove the following components: a. Service door (see Service door on page 26). b. WLAN module (see WLAN/Bluetooth combo card on page 29) c. Keyboard (see Keyboard on page 32) d. Top cover - HP mt20 | Maintenance and Service Guide - Page 68
by first unplugging the power cord from the AC outlet, and then unplugging the AC adapter from the computer. 4. Remove the following components: a. Service door (see Service door on page 26). b. WLAN module (see WLAN/Bluetooth combo card on page 29) c. Keyboard (see Keyboard on page 32) d. Top cover - HP mt20 | Maintenance and Service Guide - Page 69
3. Lift the heat sink from the system board (5). NOTE: Thoroughly clean thermal material from the surfaces of the system board components (1) and the heat sink (2) each time you remove the heat sink. All heat sink and processor spare part kits include thermal material. Reverse this procedure to - HP mt20 | Maintenance and Service Guide - Page 70
by first unplugging the power cord from the AC outlet, and then unplugging the AC adapter from the computer. 4. Remove the following components: a. Service door (see Service door on page 26). b. WLAN module (see WLAN/Bluetooth combo card on page 29) c. Keyboard (see Keyboard on page 32) d. Top cover - HP mt20 | Maintenance and Service Guide - Page 71
5. Lift the display assembly straight up and remove it (4). CAUTION: When installing the display assembly, be sure that the wireless antenna cables are routed and arranged properly. Failure to properly route the antennas can result in degradation of the computer's wireless performance. 6. Flex the - HP mt20 | Maintenance and Service Guide - Page 72
a webcam NOTE: The display will not be connected to the computer as shown in the following image. 62 Chapter 6 Removal and replacement procedures for Authorized Service Provider parts - HP mt20 | Maintenance and Service Guide - Page 73
8. If it is necessary to replace the webcam or microphone module, gently pull the module away from the double-sided tape on the display enclosure (1), and then disconnect the cable from the module (2). The webcam module is available using spare part number 826271-002. 9. If it is necessary to remove - HP mt20 | Maintenance and Service Guide - Page 74
hinge covers from the display hinges (2). Display hinge covers are available using spare part number 905699-001. 64 Chapter 6 Removal and replacement procedures for Authorized Service Provider parts - HP mt20 | Maintenance and Service Guide - Page 75
15. If it is necessary to remove or replace the display hinges, remove the 6 Phillips PM2.5×2.5 screws (1) that secure both display hinges to the display enclosure. 16. Remove the display hinges from the display enclosure (2). Display hinges are available in the Display Hinge Kit using spare part - HP mt20 | Maintenance and Service Guide - Page 76
by first unplugging the power cord from the AC outlet, and then unplugging the AC adapter from the computer. 4. Remove the following components: a. Service door (see Service door on page 26). b. Keyboard (see Keyboard on page 32) c. Top cover (see Top cover on page 39) d. USB/audio board (see USB - HP mt20 | Maintenance and Service Guide - Page 77
BIOS), TPM, and HP Sure Start Using Computer Setup Computer Setup, or Basic Input/Output System (BIOS if USB legacy support is enabled. ▲ Turn on or restart the computer, and when the HP logo appears, the screen, and then follow the on-screen instructions. - or - Select Main, select Ignore Changes - HP mt20 | Maintenance and Service Guide - Page 78
may be available on the HP website. Most BIOS updates on the HP website are packaged in compressed files called SoftPaqs. Some download packages contain a file named Readme.txt, which contains information regarding installing and troubleshooting the file. Determining the BIOS version and using Setup - HP mt20 | Maintenance and Service Guide - Page 79
or disconnect any device, cable, or cord. 1. To access HP Support, go to http://www.hp.com/support, and select your country. Select Drivers & Downloads, and then follow the on-screen instructions to access BIOS downloads. 2. At the BIOS download area, follow these steps: a. Identify the most recent - HP mt20 | Maintenance and Service Guide - Page 80
default configuration. The default configuration can be customized by advanced users. To access the latest documentation on HP Sure Start, go to http://www.hp.com/support. Select Find your product, and then follow the on-screen instructions. 70 Chapter 7 Computer Setup (BIOS), TPM, and HP Sure Start - HP mt20 | Maintenance and Service Guide - Page 81
diagnostic test, press esc. Downloading HP PC Hardware Diagnostics (UEFI) to a USB device NOTE: The HP PC Hardware Diagnostics (UEFI) download instructions are provided in English only, and you must use a Windows computer to download and create the HP UEFI support environment because only .exe files - HP mt20 | Maintenance and Service Guide - Page 82
://www.hp.com/support. 2. Select Get software and drivers. 3. Enter the product name or number. - or - Select Identify now to let HP automatically detect your product. 4. Select your computer, and then select your operating system. 5. In the Diagnostic section, follow the on-screen instructions to - HP mt20 | Maintenance and Service Guide - Page 83
9 Diagnostics and troubleshooting LEDs Table 9-1 Power and IDE Flash Activity LEDs : RJ-45 LEDs are located inside the RJ-45 connector on the top, rear panel of the thin client. The LEDs are visible when the connector is installed. Blinking green indicates network activity, and amber indicates - HP mt20 | Maintenance and Service Guide - Page 84
diagnostic tests a second time to confirm the first shutdown. The following table lists the tests that are performed on the unit. 74 Chapter 9 Diagnostics and troubleshooting - HP mt20 | Maintenance and Service Guide - Page 85
in and running, if equipped. turning. 2. Contact an authorized reseller or service provider. OR The heat sink/fan assembly is not properly attached to the supply 1. is overloaded). OR Check if a device is causing the problem by removing ALL attached devices. Power on the system. If the system - HP mt20 | Maintenance and Service Guide - Page 86
a time to isolate the faulty module. 3. Replace third-party memory with HP memory. 4. Replace the system board. Red Power LED flashes six times, problem is solved. Invalid ROM based on bad checksum. 1. Reflash the system ROM with the latest BIOS image using the BIOS and troubleshooting - HP mt20 | Maintenance and Service Guide - Page 87
(Computer Setup can also be used). If the problem persists, replace the RTC battery. See the Removal and Replacement section for instructions on installing a new battery, or contact an authorized has errors. Reflash the system ROM with the latest BIOS image. POST numeric codes and text messages 77 - HP mt20 | Maintenance and Service Guide - Page 88
in PCI Express slot failed to initialize There is an incompatibility/problem with this Try rebooting the system. If the error reoccurs, firmware patch if applicable. (Available at http://www.hp.com/support.) 3. Back up contents and replace hard drive. Chapter 9 Diagnostics and troubleshooting - HP mt20 | Maintenance and Service Guide - Page 89
troubleshooting Issue Procedures The thin client unit is experiencing operating problems. Ensure that the following connectors are securely plugged into the thin client with the replaced power supply, have the unit serviced. The thin client unit powers on and displays a splash screen, but - HP mt20 | Maintenance and Service Guide - Page 90
troubleshooting Item Information Action MAC Address NIC portion of the system board is OK If no MAC Address, the system board is at fault. Contact the Call Center for service. GUID General system board information If no GUID there is no Client IP. ERROR: Non-system disk or disk error. - HP mt20 | Maintenance and Service Guide - Page 91
Configuring a PXE server NOTE: All PXE software is supported by authorized service providers on a warranty or service contract basis. Customers who call the HP Customer Service Center with PXE issues and questions should be referred to their PXE provider for assistance. Additionally, refer to the - HP mt20 | Maintenance and Service Guide - Page 92
. You can download it from http://www.hp.com/ support (search for the Thin Client model and click on the Drivers & software section of the support page for that model. For information on using this software, refer to the Manuals section). NOTE: HP recommends periodically going to the website to - HP mt20 | Maintenance and Service Guide - Page 93
tool used to manage the full life cycle of HP thin clients to include Discover, Asset Management, Deployment and Configuration. For more information on HP Device Manager, please visit www.hp.com/go/hpdm. If you wish to manage the thin client with other management tools such as Microsoft SCCM or - HP mt20 | Maintenance and Service Guide - Page 94
12 Specifications Computer specifications Metric U.S. Dimensions Depth 239.0 mm 9.41 in Width 343.2 mm 13.51 in Height 20.3 mm 0.80 in Weight Includes 1 DIMM 1.64 kg 3.61 lbs Input power Operating voltage 19.0 V dc @ 4.74 A - 90 W or 18.5 V dc @ 3.5 A - 65 W Operating current - HP mt20 | Maintenance and Service Guide - Page 95
when referring to drive storage capacity. Actual accessible capacity is less. Actual drive specifications may differ slightly. NOTE: Certain restrictions and exclusions apply. Contact technical support for details. 35.6-cm (14.0-in) display specifications 85 - HP mt20 | Maintenance and Service Guide - Page 96
information regarding nonvolatile memory in HP Business PCs. This chapter also provides general instructions for restoring nonvolatile memory at the bottom of the screen. NOTE: If the system has a BIOS administrator password, enter the password at the prompt. f. If an asset or ownership tag is set, - HP mt20 | Maintenance and Service Guide - Page 97
bottom of the screen. NOTE: If the system has a BIOS administrator password, enter the password at the prompt. j. Select the Main menu, select Apply screen instructions to continue. Legacy BIOS Steps Use the steps for older versions of BIOS. NOTE: If you already completed the steps in Current BIOS - HP mt20 | Maintenance and Service Guide - Page 98
than one hard drive has an Automatic DriveLock password. f. Select the Main menu, and then select Reset BIOS Security to factory default. Click Yes at the storing the data you want to clear, and then follow the on-screen instructions to continue. - or - ● Clear the contents of the drive by using - HP mt20 | Maintenance and Service Guide - Page 99
-screen instructions to continue. Nonvolatile memory usage Nonvolatile Memory Type Amount (Size) HP Sure Start HP Sure Start BIOS code, EC Embedded Controller. firmware, and critical PC configuration data for select platforms that support HP Sure Start. For more information, see Using HP - HP mt20 | Maintenance and Service Guide - Page 100
BIOS) or a custom utility. A utility is required for writing data to this memory and is available on the HP website; go to http://www.hp.com/ support. Select Find your product, and then follow the on-screen instructions can be obtained versions of the driver from the silicon vendor. whenever - HP mt20 | Maintenance and Service Guide - Page 101
on-screen instructions. 2. What is a UEFI BIOS, and how is it different from a legacy BIOS? The Unified Extensible Firmware Interface (UEFI) BIOS is for the older BIOS architecture, but supports much of the legacy BIOS functionality. Like the legacy BIOS, the UEFI BIOS provides an interface - HP mt20 | Maintenance and Service Guide - Page 102
6. How can the BIOS security be reset to HP Sure Start default configuration. The default configuration can be customized by advanced users. To access the latest documentation on HP Sure Start, go to http://www.hp.com/support. Select Find your product, and then follow the on-screen instructions - HP mt20 | Maintenance and Service Guide - Page 103
14 Power cord set requirements The wide-range input feature of the computer permits it to operate from any line voltage from 100 to 120 volts ac, or from 220 to 240 volts ac. The 3-conductor power cord set included with the computer meets the requirements for use in the country or region where the - HP mt20 | Maintenance and Service Guide - Page 104
Country/region Accredited agency Applicable note number Japan JIS 3 The Netherlands KEMA 1 New Zealand SANZ 1 Norway NEMKO 1 The People's Republic of China CCC 4 Saudi Arabia SASO 7 Singapore PSB 1 South Africa SABS 1 South Korea KTL 5 Sweden SEMKO 1 Switzerland SEV - HP mt20 | Maintenance and Service Guide - Page 105
dispose of the battery in general household waste. Follow the local laws and regulations in your area for battery disposal. HP encourages customers to recycle used electronic hardware, HP original print cartridges, and rechargeable batteries. For more information about recycling programs, see the - HP mt20 | Maintenance and Service Guide - Page 106
troubleshooting 79 battery removing 50 spare part number 15, 50 beep codes 75 BIOS service considerations 21 D diagnostics and troubleshooting 73 disabling/enabling Wake-on LAN (WOL) 74 diskless troubleshooting microphone mute 11 using 11 HP PC Hardware Diagnostics (UEFI) using 71 HP Sure Start 92 I - HP mt20 | Maintenance and Service Guide - Page 107
keys esc 10 fn 10 Windows key 10 L labels Bluetooth 13 regulatory 13 serial number 13 service 13 wireless certification 13 WLAN 13 LEDs 73 blinking power 75 legacy support, USB 67 lights 5 caps lock 8 microphone mute 8 num lock 8 power 8 RJ-45 (network) 4 webcam 6 wireless 8 M memory nonvolatile 86 - HP mt20 | Maintenance and Service Guide - Page 108
47 spare part number 47 TouchPad zone identifying 7 TPM settings 70 transporting guidelines 23 traveling with the computer 13 troubleshooting 79 U USB 3.0 port 4 USB legacy support 67 USB ports, identifying 4 USB Type-C charging port, identifying 4 USB/audio board removal 49 spare part number 15, 49
-
 1
1 -
 2
2 -
 3
3 -
 4
4 -
 5
5 -
 6
6 -
 7
7 -
8
-
9
-
10
-
11
-
12
-
13
-
14
-
15
-
16
-
17
-
18
-
19
-
20
-
21
-
22
-
23
-
24
-
25
-
26
-
27
-
28
-
29
-
30
-
31
-
32
-
33
-
34
-
35
-
36
-
37
-
38
-
39
-
40
-
41
-
42
-
43
-
44
-
45
-
46
-
47
-
48
-
49
-
50
-
51
-
52
-
53
-
54
-
55
-
56
-
57
-
58
-
59
-
60
-
61
-
62
-
63
-
64
-
65
-
66
-
67
-
68
-
69
-
70
-
71
-
72
-
73
-
74
-
75
-
76
-
77
-
78
-
79
-
80
-
81
-
82
-
83
-
84
-
85
-
86
-
87
-
88
-
89
-
90
-
91
-
92
-
93
-
94
-
95
-
96
-
97
-
98
-
99
-
100
-
101
-
102
-
103
-
104
-
105
-
106
-
107
-
108
 |
 |

HP mt20 Mobile Thin Client
Maintenance and Service Guide