HP sd828a1 User Manual - Page 15
Initial Frame Setup, Clock Info, Setup Wizard - manual com
 |
UPC - 844149050171
View all HP sd828a1 manuals
Add to My Manuals
Save this manual to your list of manuals |
Page 15 highlights
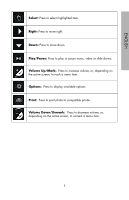
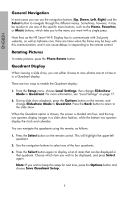
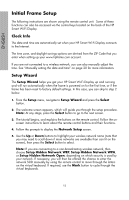
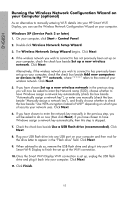
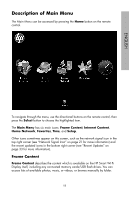
ENGLISH Initial Frame Setup The following instructions are shown using the remote control unit. Some of these functions can also be accessed via the control keys located on the back of the HP Smart Wi-Fi Display. Clock Info The date and time are automatically set when your HP Smart Wi-Fi Display connects to the Internet. The time zone, and daylight savings options are derived from the ZIP Code that you enter when setting up your www.hpframe.com account. If you are not connected to a wireless network, you can also manually adjust the time. See "Manually setting the date and time" on page 20 for more information. Setup Wizard The Setup Wizard helps you get your HP Smart Wi-Fi Display up and running and will run automatically when the frame is powered on for the first time, or if the frame has been reset to factory default settings. In this case, you can skip to step 2 below. 1. From the Setup menu, navigate to Setup Wizard and press the Select button. 2. The welcome screen appears, which will guide you through the setup procedure. Note: At any stage, press the Select button to go to the next screen. 3. The tutorial begins, and explains the buttons on the remote control. Follow the onscreen instructions to learn about the remote control buttons and their functions. 4. Follow the prompts to display the Network Setup screen. 5. Use the Up or Down buttons to highlight your wireless network name (note that you may need to scroll down if more networks are available than can fit on the screen), then press the Select button to select. Note: If you are connecting to a non-broadcasting wireless network, then choose Setup Hidden Network WEP, Setup Hidden Network WPA, or Setup Hidden Network Open, depending on which security is used by your network. If necessary, you will then be offered the chance to enter the network SSID manually by using the remote control to move through the letters on the virtual keyboard. If required, use the Mark button to cycle through the virtual keyboards. 13
-
 1
1 -
2
-
3
-
4
-
5
-
6
-
7
-
8
-
9
-
 10
10 -
 11
11 -
 12
12 -
 13
13 -
 14
14 -
 15
15 -
 16
16 -
 17
17 -
 18
18 -
 19
19 -
 20
20 -
21
-
22
-
23
-
24
-
25
-
26
-
27
-
28
-
29
-
30
-
31
-
32
-
33
-
34
-
35
-
36
-
37
-
38
-
39
-
40
-
41
-
42
-
43
-
44
-
45
-
46
-
47
-
48
-
49
-
50
-
51
-
52
-
53
-
54
-
55
-
56
-
57
-
58
-
59
-
60
-
61
-
62
-
63
-
64
-
65
-
66
-
67
-
68
-
69
-
70
-
71
-
72
-
73
-
74
-
75
-
76
-
77
-
78
-
79
-
80
-
81
-
82
-
83
-
84
-
85
-
86
-
87
-
88
-
89
-
90
-
91
-
92
-
93
-
94
-
95
-
96
-
97
-
98
-
99
-
100
 |
 |