Honeywell 1900GHD-2 User Guide - Page 207
Imaging Commands, Single-Use Basis, Command Syntax
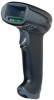 |
View all Honeywell 1900GHD-2 manuals
Add to My Manuals
Save this manual to your list of manuals |
Page 207 highlights
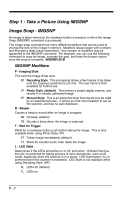
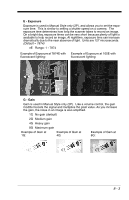
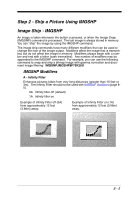
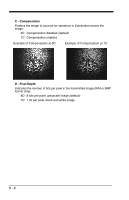
8 Imaging Commands The scanner is like a digital camera in the way it captures, manipulates, and transfers images. The following commands allow you to alter the way the scanner performs these functions. Note: If you are using the scanner in a stand, you must set the In-Stand Sensor Mode to Off in order to take images (see In-Stand Sensor Mode on page 4-12). Single-Use Basis Imaging Commands with their modifiers send instructions to the scanner on a single-use basis, and take effect for a single image capture. Once that capture is complete, the scanner reverts to its imaging default settings. If you want to permanently change a setting, you must use the serial default commands (see Chapter 11). When the serial default command is used, that selection becomes the new, permanent setting for the scanner. Command Syntax Multiple modifiers and commands can be issued within one sequence. If additional modifiers are to be applied to the same command, just add the modifiers to that command. For example, to add 2 modifiers to the Image Snap command, such as setting the Imaging Style to 1P and the Wait for Trigger to 1T, you would enter IMGSNP1P1T. Note: After processing an image capture command (IMGSNP or IMGBOX), you must follow it with an IMGSHP command if you want to see it on your terminal. To add a command to a sequence, each new command is separated with a semicolon. For example, to add the Image Ship command to the above sequence, you would enter IMGSNP1P1T;IMGSHP. The imaging commands are: Image Snap - IMGSNP (page 8-2) Image Ship - IMGSHP (page 8-5) Intelligent Signature Capture - IMGBOX (page 8-14) The modifiers for each of these commands follow the command description. Note: The images included with each command description are examples only. The results you achieve may be different from those included in this manual. The quality of the output you receive will vary depending on lighting, quality of the initial image/object being captured, and distance of the scanner from the image/object. To achieve a high quality image, it is recommended that you position your scanner 4-6" (10.2-15.2 cm) away from the image/object you are capturing. 8 - 1
-
 1
1 -
2
-
3
-
4
-
5
-
6
-
7
-
8
-
9
-
10
-
11
-
12
-
13
-
14
-
15
-
16
-
17
-
18
-
19
-
20
-
21
-
22
-
23
-
24
-
25
-
26
-
27
-
28
-
29
-
30
-
31
-
32
-
33
-
34
-
35
-
36
-
37
-
38
-
39
-
40
-
41
-
42
-
43
-
44
-
45
-
46
-
47
-
48
-
49
-
50
-
51
-
52
-
53
-
54
-
55
-
56
-
57
-
58
-
59
-
60
-
61
-
62
-
63
-
64
-
65
-
66
-
67
-
68
-
69
-
70
-
71
-
72
-
73
-
74
-
75
-
76
-
77
-
78
-
79
-
80
-
81
-
82
-
83
-
84
-
85
-
86
-
87
-
88
-
89
-
90
-
91
-
92
-
93
-
94
-
95
-
96
-
97
-
98
-
99
-
100
-
101
-
102
-
103
-
104
-
105
-
106
-
107
-
108
-
109
-
110
-
111
-
112
-
113
-
114
-
115
-
116
-
117
-
118
-
119
-
120
-
121
-
122
-
123
-
124
-
125
-
126
-
127
-
128
-
129
-
130
-
131
-
132
-
133
-
134
-
135
-
136
-
137
-
138
-
139
-
140
-
141
-
142
-
143
-
144
-
145
-
146
-
147
-
148
-
149
-
150
-
151
-
152
-
153
-
154
-
155
-
156
-
157
-
158
-
159
-
160
-
161
-
162
-
163
-
164
-
165
-
166
-
167
-
168
-
169
-
170
-
171
-
172
-
173
-
174
-
175
-
176
-
177
-
178
-
179
-
180
-
181
-
182
-
183
-
184
-
185
-
186
-
187
-
188
-
189
-
190
-
191
-
192
-
193
-
194
-
195
-
196
-
197
-
198
-
199
-
200
-
201
-
 202
202 -
 203
203 -
 204
204 -
 205
205 -
 206
206 -
 207
207 -
 208
208 -
 209
209 -
 210
210 -
 211
211 -
 212
212 -
213
-
214
-
215
-
216
-
217
-
218
-
219
-
220
-
221
-
222
-
223
-
224
-
225
-
226
-
227
-
228
-
229
-
230
-
231
-
232
-
233
-
234
-
235
-
236
-
237
-
238
-
239
-
240
-
241
-
242
-
243
-
244
-
245
-
246
-
247
-
248
-
249
-
250
-
251
-
252
-
253
-
254
-
255
-
256
-
257
-
258
-
259
-
260
-
261
-
262
-
263
-
264
-
265
-
266
-
267
-
268
-
269
-
270
-
271
-
272
-
273
-
274
-
275
-
276
-
277
-
278
-
279
-
280
-
281
-
282
-
283
-
284
-
285
-
286
-
287
-
288
-
289
-
290
-
291
-
292
-
293
-
294
-
295
-
296
-
297
-
298
-
299
-
300
-
301
-
302
-
303
-
304
-
305
-
306
-
307
-
308
-
309
-
310
-
311
-
312
-
313
-
314
 |
 |