IBM 8852 User Guide - Page 45
Slide the module into the bay until it stops; then, push the handle to the closed
 |
UPC - 883436027069
View all IBM 8852 manuals
Add to My Manuals
Save this manual to your list of manuals |
Page 45 highlights
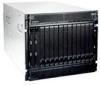
To install a power module, complete the following steps. 3rd power module Handle (open) Power-module filler Handle (open) 4th power module 1. Remove the module filler if one is installed. 2. Make sure that the handle on the power module is in the open position. 3. Orient the new power module to the selected power-module bay: v For the upper power-module bays, the rear connector on the power module must be facing down. v For the lower power-module bays, the rear connector on the power module must be facing up. 4. Slide the module into the bay until it stops; then, push the handle to the closed position. Release buttons Release buttons 5. Align the blue tabs on the ends of the bezel with the corresponding holes in the front of the BladeCenter unit. 6. Firmly press the bezel into the BladeCenter unit until the tabs lock it into place. Chapter 3. Installing the BladeCenter unit and options 29
-
 1
1 -
2
-
3
-
4
-
5
-
6
-
7
-
8
-
9
-
10
-
11
-
12
-
13
-
14
-
15
-
16
-
17
-
18
-
19
-
20
-
21
-
22
-
23
-
24
-
25
-
26
-
27
-
28
-
29
-
30
-
31
-
32
-
33
-
34
-
35
-
36
-
37
-
38
-
39
-
 40
40 -
 41
41 -
 42
42 -
 43
43 -
 44
44 -
 45
45 -
 46
46 -
 47
47 -
 48
48 -
 49
49 -
 50
50 -
51
-
52
-
53
-
54
-
55
-
56
-
57
-
58
-
59
-
60
-
61
-
62
-
63
-
64
-
65
-
66
-
67
-
68
-
69
-
70
-
71
-
72
-
73
-
74
-
75
-
76
-
77
-
78
-
79
-
80
-
81
-
82
 |
 |
