IBM 8852 User Guide - Page 48
Completing the installation, Notes, Attention, Important
 |
UPC - 883436027069
View all IBM 8852 manuals
Add to My Manuals
Save this manual to your list of manuals |
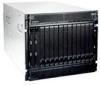
Page 48 highlights
Release handles (open) 1. Select the bay for the blade server. Notes: a. Depending on the blade-server type and the optional devices that are installed in it, two or more adjacent bays might be required. b. When any blade server or device is in blade bays 8 through 14, power modules must be present in all four power bays. 2. Remove the filler from the bay, if one is installed. Attention: To help ensure proper cooling, performance and system reliability, do not operate the BladeCenter unit for more than 1 minute without either a blade server or a blade filler installed in each blade bay. 3. Make sure that the two release handles are in the open position. 4. Slide the blade server into the bay until it stops. 5. Push the two release handles to the closed position. 6. Make sure that the blade server is receiving power. See the documentation that comes with the blade server for instructions. 7. If this is a new blade server, write identifying information on one of the user labels that come with the blade server; then, place the label on the BladeCenter unit top bezel just above the blade server. Important: Do not place the label on the blade server or in any way block the ventilation holes on the BladeCenter unit bezel. Completing the installation After you connect the cables to the modules and route the cables (see the cable routing instructions supplied with the rack if necessary), do the following to start the BladeCenter unit and verify that it is working correctly. 1. Supply power to the BladeCenter unit by connecting the power cords to a 220-volt power distribution unit or appropriate electrical outlets. 2. Make sure that the following LEDs are lit and indicate that the device is working properly. v dc power and ac power LEDs on each power module. v OK LED on each management module. v OK LED on each I/O module. 3. Make sure that the power-on LED on each blade server is lit, either steady or flashing. 32 BladeCenter H Type 8852, 7989, and 1886: Installation and User's Guide
-
 1
1 -
2
-
3
-
4
-
5
-
6
-
7
-
8
-
9
-
10
-
11
-
12
-
13
-
14
-
15
-
16
-
17
-
18
-
19
-
20
-
21
-
22
-
23
-
24
-
25
-
26
-
27
-
28
-
29
-
30
-
31
-
32
-
33
-
34
-
35
-
36
-
37
-
38
-
39
-
40
-
41
-
42
-
 43
43 -
 44
44 -
 45
45 -
 46
46 -
 47
47 -
 48
48 -
 49
49 -
 50
50 -
 51
51 -
 52
52 -
 53
53 -
54
-
55
-
56
-
57
-
58
-
59
-
60
-
61
-
62
-
63
-
64
-
65
-
66
-
67
-
68
-
69
-
70
-
71
-
72
-
73
-
74
-
75
-
76
-
77
-
78
-
79
-
80
-
81
-
82
 |
 |
