Icom IC-V3500 Advanced Manual - Page 84
Installing an antenna, Antenna location, Connecting to a battery
 |
View all Icom IC-V3500 manuals
Add to My Manuals
Save this manual to your list of manuals |
Page 84 highlights
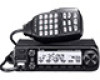
11. INSTALL AND CONNECTIONS Installing an antenna To obtain maximum performance from the transceiver, select a high-quality antenna and mount it in a good location. DDAntenna location Roof-mount antenna (Drill a hole or use a magnetic mount.) Trunk-mount antenna Gutter-mount antenna Connect the antenna coaxial cable to the antenna connector on the rear panel of the transceiver. Antenna connector NOTE: Make the coaxial cable as short as possible. Connecting to a battery RRWARNING! •• NEVER remove the fuses from the cable connecting the transceiver to a power source, especially a car battery. •• NEVER connect the transceiver directly to a 24 V battery. The transceiver must be connected to a 24 V battery through the DC-DC converter. CAUTION: •• DO NOT use a cigarette lighter socket as a power source when operating in a vehicle. The plug may cause voltage drops, and ignition noise may be superimposed onto transmit or receive audio. •• DO NOT pull or tightly bend the DC power cable. •• DO NOT reverse the polarity when connecting the DC power cable. •• Use a rubber grommet when passing the DC power cable through a metal plate to prevent a short circuit. •• The transceiver may not receive well on some frequencies when installed in a hybrid or electric vehicle (fuel cell vehicle). This is because the vehicle's electric components, such as the inverter system, generate a lot of electrical noise. CONNECTING TO A VEHICLE BATTERY Grommet IC-V3500 + red Fuses 15 A − black _ black + red 12 V NOTE: Use terminals for the cable connections. 12 V battery Supplied DC power cable Crimp Solder 11-4
-
 1
1 -
2
-
3
-
4
-
5
-
6
-
7
-
8
-
9
-
10
-
11
-
12
-
13
-
14
-
15
-
16
-
17
-
18
-
19
-
20
-
21
-
22
-
23
-
24
-
25
-
26
-
27
-
28
-
29
-
30
-
31
-
32
-
33
-
34
-
35
-
36
-
37
-
38
-
39
-
40
-
41
-
42
-
43
-
44
-
45
-
46
-
47
-
48
-
49
-
50
-
51
-
52
-
53
-
54
-
55
-
56
-
57
-
58
-
59
-
60
-
61
-
62
-
63
-
64
-
65
-
66
-
67
-
68
-
69
-
70
-
71
-
72
-
73
-
74
-
75
-
76
-
77
-
78
-
 79
79 -
 80
80 -
 81
81 -
 82
82 -
 83
83 -
 84
84 -
 85
85 -
 86
86 -
 87
87 -
 88
88 -
 89
89
 |
 |
