Intel TIGI2U User Guide - Page 37
Removing and Installing the Front Bezel
 |
UPC - 735858176958
View all Intel TIGI2U manuals
Add to My Manuals
Save this manual to your list of manuals |
Page 37 highlights
Platform Installations and Upgrades Removing and Installing the Front Bezel The front bezel needs to be removed only to install or remove hot-swap hard drives or the CDROM drive. Removing the Front Bezel 1. Loosen the captive screws at the left and right edges of the front bezel (one screw at the right and one screw at the left; see letter "A"). NOTE Hold the bezel in place while you loosen the screws. After both screws are loosened, the bezel will drop from the chassis. 2. Remove the front bezel from the chassis (see letter "B"). Figure 12. Removing the Front Bezel Intel® Carrier Grade Server TIGI2U User Guide 37
-
 1
1 -
2
-
3
-
4
-
5
-
6
-
7
-
8
-
9
-
10
-
11
-
12
-
13
-
14
-
15
-
16
-
17
-
18
-
19
-
20
-
21
-
22
-
23
-
24
-
25
-
26
-
27
-
28
-
29
-
30
-
31
-
 32
32 -
 33
33 -
 34
34 -
 35
35 -
 36
36 -
 37
37 -
 38
38 -
 39
39 -
 40
40 -
 41
41 -
 42
42 -
43
-
44
-
45
-
46
-
47
-
48
-
49
-
50
-
51
-
52
-
53
-
54
-
55
-
56
-
57
-
58
-
59
-
60
-
61
-
62
-
63
-
64
-
65
-
66
-
67
-
68
-
69
-
70
-
71
-
72
-
73
-
74
-
75
-
76
-
77
-
78
-
79
-
80
-
81
-
82
-
83
-
84
-
85
-
86
-
87
-
88
-
89
-
90
-
91
-
92
-
93
-
94
-
95
-
96
-
97
-
98
-
99
-
100
-
101
-
102
-
103
-
104
-
105
-
106
-
107
-
108
-
109
-
110
-
111
-
112
-
113
-
114
 |
 |

Platform Installations and Upgrades
Intel
®
Carrier Grade Server TIGI2U User Guide
37
Removing and Installing the Front Bezel
The front bezel needs to be removed only to install or remove hot-swap hard drives or the
CDROM drive.
Removing the Front Bezel
1.
Loosen the captive screws at the left and right edges of the front bezel (one screw at
the right and one screw at the left; see letter “A”).
NOTE
Hold the bezel in place while you loosen the screws. After both
screws are loosened, the bezel will drop from the chassis.
2.
Remove the front bezel from the chassis (see letter “B”).
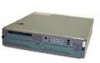
Figure 12.
Removing the Front Bezel