Intel TIGI2U User Guide - Page 46
Installing or Removing a Hard Drive
 |
UPC - 735858176958
View all Intel TIGI2U manuals
Add to My Manuals
Save this manual to your list of manuals |
Page 46 highlights
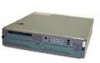
Platform Installations and Upgrades Installing or Removing a Hard Drive Up to two hot-swappable SCSI drives can be installed in your chassis. It is not necessary to remove the chassis cover to add or replace a hot-swap hard drive. It is necessary to remove the front bezel from the chassis. CAUTION The Intel® Carrier Grade Server TIGI2U does not support all hard drives. To see a list of validated manufacturers and hard drive types, see: http://support.intel.com/support/motherboards/server/TIGI2U Installing a Hard Drive 1. Remove the front bezel. For instructions, see "Removing the Front Bezel." 2. Press in on the green latch on the front of the hard drive carrier (see letter "A"). 3. Pull out on the black lever to slide the carrier from the chassis (see letter "B"). Figure 22. Removing Hard Drive Carrier from Chassis 4. Remove the hard drive from its wrapper and place it on an antistatic surface. 5. Set any jumpers and/or switches on the drive according to the drive manufacturer's instructions. 6. With the drive circuit-side down, position the connector end of the drive so that it is facing the rear of the drive carrier (see letter "A"). 46 Intel® Carrier Grade Server TIGI2U User Guide
-
 1
1 -
2
-
3
-
4
-
5
-
6
-
7
-
8
-
9
-
10
-
11
-
12
-
13
-
14
-
15
-
16
-
17
-
18
-
19
-
20
-
21
-
22
-
23
-
24
-
25
-
26
-
27
-
28
-
29
-
30
-
31
-
32
-
33
-
34
-
35
-
36
-
37
-
38
-
39
-
40
-
 41
41 -
 42
42 -
 43
43 -
 44
44 -
 45
45 -
 46
46 -
 47
47 -
 48
48 -
 49
49 -
 50
50 -
 51
51 -
52
-
53
-
54
-
55
-
56
-
57
-
58
-
59
-
60
-
61
-
62
-
63
-
64
-
65
-
66
-
67
-
68
-
69
-
70
-
71
-
72
-
73
-
74
-
75
-
76
-
77
-
78
-
79
-
80
-
81
-
82
-
83
-
84
-
85
-
86
-
87
-
88
-
89
-
90
-
91
-
92
-
93
-
94
-
95
-
96
-
97
-
98
-
99
-
100
-
101
-
102
-
103
-
104
-
105
-
106
-
107
-
108
-
109
-
110
-
111
-
112
-
113
-
114
 |
 |
