Invacare 9XT Owners Manual - Page 65
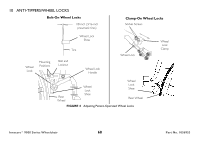
Using/Adjusting Disk Wheel Locks, Using Patient Operated Disk Wheel Locks
 |
View all Invacare 9XT manuals
Add to My Manuals
Save this manual to your list of manuals |
Page 65 highlights
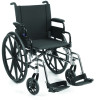
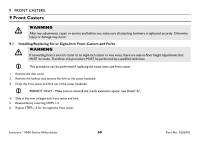
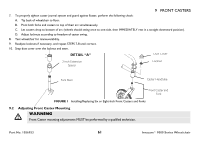
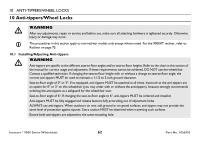
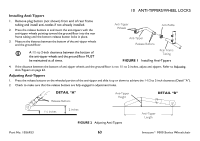
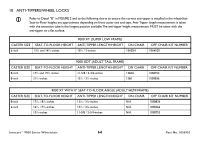
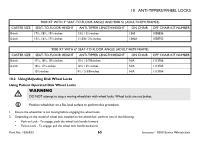
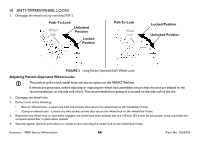
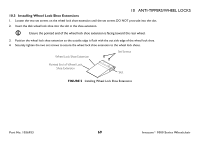
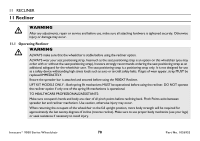
10 ANTI-TIPPERS/WHEEL LOCKS CASTER SIZE 8-inch 6-inch 9000 XT WITH 3° SEAT-TO-FLOOR ANGLE AND 9000 SL (ADULT/HEMI FRAMES) SEAT-TO-FLOOR HEIGHT ANTI-TIPPER LENGTH/HEIGHT ON CHAIR OFF CHAIR KIT NUMBER 17½, 18½, 19½-inches 13½ / 3½-inches 1360 1058836 15½, 16½, 17½-inches 11-5/8 / 2¾-inches 1360A 1058752 CASTER SIZE 8-inch 6-inch 9000 XT WITH 6° SEAT-TO-FLOOR ANGLE (ADULT/HEMI FRAME) SEAT-TO-FLOOR HEIGHT ANTI-TIPPER LENGTH/HEIGHT ON CHAIR 17½, 18½, 19½-inches 13½ / 2-7/8-inches N/A 16½, 17½-inches 12½ / 2¾-inches N/A 15½-inches 9½ / 2-3/8-inches N/A OFF CHAIR KIT NUMBER 1113766 1113765 1113764 10.2 Using/Adjusting Disk Wheel Locks Using Patient Operated Disk Wheel Locks ƽ WARNING DO NOT attempt to stop a moving wheelchair with wheel locks. Wheel locks are not brakes. Position wheelchair on a flat, level surface to perform this procedure. 1. Ensure the wheelchair is not moving before engaging the wheel locks. 2. Depending on the model of wheel lock installed on the wheelchair, perform one of the following: • Push-to-Lock - To engage, push the wheel lock handle forward. • Pull-to-Lock - To engage, pull the wheel lock handle backward. Part No. 1056953 65 Invacare® 9000 Series Wheelchair
-
 1
1 -
2
-
3
-
4
-
5
-
6
-
7
-
8
-
9
-
10
-
11
-
12
-
13
-
14
-
15
-
16
-
17
-
18
-
19
-
20
-
21
-
22
-
23
-
24
-
25
-
26
-
27
-
28
-
29
-
30
-
31
-
32
-
33
-
34
-
35
-
36
-
37
-
38
-
39
-
40
-
41
-
42
-
43
-
44
-
45
-
46
-
47
-
48
-
49
-
50
-
51
-
52
-
53
-
54
-
55
-
56
-
57
-
58
-
59
-
 60
60 -
 61
61 -
 62
62 -
 63
63 -
 64
64 -
 65
65 -
 66
66 -
 67
67 -
 68
68 -
 69
69 -
 70
70 -
71
-
72
-
73
-
74
-
75
-
76
-
77
-
78
-
79
-
80
-
81
-
82
-
83
-
84
-
85
-
86
-
87
-
88
-
89
-
90
-
91
-
92
 |
 |
