JVC GRD396US Instructions - Page 13
How To Attach The Core Filter, Power, Charging The Battery Pack
 |
UPC - 046838026096
View all JVC GRD396US manuals
Add to My Manuals
Save this manual to your list of manuals |
Page 13 highlights
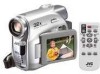
GETTING STARTED How To Attach The Core Filter Attach the core filters to the cables. The core filter reduces interference. 1 Release the stoppers on both ends of the core filter. GETTING STARTED EN 13 Power This camcorder's 2-way power supply system lets you choose the most appropriate source of power. Do not use provided power supply units with other equipment. Charging The Battery Pack Stopper 2 Run the cable through the core filter, leaving approx. 3 cm (1-3/16") of cable between the cable plug and the core filter. Wind the cable once around the outside of the core filter as shown in the illustration. Core filter 3 cm (1-3/16") Battery pack mount Battery pack Arrow 1 2 To DC connector PUSH BATT. POWER/ CHARGE lamp Wind once 3 Close the core filter until it clicks shut. NOTES: ● Take care not to damage the cable. ● When connecting a cable, attach the end with the core filter to the camcorder. To AC outlet Power switch AC Adapter 1 Set the Power Switch to "OFF". 2 With the arrow on the battery pack pointing downward, push the battery pack slightly against the battery pack mount 1. 3 Slide down the battery pack until it locks in place 2. 4 Connect the AC Adapter to the camcorder. 5 Plug the AC Adapter into an AC outlet. The POWER/CHARGE lamp on the camcorder blinks to indicate charging has started. 6 When the POWER/CHARGE lamp goes out, charging is finished. Unplug the AC Adapter from the AC outlet. Disconnect the AC Adapter from the camcorder. CONTINUED ON NEXT PAGE
-
 1
1 -
2
-
3
-
4
-
5
-
6
-
7
-
 8
8 -
 9
9 -
 10
10 -
 11
11 -
 12
12 -
 13
13 -
 14
14 -
 15
15 -
 16
16 -
 17
17 -
 18
18 -
19
-
20
-
21
-
22
-
23
-
24
-
25
-
26
-
27
-
28
-
29
-
30
-
31
-
32
-
33
-
34
-
35
-
36
-
37
-
38
-
39
-
40
-
41
-
42
-
43
-
44
-
45
-
46
-
47
-
48
-
49
-
50
-
51
-
52
-
53
-
54
-
55
-
56
-
57
-
58
-
59
-
60
-
61
-
62
-
63
-
64
-
65
-
66
-
67
-
68
-
69
-
70
-
71
-
72
-
73
-
74
-
75
-
76
-
77
-
78
-
79
-
80
-
81
-
82
-
83
-
84
-
85
-
86
-
87
-
88
-
89
-
90
-
91
-
92
-
93
-
94
-
95
-
96
-
97
-
98
-
99
-
100
-
101
-
102
-
103
-
104
-
105
-
106
-
107
-
108
-
109
-
110
-
111
-
112
 |
 |
