Konica Minolta C250i AU-211P User Guide for bizhub C360i and C4050i Series - Page 14
Configuring Settings for Verifying the Active Directory Certificate, Certificate Verification
 |
View all Konica Minolta C250i manuals
Add to My Manuals
Save this manual to your list of manuals |
Page 14 highlights
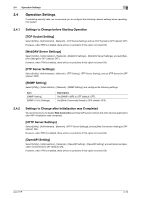
2.3 Pre-Setting 2 2.3.6 Configuring Settings for Verifying the Active Directory Certificate Configure the certificate verification settings to verify the Active Directory certificate when communicating with Active Directory. [Certificate Verification Setting] Select [Utility] - [Administrator] - [User Auth/Account Track] - [Certificate Verification Setting], and configure the following settings. Item [Verify Validity Period] [Check Root Signature] [Check CRL Expiration] [Check OCSP Expiration] Description Select whether to verify that the certificate is within the validity period. Select whether to check the root signature. To check the root signature, view the external certificates managed on the MFP. For details on how to register an external certificate in the MFP, refer to "[External Certificate Setting] (p. 2-9)". Select whether to check that the certificate is not expired in the CRL (Certificate Revocation List). Select whether to check that the certificate is not expired in the OCSP service. For details on the OCSP service setting procedure, refer to "[Certificate Verification Settings] (p. 2-8)". [Certificate Verification Settings] Select [Security] - [Certificate Verification Settings] in the administrator mode of Web Connection, and configure the following settings. Item [Certificate Verification Settings] [Timeout] [OCSP Service] [Proxy Settings] Description When verifying the reliability of the peer's certificate, set this option to ON (default: ON). Change the time-out time of the certificate expiration confirmation if necessary (default: [30] sec.). Using the Online Certificate Status Protocol (OCSP) service enables you to check online whether or not the certificate has expired. When using the OCSP service, set this option to ON. Also, enter the URL of the OCSP service (using up to 511 characters). If [URL] is left blank, the URL of the OCSP service embedded in the certificate will be used. When a proxy server is installed in your environment, register the proxy server. • [Proxy Server Address]: Enter the proxy server address. When speci- fying the host name instead of the address, select the [Please check to enter host name.] check box. • [Proxy Server Port Number]: If necessary, change the proxy server port number (default: [8080]). • [User Name]: Enter the user name used for proxy authentication (using up to 63 characters). • [Password]: Enter the password used for proxy authentication (using up to 63 characters). • [Address not using Proxy Server]: Enter the address with no proxy server used as needed. When specifying the host name instead of the address, select the [Please check to enter host name.] check box. dReference For details on how to use Web Connection, refer to the User's Guide (Web Management Tool) supplied with the MFP. AU-211P 2-8
-
 1
1 -
2
-
3
-
4
-
5
-
6
-
7
-
8
-
 9
9 -
 10
10 -
 11
11 -
 12
12 -
 13
13 -
 14
14 -
 15
15 -
 16
16 -
 17
17 -
 18
18 -
 19
19 -
20
-
21
-
22
-
23
-
24
-
25
-
26
-
27
-
28
-
29
-
30
-
31
-
32
-
33
-
34
-
35
-
36
-
37
-
38
-
39
-
40
-
41
-
42
-
43
-
44
-
45
-
46
-
47
-
48
-
49
-
50
-
51
-
52
 |
 |