Konica Minolta bizhub 36 bizhub 36/42 Administrator Operations User Guide - Page 224
NetWare Settings]
 |
View all Konica Minolta bizhub 36 manuals
Add to My Manuals
Save this manual to your list of manuals |
Page 224 highlights
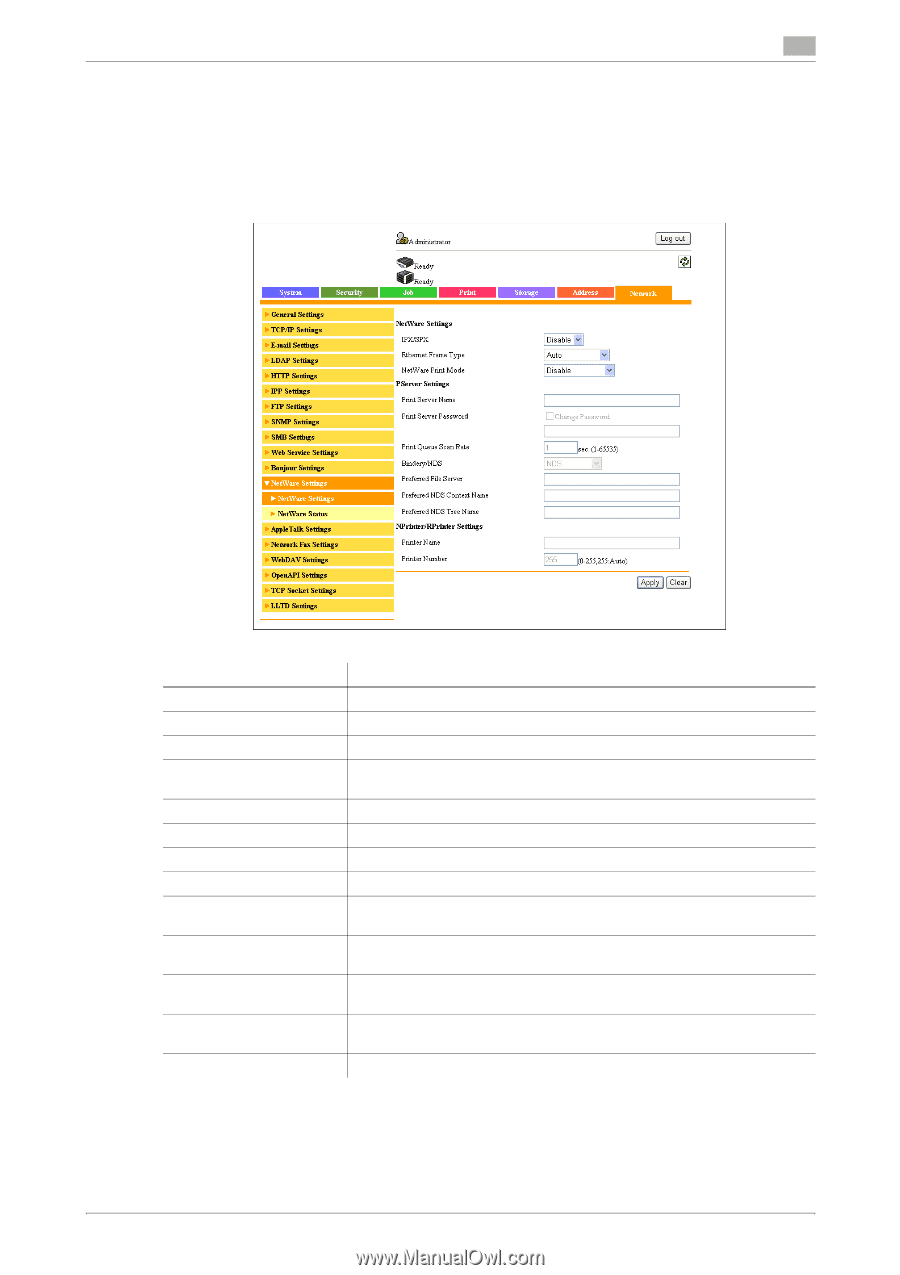
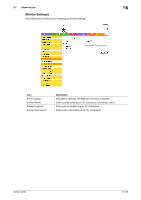
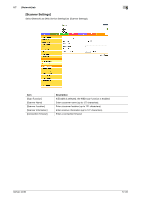
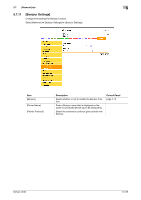
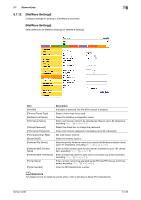
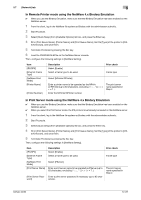
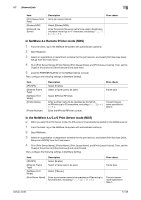
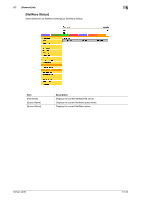
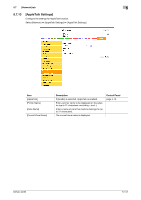
5.7 [Network] tab 5 5.7.12 [NetWare Settings] Configure settings for printing in a NetWare environment. [NetWare Settings] Select [Network] ö [NetWare Settings] ö [NetWare Settings]. Item [IPX/SPX] [Ethernet Frame Type] [NetWare Print Mode] [Print Server Name] [Change Password] [Print Server Password] [Print Queue Scan Rate] [Bindery/NDS] [Preferred File Server] [Preferred NDS Context Name] [Preferred NDS Tree Name] [Printer Name] [Printer Number] Description If [Enable] is selected, the IPX/SPX function is enabled. Select a frame type to be used. Select the NetWare configuration mode. Enter a print server name to be operated as PServer (up to 63 characters, excluding Select this check box to change the password. Enter a print server password if necessary (up to 63 characters). Set a job inquiry interval. Select the bindery options. Enter the priority file server name to be used in the Bindery emulation mode (up to 47 characters, excluding Enter an NDS context name for print server connection (up to 191 characters, excluding Enter an NDS tree name for print server connection (up to 63 characters, excluding Enter a printer name to be operated as the NPrinter/RPrinter (up to 63 characters, excluding Enter the NPrinter/RPrinter number. d Reference For details on how to install the printer driver, refer to the [User's Guide Print Operations]. bizhub 42/36 5-136
-
 1
1 -
2
-
3
-
4
-
5
-
6
-
7
-
8
-
9
-
10
-
11
-
12
-
13
-
14
-
15
-
16
-
17
-
18
-
19
-
20
-
21
-
22
-
23
-
24
-
25
-
26
-
27
-
28
-
29
-
30
-
31
-
32
-
33
-
34
-
35
-
36
-
37
-
38
-
39
-
40
-
41
-
42
-
43
-
44
-
45
-
46
-
47
-
48
-
49
-
50
-
51
-
52
-
53
-
54
-
55
-
56
-
57
-
58
-
59
-
60
-
61
-
62
-
63
-
64
-
65
-
66
-
67
-
68
-
69
-
70
-
71
-
72
-
73
-
74
-
75
-
76
-
77
-
78
-
79
-
80
-
81
-
82
-
83
-
84
-
85
-
86
-
87
-
88
-
89
-
90
-
91
-
92
-
93
-
94
-
95
-
96
-
97
-
98
-
99
-
100
-
101
-
102
-
103
-
104
-
105
-
106
-
107
-
108
-
109
-
110
-
111
-
112
-
113
-
114
-
115
-
116
-
117
-
118
-
119
-
120
-
121
-
122
-
123
-
124
-
125
-
126
-
127
-
128
-
129
-
130
-
131
-
132
-
133
-
134
-
135
-
136
-
137
-
138
-
139
-
140
-
141
-
142
-
143
-
144
-
145
-
146
-
147
-
148
-
149
-
150
-
151
-
152
-
153
-
154
-
155
-
156
-
157
-
158
-
159
-
160
-
161
-
162
-
163
-
164
-
165
-
166
-
167
-
168
-
169
-
170
-
171
-
172
-
173
-
174
-
175
-
176
-
177
-
178
-
179
-
180
-
181
-
182
-
183
-
184
-
185
-
186
-
187
-
188
-
189
-
190
-
191
-
192
-
193
-
194
-
195
-
196
-
197
-
198
-
199
-
200
-
201
-
202
-
203
-
204
-
205
-
206
-
207
-
208
-
209
-
210
-
211
-
212
-
213
-
214
-
215
-
216
-
217
-
218
-
 219
219 -
 220
220 -
 221
221 -
 222
222 -
 223
223 -
 224
224 -
 225
225 -
 226
226 -
 227
227 -
 228
228 -
 229
229 -
230
-
231
-
232
-
233
-
234
-
235
-
236
-
237
-
238
-
239
-
240
-
241
-
242
-
243
-
244
-
245
-
246
-
247
-
248
-
249
-
250
-
251
-
252
-
253
-
254
-
255
-
256
-
257
-
258
-
259
-
260
-
261
-
262
-
263
-
264
-
265
-
266
-
267
-
268
-
269
-
270
-
271
-
272
-
273
-
274
-
275
-
276
-
277
-
278
-
279
-
280
-
281
-
282
-
283
-
284
 |
 |