Kyocera TASKalfa 2550ci Fax System (W) Operation Guide - Page 89
Use Rule for All Receptions, FAX Operation Advanced, RX/Forward Rules, Forward Setting, Forwarding
 |
View all Kyocera TASKalfa 2550ci manuals
Add to My Manuals
Save this manual to your list of manuals |
Page 89 highlights
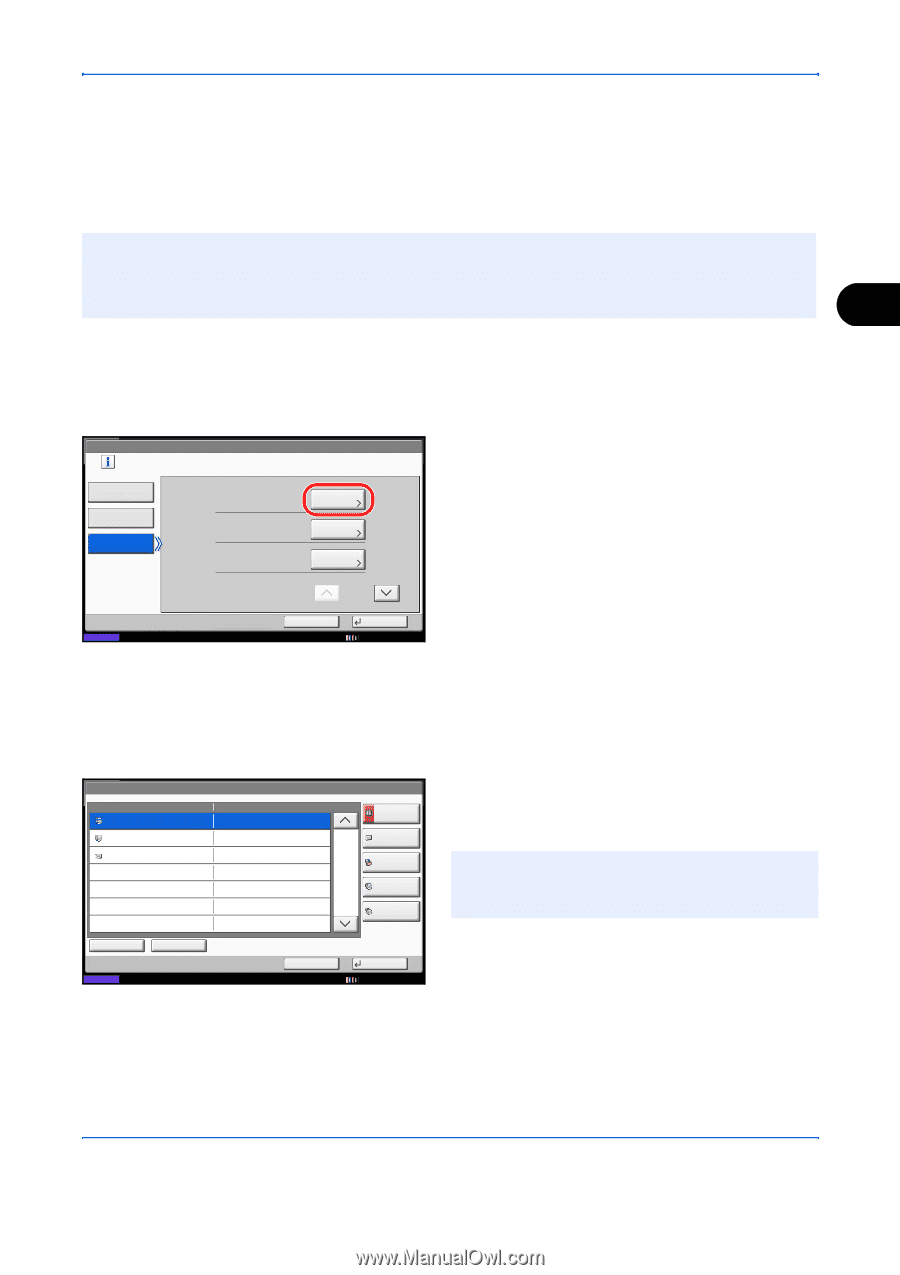
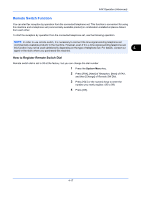
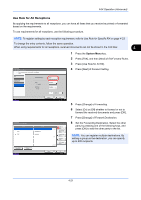
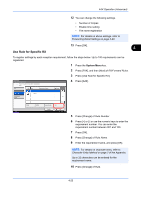
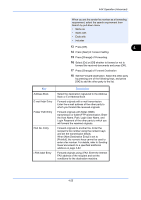
FAX Operation (Advanced) Use Rule for All Receptions By applying the requirements to all receptions, you can have all faxes that you receive be printed or forwarded based on the requirements. To use requirements for all receptions, use the following procedure. NOTE: To register setting by each reception requirement, refer to Use Rule for Specific RX on page 4-23. To change the entry contents, follow the same operation. When using requirements for all receptions, received documents can not be stored in the FAX Box. 4 1 Press the System Menu key. 2 Press [FAX], and then [Next] of RX/Forward Rules. 3 Press [Use Rule for All RX]. FAX - RX/Forward Rules Print or forward the received file according to rules. Off Forward Settings: Use Rule for Specific RX Use Rule for All RX Print: 1 Copy(s) Schedule: All Day Next Change Change 4 Press [Next] of Forward Setting. 1/2 Status FAX - Forward Destination ABC DEF Dest GHI Cancel OK 12/12/2011 10:10 Detail 012345678 9876543210 abc@efg Address Book E-mail Addr Entry Folder Path Entry 1/1 FAX No. Entry i-FAX Addr Entry 5 Press [Change] of Forwarding. 6 Select [On] or [Off] whether to forward or not to forward the received documents and press [OK]. 7 Press [Change] of Forward Destination. 8 Set the Forwarding Destination. Select the other party by pressing one of the following keys, and press [OK] to add the other party to the list. NOTE: You can register multiple destinations. By setting a group as the destination, you can specify up to 500 recipients. Detail/Edit Status Delete Cancel OK 12/12/2011 10:10 4-21
-
 1
1 -
2
-
3
-
4
-
5
-
6
-
7
-
8
-
9
-
10
-
11
-
12
-
13
-
14
-
15
-
16
-
17
-
18
-
19
-
20
-
21
-
22
-
23
-
24
-
25
-
26
-
27
-
28
-
29
-
30
-
31
-
32
-
33
-
34
-
35
-
36
-
37
-
38
-
39
-
40
-
41
-
42
-
43
-
44
-
45
-
46
-
47
-
48
-
49
-
50
-
51
-
52
-
53
-
54
-
55
-
56
-
57
-
58
-
59
-
60
-
61
-
62
-
63
-
64
-
65
-
66
-
67
-
68
-
69
-
70
-
71
-
72
-
73
-
74
-
75
-
76
-
77
-
78
-
79
-
80
-
81
-
82
-
83
-
 84
84 -
 85
85 -
 86
86 -
 87
87 -
 88
88 -
 89
89 -
 90
90 -
 91
91 -
 92
92 -
 93
93 -
 94
94 -
95
-
96
-
97
-
98
-
99
-
100
-
101
-
102
-
103
-
104
-
105
-
106
-
107
-
108
-
109
-
110
-
111
-
112
-
113
-
114
-
115
-
116
-
117
-
118
-
119
-
120
-
121
-
122
-
123
-
124
-
125
-
126
-
127
-
128
-
129
-
130
-
131
-
132
-
133
-
134
-
135
-
136
-
137
-
138
-
139
-
140
-
141
-
142
-
143
-
144
-
145
-
146
-
147
-
148
-
149
-
150
-
151
-
152
-
153
-
154
-
155
-
156
-
157
-
158
-
159
-
160
-
161
-
162
-
163
-
164
-
165
-
166
-
167
-
168
-
169
-
170
-
171
-
172
-
173
-
174
-
175
-
176
-
177
-
178
-
179
-
180
-
181
-
182
-
183
-
184
-
185
-
186
-
187
-
188
-
189
-
190
-
191
-
192
-
193
-
194
-
195
-
196
-
197
-
198
-
199
-
200
-
201
-
202
-
203
-
204
-
205
-
206
-
207
-
208
-
209
-
210
-
211
-
212
-
213
-
214
-
215
-
216
-
217
-
218
-
219
-
220
-
221
-
222
-
223
-
224
-
225
-
226
-
227
-
228
-
229
-
230
-
231
-
232
-
233
-
234
-
235
-
236
-
237
-
238
-
239
-
240
-
241
-
242
-
243
-
244
-
245
-
246
-
247
-
248
-
249
-
250
-
251
-
252
 |
 |