LG KP500_silver User Guide - Page 65
Changing the video image, Choosing a colour tone - software
 |
UPC - 012975467986
View all LG KP500_silver manuals
Add to My Manuals
Save this manual to your list of manuals |
Page 65 highlights
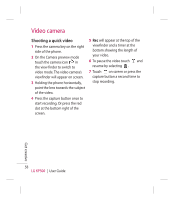
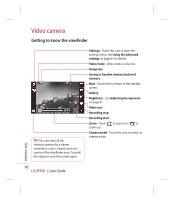
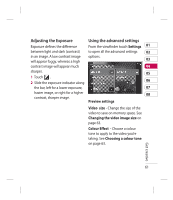
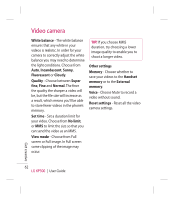
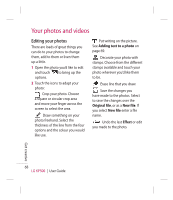
Changing the video image size 4 Select the size option you'd like to use. 01 The more pixels, the larger the file size, which in turn means they take up more memory. If you want to fit more videos on to your phone you TIP! For video format conversion 02 software, see the CD you 03 received with your KP500. 04 can alter the pixel number to make Choosing a colour tone 05 the file size smaller. 1 From the viewfinder touch the top left corner. 1 From the viewfinder touch in the top left corner. in 06 07 2 Select Video size from the 2 Select Colour Effect from the settings menu. 08 Preview menu. 3 There are five colour tone options, 3 Select a pixel value from the two Off (Normal), Black & White, options: Negative, Sepia. 320x240 - Large image size, 4 Touch the colour tone you'd like therefore larger file size. Up to 24 to use. fps are available for video play back, up to 12 fps are available for video recording. 176x144 - Small image size and therefore smaller file size. Up to 15 fps are available for video play back. TIP! You can change a video shot in colour to black and white or sepia after it's taken, but you cannot change a video shot in black and white or sepia back to colour. Get creative 63
-
 1
1 -
2
-
3
-
4
-
5
-
6
-
7
-
8
-
9
-
10
-
11
-
12
-
13
-
14
-
15
-
16
-
17
-
18
-
19
-
20
-
21
-
22
-
23
-
24
-
25
-
26
-
27
-
28
-
29
-
30
-
31
-
32
-
33
-
34
-
35
-
36
-
37
-
38
-
39
-
40
-
41
-
42
-
43
-
44
-
45
-
46
-
47
-
48
-
49
-
50
-
51
-
52
-
53
-
54
-
55
-
56
-
57
-
58
-
59
-
 60
60 -
 61
61 -
 62
62 -
 63
63 -
 64
64 -
 65
65 -
 66
66 -
 67
67 -
 68
68 -
 69
69 -
 70
70 -
71
-
72
-
73
-
74
-
75
-
76
-
77
-
78
-
79
-
80
-
81
-
82
-
83
-
84
-
85
-
86
-
87
-
88
-
89
-
90
-
91
-
92
-
93
-
94
-
95
-
96
-
97
-
98
-
99
-
100
-
101
-
102
-
103
-
104
-
105
-
106
-
107
-
108
-
109
-
110
-
111
-
112
-
113
-
114
-
115
-
116
-
117
-
118
-
119
-
120
-
121
-
122
-
123
-
124
-
125
-
126
-
127
-
128
-
129
-
130
-
131
-
132
-
133
-
134
 |
 |
