Lacie 300673 User Manual - Page 26
User Manual,
 |
UPC - 093053306731
View all Lacie 300673 manuals
Add to My Manuals
Save this manual to your list of manuals |
Page 26 highlights
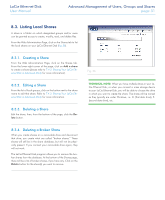
LaCie Ethernet Disk User Manual Using the Web Administration Page page 26 7.4.3. Sharing Your LaCie Ethernet Disk in Advanced Mode Your LaCie Ethernet Disk works like a typical file sharing system: you create users and/or groups that have access to use and share data, then create a share and assign the users and/or groups rights to that share. Creating Users Click on the Users tab and press the Add a user icon (Fig. 29). Enter the username* and all the necessary information in the text fields, then press the Add new user button. *Username must be unique and contain at least 4 characters. Do not use any of the following characters: Fig. 29 Creating Groups Click on the Groups tab and press the Add a group icon (Fig. 30). Enter a group name* and a description for the group in the text fields and press the Add group button. *The group name must be unique and contain at least 4 characters. Do not use any of the following characters: Fig. 30
-
 1
1 -
2
-
3
-
4
-
5
-
6
-
7
-
8
-
9
-
10
-
11
-
12
-
13
-
14
-
15
-
16
-
17
-
18
-
19
-
20
-
 21
21 -
 22
22 -
 23
23 -
 24
24 -
 25
25 -
 26
26 -
 27
27 -
 28
28 -
 29
29 -
 30
30 -
 31
31 -
32
-
33
-
34
-
35
-
36
-
37
-
38
-
39
-
40
-
41
-
42
-
43
-
44
-
45
-
46
-
47
-
48
-
49
-
50
-
51
-
52
-
53
-
54
-
55
-
56
-
57
-
58
-
59
-
60
-
61
-
62
 |
 |
