Lacie 300673 User Manual - Page 31
Listing Local Shares
 |
UPC - 093053306731
View all Lacie 300673 manuals
Add to My Manuals
Save this manual to your list of manuals |
Page 31 highlights
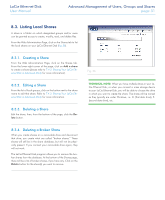
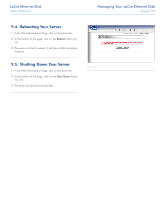
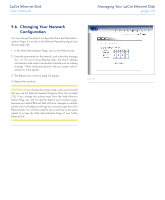
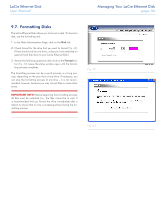
LaCie Ethernet Disk User Manual Advanced Management of Users, Groups and Shares page 31 8.3. Listing Local Shares A share is a folder on which designated groups and/or users can be granted access to create, modify, read, and delete files. From the Web Administration Page, click on the Shares tab to list the local shares on your LaCie Ethernet Disk (Fig. 36). 8.3.1. Creating a Share From the Web Administration Page, click on the Shares tab. From the lower-right corner of the page, click on Add a share to create a share (please refer to 7.4.3. Sharing Your LaCie Ethernet Disk in Advanced Mode for more information). 8.3.2. Editing a Share From the list of local groups, click on the button next to the share name to edit that share. Refer to 7.4.3. Sharing Your LaCie Ethernet Disk in Advanced Mode for more information. 8.3.3. Deleting a Share Edit the share, then, from the bottom of the page, click the Delete button. Fig. 36 TECHNICAL NOTE: When you have multiple drives in your LaCie Ethernet Disk, or when you connect a mass storage device to your LaCie Ethernet Disk, you will be able to choose the drive in which you want to create the share. The drives will be named as they typically are under Windows, i.e. D: (first data drive), E: (second data drive), etc.. 8.3.4. Deleting a Broken Share When you create shares on a removable drive and disconnect that drive, you create what are called "broken shares." These shares will still be in the share database, but will not be physically present. If you connect your removable drive again, they will not work. The LaCie Ethernet Disk program allows you to remove the broken shares from the database. At the bottom of the Shares page, there will be a list of broken shares, if you have any. Click on the Delete button for the share(s) you want to remove.
-
 1
1 -
2
-
3
-
4
-
5
-
6
-
7
-
8
-
9
-
10
-
11
-
12
-
13
-
14
-
15
-
16
-
17
-
18
-
19
-
20
-
21
-
22
-
23
-
24
-
25
-
 26
26 -
 27
27 -
 28
28 -
 29
29 -
 30
30 -
 31
31 -
 32
32 -
 33
33 -
 34
34 -
 35
35 -
 36
36 -
37
-
38
-
39
-
40
-
41
-
42
-
43
-
44
-
45
-
46
-
47
-
48
-
49
-
50
-
51
-
52
-
53
-
54
-
55
-
56
-
57
-
58
-
59
-
60
-
61
-
62
 |
 |
