Lantronix MPS100 EPS Reference Manual - Page 88
Escape, Available Options, Print Server Information, Enter, Print Server Status/Control, Server Info
 |
View all Lantronix MPS100 manuals
Add to My Manuals
Save this manual to your list of manuals |
Page 88 highlights
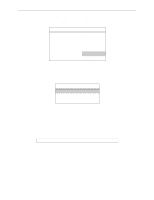
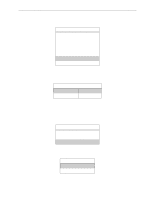
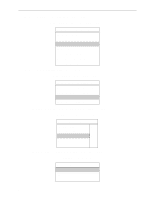
Printing NetWare Host Setup 6 Press Escape to return to the Available Options menu. 7 Repeat step 1 through step 5 for all necessary queues. When no other configuration is desired, the Server must be told to rescan the file server queues so that it is aware of the modifications. This can be done with the following steps. 8 In the Available Options menu, highlight Print Server Information and press Enter. Figure 8-17: Available Options Menu Available Options Change Current File Server Print Queue Information Print Server Information 9 Select the Server name (LAB_Server) and press Enter. The menu shown in Figure 8-18 appears. Figure 8-18: Print Server Information Menu Print Server Information Change Password Print Queue Full Name Print Server Configuration Print Server ID Print Server Operators Print Server Status/Control Print Server Users 10 Highlight Print Server Status/Control and press Enter. 11 Highlight Server Info and press Enter. Figure 8-19: Server Status Menu Print Server Status File Servers Being Serviced Notify List for Printer Printer Status Queues Services by Printer Server Info 8-8
-
 1
1 -
2
-
3
-
4
-
5
-
6
-
7
-
8
-
9
-
10
-
11
-
12
-
13
-
14
-
15
-
16
-
17
-
18
-
19
-
20
-
21
-
22
-
23
-
24
-
25
-
26
-
27
-
28
-
29
-
30
-
31
-
32
-
33
-
34
-
35
-
36
-
37
-
38
-
39
-
40
-
41
-
42
-
43
-
44
-
45
-
46
-
47
-
48
-
49
-
50
-
51
-
52
-
53
-
54
-
55
-
56
-
57
-
58
-
59
-
60
-
61
-
62
-
63
-
64
-
65
-
66
-
67
-
68
-
69
-
70
-
71
-
72
-
73
-
74
-
75
-
76
-
77
-
78
-
79
-
80
-
81
-
82
-
 83
83 -
 84
84 -
 85
85 -
 86
86 -
 87
87 -
 88
88 -
 89
89 -
 90
90 -
 91
91 -
 92
92 -
 93
93 -
94
-
95
-
96
-
97
-
98
-
99
-
100
-
101
-
102
-
103
-
104
-
105
-
106
-
107
-
108
-
109
-
110
-
111
-
112
-
113
-
114
-
115
-
116
-
117
-
118
-
119
-
120
-
121
-
122
-
123
-
124
-
125
-
126
-
127
-
128
-
129
-
130
-
131
-
132
-
133
-
134
-
135
-
136
-
137
-
138
-
139
-
140
-
141
-
142
-
143
-
144
-
145
-
146
-
147
-
148
-
149
-
150
-
151
-
152
-
153
-
154
-
155
-
156
-
157
-
158
-
159
-
160
-
161
-
162
-
163
-
164
-
165
-
166
-
167
-
168
-
169
-
170
-
171
-
172
-
173
-
174
-
175
-
176
-
177
-
178
-
179
-
180
-
181
-
182
-
183
-
184
-
185
-
186
-
187
-
188
-
189
-
190
-
191
-
192
-
193
-
194
-
195
-
196
-
197
-
198
-
199
-
200
-
201
-
202
-
203
-
204
-
205
-
206
-
207
-
208
-
209
-
210
-
211
-
212
-
213
-
214
-
215
-
216
-
217
-
218
-
219
-
220
-
221
-
222
-
223
 |
 |
