Lantronix MPS100 EPS Reference Manual - Page 90
Set/Define Protocols NetWare Printserver, Available Options, Print Queue Information, Enter, Insert
 |
View all Lantronix MPS100 manuals
Add to My Manuals
Save this manual to your list of manuals |
Page 90 highlights
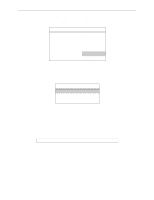
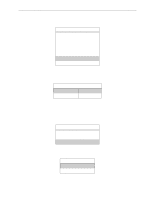
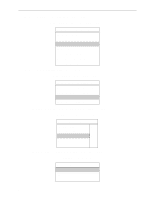
Printing NetWare Host Setup Note: rprinter is also known as nprinter. Before beginning rprinter configuration, you will need to know the name of the printserver process you will be starting on the file server, and the name of the print service on the Server. 1 Set the rprinter printserver on the Server. A From the Server local prompt, enter the Set/Define Protocols NetWare Printserver command, where pserver_name is the name with which the pserver NLM/VAP/standalone program will be started (under step 11 on page 8-14). Figure 8-23: Setting the Printserver Local>> SET PROTOCOL NETWARE PRINTSERVER pserver_name Local>> DEFINE PROTOCOL NETWARE PRINTSERVER pserver_name B Create a print queue on the file server and associate it with the Server service. 2 In the Available Options menu, select the Print Queue Information option and press Enter. Figure 8-24: Print Server Information Option Available Options Change Current File Server Print Queue Information Print Server Information You will see a list of configured print queues on the file server. 3 Press Insert to create a new queue on the file server, type the new queue name, and press Enter. Figure 8-25: Queue Name Example New Print Queue Name: TESTQ The name does not have to be related to the name of the Server resources, but should be short and easy to remember. 4 Highlight the queue you just entered and press Enter to configure the queue itself. A From the menu that appears, select Queue Servers and press Enter to specify which network print servers can print jobs from this print queue. The list will be empty, as none have been selected yet. 8-10
-
 1
1 -
2
-
3
-
4
-
5
-
6
-
7
-
8
-
9
-
10
-
11
-
12
-
13
-
14
-
15
-
16
-
17
-
18
-
19
-
20
-
21
-
22
-
23
-
24
-
25
-
26
-
27
-
28
-
29
-
30
-
31
-
32
-
33
-
34
-
35
-
36
-
37
-
38
-
39
-
40
-
41
-
42
-
43
-
44
-
45
-
46
-
47
-
48
-
49
-
50
-
51
-
52
-
53
-
54
-
55
-
56
-
57
-
58
-
59
-
60
-
61
-
62
-
63
-
64
-
65
-
66
-
67
-
68
-
69
-
70
-
71
-
72
-
73
-
74
-
75
-
76
-
77
-
78
-
79
-
80
-
81
-
82
-
83
-
84
-
 85
85 -
 86
86 -
 87
87 -
 88
88 -
 89
89 -
 90
90 -
 91
91 -
 92
92 -
 93
93 -
 94
94 -
 95
95 -
96
-
97
-
98
-
99
-
100
-
101
-
102
-
103
-
104
-
105
-
106
-
107
-
108
-
109
-
110
-
111
-
112
-
113
-
114
-
115
-
116
-
117
-
118
-
119
-
120
-
121
-
122
-
123
-
124
-
125
-
126
-
127
-
128
-
129
-
130
-
131
-
132
-
133
-
134
-
135
-
136
-
137
-
138
-
139
-
140
-
141
-
142
-
143
-
144
-
145
-
146
-
147
-
148
-
149
-
150
-
151
-
152
-
153
-
154
-
155
-
156
-
157
-
158
-
159
-
160
-
161
-
162
-
163
-
164
-
165
-
166
-
167
-
168
-
169
-
170
-
171
-
172
-
173
-
174
-
175
-
176
-
177
-
178
-
179
-
180
-
181
-
182
-
183
-
184
-
185
-
186
-
187
-
188
-
189
-
190
-
191
-
192
-
193
-
194
-
195
-
196
-
197
-
198
-
199
-
200
-
201
-
202
-
203
-
204
-
205
-
206
-
207
-
208
-
209
-
210
-
211
-
212
-
213
-
214
-
215
-
216
-
217
-
218
-
219
-
220
-
221
-
222
-
223
 |
 |
