Lantronix MPS100 EPS Reference Manual - Page 94
Enter, Escape, Set/Define Protocols NetWare Reset
 |
View all Lantronix MPS100 manuals
Add to My Manuals
Save this manual to your list of manuals |
Page 94 highlights
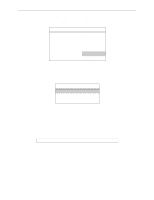
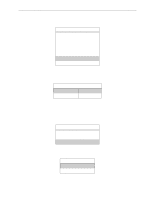
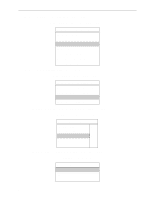
Printing NetWare Host Setup 8 Select the name of this file server and press Enter (or just press Enter if no file servers appear). Figure 8-37: Selecting the File Server File Server eng_server docserver labserver Print Queue TESTQ DOCQ LABQ Priority 1 1 1 9 Highlight the name of the queue created in step B and press Enter twice, leaving the priority at +1. 10 Exit PCONSOLE by repeatedly pressing Escape. 11 Restart the pserver VAP/NLM/process on the file server or PC. 12 To connect the Server port to the rprinter file server, complete one of the following steps, depending on how pserver is running: 13 If pserver is running as a VAP, enter the following on the file server. The pserver name must match the name you entered on the Server for the PRINTSERVER. Figure 8-38: Restarting pserver as a VAP : STOP pserver_name : START pserver_name If pserver is running as an NLM, enter the following: Figure 8-39: Restarting pserver as an NLM : UNLOAD PSERVER pserver_name : LOAD PSERVER pserver_name If pserver is running on a dedicated PC, start it by entering the following: Figure 8-40: Restarting pserver on a Dedicated PC F:> PSERVER pserver_name At this point, the Server will connect the port to the rprinter file server, and the port is ready to print from NetWare. The port will be unavailable for other protocols to use. If the Server does not connect within one minute, use the Set/Define Protocols NetWare Reset command to force the Server to re-scan the NetWare connections. 8-14
-
 1
1 -
2
-
3
-
4
-
5
-
6
-
7
-
8
-
9
-
10
-
11
-
12
-
13
-
14
-
15
-
16
-
17
-
18
-
19
-
20
-
21
-
22
-
23
-
24
-
25
-
26
-
27
-
28
-
29
-
30
-
31
-
32
-
33
-
34
-
35
-
36
-
37
-
38
-
39
-
40
-
41
-
42
-
43
-
44
-
45
-
46
-
47
-
48
-
49
-
50
-
51
-
52
-
53
-
54
-
55
-
56
-
57
-
58
-
59
-
60
-
61
-
62
-
63
-
64
-
65
-
66
-
67
-
68
-
69
-
70
-
71
-
72
-
73
-
74
-
75
-
76
-
77
-
78
-
79
-
80
-
81
-
82
-
83
-
84
-
85
-
86
-
87
-
88
-
 89
89 -
 90
90 -
 91
91 -
 92
92 -
 93
93 -
 94
94 -
 95
95 -
 96
96 -
 97
97 -
 98
98 -
 99
99 -
100
-
101
-
102
-
103
-
104
-
105
-
106
-
107
-
108
-
109
-
110
-
111
-
112
-
113
-
114
-
115
-
116
-
117
-
118
-
119
-
120
-
121
-
122
-
123
-
124
-
125
-
126
-
127
-
128
-
129
-
130
-
131
-
132
-
133
-
134
-
135
-
136
-
137
-
138
-
139
-
140
-
141
-
142
-
143
-
144
-
145
-
146
-
147
-
148
-
149
-
150
-
151
-
152
-
153
-
154
-
155
-
156
-
157
-
158
-
159
-
160
-
161
-
162
-
163
-
164
-
165
-
166
-
167
-
168
-
169
-
170
-
171
-
172
-
173
-
174
-
175
-
176
-
177
-
178
-
179
-
180
-
181
-
182
-
183
-
184
-
185
-
186
-
187
-
188
-
189
-
190
-
191
-
192
-
193
-
194
-
195
-
196
-
197
-
198
-
199
-
200
-
201
-
202
-
203
-
204
-
205
-
206
-
207
-
208
-
209
-
210
-
211
-
212
-
213
-
214
-
215
-
216
-
217
-
218
-
219
-
220
-
221
-
222
-
223
 |
 |
