Lenovo NetVista Hardware Maintenance Manual for NetVista 6266, 6270, 6276, 627 - Page 48
Does System Load The Diagnostics Program From The Diskette Drive? Yes, Read Ahead. No, Go To Step
 |
View all Lenovo NetVista manuals
Add to My Manuals
Save this manual to your list of manuals |
Page 48 highlights
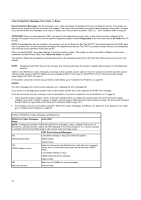
If a newly replaced FRU does not correct the problem: If you have reached this point of the check procedures and were instructed to replace a FRU but doing so did not correct the problem, reinstall the original FRU and go through "Start" again. If you want to print a copy of a BIOS Setup Utility screen to an attached printer, press Print Screen key, while the screen is displayed. PLEASE READ THE FOLLOWING: Human Error is a cause for concern when applied to check procedures. It exists in every first time set of analysis procedures. It is therefore essential for effective and time-efficient servicing that each stage of every procedure be verified. (For example: When a symptom is found, or when a symptom appears to have been cured; the preceding steps should be repeated for accuracy of analysis.) 001 - START To begin, note the following: Disable the setting of "Quick Power-On Self Test" from BIOS Setup. Disconnect all external cables and devices including speakers and microphone from the system unit, except for the keyboard, mouse, and monitor. Power off the system unit before moving it or when replacing FRUs. Remove all adapter cards, except for the factory-installed modem adapter card and any other IBM factory-installed adapter cards. Disconnect any drives except: • 3.5-in. diskette drive • Hard disk drive • Factory-installed devices (such as a CD-ROM drive) Make sure that all power cords and cables are connected properly. Make sure that the monitor brightness and contrast controls are not turned down. Power on the system unit. NOTE: Some monitors have a detachable system I/O signal cable between the monitor and the system unit. In this case, check this signal cable before replacing the unit. See "Monitor Port Signals" on page 111 for pin identification. Make sure that the monitor refresh rate is correct. Note any symptoms, messages, error codes, or beeps. Make sure that there are no diskettes or CDs in the drives. 002 - DOES AN IBM LOGO SCREEN APPEAR? (YES, READ AHEAD. NO, GO TO STEP 004.) Insert the diagnostics diskette in the diskette drive. 003 - DOES SYSTEM LOAD THE DIAGNOSTICS PROGRAM FROM THE DISKETTE DRIVE? (YES, READ AHEAD. NO, GO TO STEP 004.) Follow the instructions on the screen and select Utility from the diagnostics program menu. Select Tech Support Form from the menu, press F5 to execute, then generate a system configuration report. Compare the system configuration list with the actual devices installed in system. NOTE: If necessary, remove the machine cover and visually compare the devices installed in system to those shown in the system configuration report. Go to step 006. 004 - DO ANY MESSAGES, ERROR CODES, OR SYMPTOMS APPEAR? (YES, READ AHEAD. NO, GO TO STEP 005) Go to "Index of Symptoms, Messages, Error Codes, or Beeps" on page 50. End. 005 If the keyboard responds incorrectly, go to "Keyboard" on page 64. 006 - DOES THE SYSTEM CONFIGURATION REPORT CORRECTLY IDENTIFY THE DEVICES INSTALLED IN SYSTEM? (YES, READ AHEAD. NO, GO TO STEP 007.) Select Diagnostics from the diagnostics program menu. Select and execute All Tests. Go to step 008. 48
-
 1
1 -
2
-
3
-
4
-
5
-
6
-
7
-
8
-
9
-
10
-
11
-
12
-
13
-
14
-
15
-
16
-
17
-
18
-
19
-
20
-
21
-
22
-
23
-
24
-
25
-
26
-
27
-
28
-
29
-
30
-
31
-
32
-
33
-
34
-
35
-
36
-
37
-
38
-
39
-
40
-
41
-
42
-
 43
43 -
 44
44 -
 45
45 -
 46
46 -
 47
47 -
 48
48 -
 49
49 -
 50
50 -
 51
51 -
 52
52 -
 53
53 -
54
-
55
-
56
-
57
-
58
-
59
-
60
-
61
-
62
-
63
-
64
-
65
-
66
-
67
-
68
-
69
-
70
-
71
-
72
-
73
-
74
-
75
-
76
-
77
-
78
-
79
-
80
-
81
-
82
-
83
-
84
-
85
-
86
-
87
-
88
-
89
-
90
-
91
-
92
-
93
-
94
-
95
-
96
-
97
-
98
-
99
-
100
-
101
-
102
-
103
-
104
-
105
-
106
-
107
-
108
-
109
-
110
-
111
-
112
-
113
-
114
-
115
-
116
-
117
-
118
-
119
-
120
-
121
-
122
-
123
-
124
-
125
-
126
-
127
-
128
-
129
-
130
-
131
-
132
-
133
-
134
-
135
 |
 |
