Lenovo ThinkCentre M76 (English) User Guide - Page 29
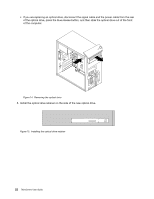
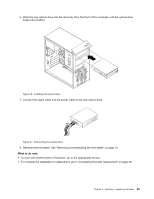
Slide the new optical drive into the drive bay from the front of the computer until the optical drive
 |
View all Lenovo ThinkCentre M76 manuals
Add to My Manuals
Save this manual to your list of manuals |
Page 29 highlights
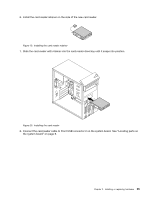
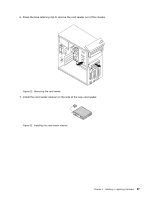
6. Slide the new optical drive into the drive bay from the front of the computer until the optical drive snaps into position. Figure 16. Installing the optical drive 7. Connect the signal cable and the power cable to the new optical drive. Figure 17. Connecting the optical drive 8. Reinstall the front bezel. See "Removing and reinstalling the front bezel" on page 15. What to do next: • To work with another piece of hardware, go to the appropriate section. • To complete the installation or replacement, go to "Completing the parts replacement" on page 48. Chapter 2. Installing or replacing hardware 23
-
 1
1 -
2
-
3
-
4
-
5
-
6
-
7
-
8
-
9
-
10
-
11
-
12
-
13
-
14
-
15
-
16
-
17
-
18
-
19
-
20
-
21
-
22
-
23
-
 24
24 -
 25
25 -
 26
26 -
 27
27 -
 28
28 -
 29
29 -
 30
30 -
 31
31 -
 32
32 -
 33
33 -
 34
34 -
35
-
36
-
37
-
38
-
39
-
40
-
41
-
42
-
43
-
44
-
45
-
46
-
47
-
48
-
49
-
50
-
51
-
52
-
53
-
54
-
55
-
56
-
57
-
58
-
59
-
60
-
61
-
62
-
63
-
64
-
65
-
66
-
67
-
68
-
69
-
70
-
71
-
72
-
73
-
74
-
75
-
76
-
77
-
78
-
79
-
80
-
81
-
82
-
83
-
84
-
85
-
86
-
87
-
88
-
89
-
90
-
91
-
92
 |
 |
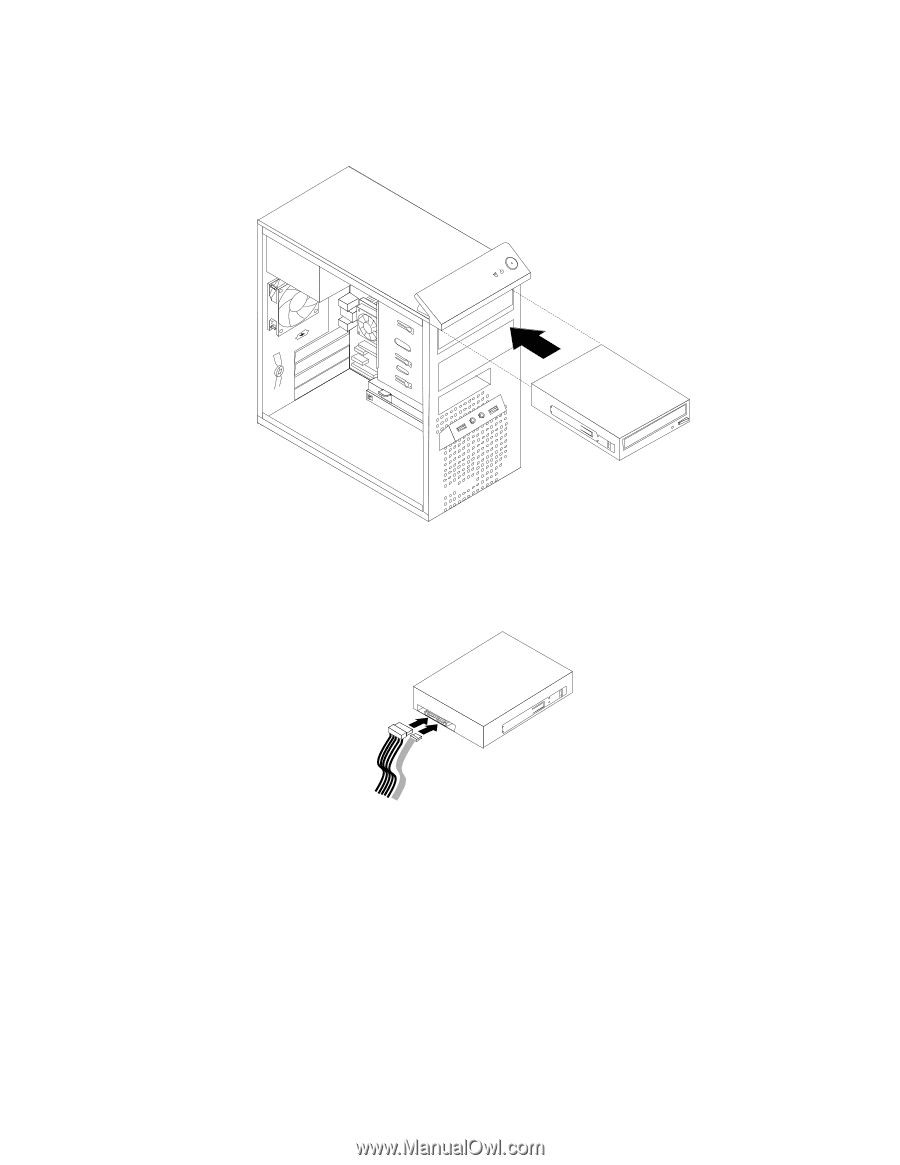
6. Slide the new optical drive into the drive bay from the front of the computer until the optical drive
snaps into position.
Figure 16. Installing the optical drive
7. Connect the signal cable and the power cable to the new optical drive.
Figure 17. Connecting the optical drive
8. Reinstall the front bezel. See “Removing and reinstalling the front bezel” on page 15.
What to do next:
•
To work with another piece of hardware, go to the appropriate section.
•
To complete the installation or replacement, go to “Completing the parts replacement” on page 48.
Chapter 2
.
Installing or replacing hardware
23