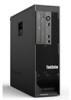
Lenovo ThinkStation C20 (English) User Guide
Lenovo ThinkStation C20 Manual
 |
View all Lenovo ThinkStation C20 manuals
Add to My Manuals
Save this manual to your list of manuals |
Lenovo ThinkStation C20 manual content summary:
- Lenovo ThinkStation C20 | (English) User Guide - Page 1
ThinkStation User Guide Machine Types: 4262, 4263, 4264, 4265, 4266, 4269, 4271, and 4272 - Lenovo ThinkStation C20 | (English) User Guide - Page 2
Note: Before using this information and the product it supports, be sure to read and understand the ThinkStation Safety and Warranty Guide and Appendix B "Notices" on page 73. Fourth Edition (June 2012) © Copyright Lenovo 2010, 2012. LIMITED AND RESTRICTED RIGHTS NOTICE: If data or software is - Lenovo ThinkStation C20 | (English) User Guide - Page 3
Setup Utility program 52 Chapter 5. Configuring RAID . . . . . 53 Configuring RAID for machine types 4262, 4263, 4264, and 4265 53 Installing SATA hard disk drives 53 Configuring the system BIOS to enable SATA RAID functionality 53 Creating RAID volumes 54 Deleting RAID volumes 54 Configuring - Lenovo ThinkStation C20 | (English) User Guide - Page 4
a POST/BIOS update failure . . 58 Chapter 7. Troubleshooting and diagnostic programs 61 Basic troubleshooting 61 Diagnostic programs 62 Lenovo Solution Center 62 Lenovo ThinkVantage Toolbox . 79 China RoHS 79 Turkish RoHS 79 Ukraine RoHS 79 India RoHS 80 Index 81 ii ThinkStation User Guide - Lenovo ThinkStation C20 | (English) User Guide - Page 5
manual, be sure to read and understand all the related safety information for this product. Refer to the ThinkStation Safety and Warranty Guide Warranty Guide, you can obtain a Portable Document Format (PDF) version from the Lenovo® Support Web site at http://support.lenovo.com. © Copyright Lenovo - Lenovo ThinkStation C20 | (English) User Guide - Page 6
iv ThinkStation User Guide - Lenovo ThinkStation C20 | (English) User Guide - Page 7
. • "Specifications" on page 3: This section lists the physical specifications for your memory modules (DDR3 DIMMs) • Each microprocessor supports up to three or six memory modules Note: The Intel Xeon microprocessor families compatible with this ThinkStation™ computer feature an integrated memory - Lenovo ThinkStation C20 | (English) User Guide - Page 8
two 10/100/1000 Mbps Ethernet controller(s) System management features • Ability to store the power-on self-test (POST) hardware test results • Advanced Configuration and Power Interface (ACPI) support • 7. Expansion • One optical drive bay • One PCI Express x1 card slot 2 ThinkStation User Guide - Lenovo ThinkStation C20 | (English) User Guide - Page 9
Two PCI Express x16 card slots Power supply • 800-watt auto-sensing power supply Security features • Cover presence switch Windows 7 Professional) Operating system(s), certified or tested for compatibility1 (varies by model type) • Linux® Specifications This section lists the physical specifications - Lenovo ThinkStation C20 | (English) User Guide - Page 10
ThinkStation computer. You can find detailed information and download the software programs from the Lenovo Support Web site at: http://support.lenovo.com • ThinkVantage Productivity Center • ThinkVantage Client Security Solution (CSS) • ThinkVantage System Update (TVSU) 4 ThinkStation User Guide - Lenovo ThinkStation C20 | (English) User Guide - Page 11
Solution Center program enables you to troubleshoot and resolve computer problems. It combines diagnostic tests, system information collection, security status, and support information, along with hints and tips for maximum system performance. See "Lenovo Solution Center" on page 62 for detailed - Lenovo ThinkStation C20 | (English) User Guide - Page 12
you can use to detect and eliminate viruses. Lenovo provides a full version of antivirus software on your computer with a free 30-day subscription. After 30 days, you must renew the license to continue receiving the antivirus software updates. For more information about how to use your antivirus - Lenovo ThinkStation C20 | (English) User Guide - Page 13
(8) 5 Audio line-out side speaker connector 6 Microphone connector 7 Audio line-out front speaker connector 8 Audio line-in connector 9 PCI Express x1 card slot cover 10 PCI Express x16 card slot cover 11 PCI card slot cover 12 PCI Express x16 card slot cover 13 PCI Express x4 card slot cover - Lenovo ThinkStation C20 | (English) User Guide - Page 14
of the computer. Used to send audio signals from the computer to external devices, such as powered stereo speakers (speakers with built-in amplifiers), multimedia keyboards, or the audio line-in connector on of the computer, see "Removing the computer cover" on page 13. 8 ThinkStation User Guide - Lenovo ThinkStation C20 | (English) User Guide - Page 15
Figure 3. Component locations 1 Memory modules 2 Heat sink and fan assembly 2 3 Optical drive bracket 4 Optical drive 5 Front fan assembly bracket 6 Hard disk drive bay 7 Hard disk drives (3) 8 Power supply assembly 9 PCI card 10 Heat sink and fan assembly 1 11 Rear fan assemblies (2) Locating - Lenovo ThinkStation C20 | (English) User Guide - Page 16
) 27 PCI Express x16 card slot 28 PCI card slot 29 PCI Express x16 card slot 30 PCI Express x1 card slot 31 Auxiliary 12 V power connector 32 Left rear fan connector 33 CPU 1 12 V power connector 34 CPU 1 fan connector 35 Microprocessor 1 10 ThinkStation User Guide - Lenovo ThinkStation C20 | (English) User Guide - Page 17
part and connector locations 1 CPU 1 memory slots (3) 2 CPU 1 memory fan connector 3 Microprocessor 2 4 CPU 2 12 V power connector 5 24-pin power connector 6 CPU 2 fan connector 7 CPU 2 memory fan connector 8 CPU 2 memory slots (3) 9 Power switch and LEDs connector 10 Auxiliary LED connector 11 - Lenovo ThinkStation C20 | (English) User Guide - Page 18
16 SATA connectors (4) 17 Battery 33 Microprocessor 1 12 ThinkStation User Guide - Lenovo ThinkStation C20 | (English) User Guide - Page 19
and understanding the "Important safety information" in the ThinkStation Safety and Warranty Guide that came with your computer. To obtain a copy of the ThinkStation Safety and Warranty Guide, go to: http://support.lenovo.com This section provides instructions on how to remove the computer cover - Lenovo ThinkStation C20 | (English) User Guide - Page 20
understanding the "Important safety information" in the ThinkStation Safety and Warranty Guide that came with your computer. To obtain a copy of the ThinkStation Safety and Warranty Guide, go to: http://support.lenovo.com This section provides instructions on how to remove and reinstall the front - Lenovo ThinkStation C20 | (English) User Guide - Page 21
and understanding the "Important safety information" in the ThinkStation Safety and Warranty Guide that came with your computer. To obtain a copy of the ThinkStation Safety and Warranty Guide, go to: http://support.lenovo.com This section provides instructions on how to remove and reinstall the PCI - Lenovo ThinkStation C20 | (English) User Guide - Page 22
the corresponding holes in the chassis, and then pivot the PCI card holder downward until the front of the card holder snaps into position. 16 ThinkStation User Guide - Lenovo ThinkStation C20 | (English) User Guide - Page 23
that came with your computer. To obtain a copy of the ThinkStation Safety and Warranty Guide, go to: http://support.lenovo.com This section provides instructions on how to install or replace a memory module. Depending on your model, your computer has six or 12 slots for installing or replacing DDR3 - Lenovo ThinkStation C20 | (English) User Guide - Page 24
fan duct, disconnect the memory fan cable from the system board, remove the blue shipping clip, press inward on the two tabs 1 , pivot the fan duct, and then disengage the rear of the fan duct. Note: Not all computer models have the memory fan duct and blue shipping clip. 18 ThinkStation User Guide - Lenovo ThinkStation C20 | (English) User Guide - Page 25
12. Opening the retaining clips If you are replacing an old memory module, open the retaining clips and gently pull the memory module out of the memory slot. Figure 13. Removing a memory module Notes: a. If your computer has 12 memory slots on the system board, you might have to use more force - Lenovo ThinkStation C20 | (English) User Guide - Page 26
b. If your computer has six memory slots on the system board, you might have to use more force to remove the memory module installed in memory slot 1 . 20 ThinkStation User Guide - Lenovo ThinkStation C20 | (English) User Guide - Page 27
on the system board" on page 9. Figure 15. Installing the memory fan duct 10. Reinstall the blue shipping clip if your computer needs to be ThinkStation Safety and Warranty Guide that came with your computer. To obtain a copy of the ThinkStation Safety and Warranty Guide, go to: http://support.lenovo - Lenovo ThinkStation C20 | (English) User Guide - Page 28
This section provides instructions on how to install or replace a from the drives and turn off all attached devices and the computer. Then, disconnect all power cords from electrical outlets and disconnect all cables that are connected to the computer. 2. it out of the slot. 22 ThinkStation User Guide - Lenovo ThinkStation C20 | (English) User Guide - Page 29
any repair before reading and understanding the "Important safety information" in the ThinkStation Safety and Warranty Guide that came with your computer. To obtain a copy of the ThinkStation Safety and Warranty Guide, go to: http://support.lenovo.com Chapter 2. Installing or replacing hardware 23 - Lenovo ThinkStation C20 | (English) User Guide - Page 30
instructions on how to install a new hard disk drive into your computer. To install a new hard disk drive, do the following: 1. Remove all media from the drives and turn off all attached devices and the computer. Then, disconnect all power cable to a SATA hard disk drive 24 ThinkStation User Guide - Lenovo ThinkStation C20 | (English) User Guide - Page 31
into the hard disk drive bay until it snaps into position. Figure 21. Installing a new hard disk drive 9. Locate one of the extra five-wire power cables and connect it to the new hard disk drive. Chapter 2. Installing or replacing hardware 25 - Lenovo ThinkStation C20 | (English) User Guide - Page 32
and understanding the "Important safety information" in the ThinkStation Safety and Warranty Guide that came with your computer. To obtain a copy of the ThinkStation Safety and Warranty Guide, go to: http://support.lenovo.com This section provides instructions on how to replace a hard disk drive. To - Lenovo ThinkStation C20 | (English) User Guide - Page 33
to replace. 5. Disconnect the signal cable and the power cable from the rear of the hard disk drive. ThinkStation Safety and Warranty Guide that came with your computer. To obtain a copy of the ThinkStation Safety and Warranty Guide, go to: http://support.lenovo.com This section provides instructions - Lenovo ThinkStation C20 | (English) User Guide - Page 34
front bezel. See "Removing and reinstalling the front bezel" on page 14. 4. Disconnect the signal cable and the power cable from the rear of the optical drive, press the blue release button 1 as shown, and then slide position. Figure 25. Installing the new optical drive 28 ThinkStation User Guide - Lenovo ThinkStation C20 | (English) User Guide - Page 35
wire power connector ThinkStation Safety and Warranty Guide, go to: http://support.lenovo.com CAUTION: The heat sink and fan assembly might be very hot. Turn off the computer and wait three to five minutes to let the computer cool before removing the computer cover. This section provides instructions - Lenovo ThinkStation C20 | (English) User Guide - Page 36
system board to avoid any possible damage to the system board. The four screws cannot be removed from the heat sink and fan assembly. 30 ThinkStation User Guide - Lenovo ThinkStation C20 | (English) User Guide - Page 37
not put the heat sink and fan assembly anywhere except on the microprocessor after the plastic cover has been removed and the thermal grease exposed. 10. Position the new heat sink and fan assembly on the microprocessor so that the four screws are aligned with the holes in the system board - Lenovo ThinkStation C20 | (English) User Guide - Page 38
understanding the "Important safety information" in the ThinkStation Safety and Warranty Guide that came with your computer. To obtain a copy of the ThinkStation Safety and Warranty Guide, go to: http://support.lenovo.com This section provides instructions on how to replace the front fan assembly - Lenovo ThinkStation C20 | (English) User Guide - Page 39
6. Press the two tabs 1 that attach the front fan assembly bracket to the chassis toward each other as shown and then completely remove the front fan assembly bracket from the chassis. Figure 29. Removing the front fan assembly bracket Chapter 2. Installing or replacing hardware 33 - Lenovo ThinkStation C20 | (English) User Guide - Page 40
and understanding the "Important safety information" in the ThinkStation Safety and Warranty Guide that came with your computer. To obtain a copy of the ThinkStation Safety and Warranty Guide, go to: http://support.lenovo.com This section provides instructions on how to replace the rear fan assembly - Lenovo ThinkStation C20 | (English) User Guide - Page 41
Note: Your computer supports two rear fan assemblies. To replace the rear fan assembly, do the following: 1. Remove all media from the drives and turn off all attached devices and the computer. Then, disconnect all power cords from electrical outlets and disconnect all cables that are connected to - Lenovo ThinkStation C20 | (English) User Guide - Page 42
place. Figure 32. Installing the rear fan assembly 10. Connect the rear fan assembly cable to the ThinkStation Safety and Warranty Guide that came with your computer. To obtain a copy of the ThinkStation Safety and Warranty Guide, go to: http://support.lenovo.com This section provides instructions - Lenovo ThinkStation C20 | (English) User Guide - Page 43
3. Disconnect the old keyboard cable or mouse cable from the computer. 4. Connect a new keyboard or mouse to one of the USB connectors on the computer. Depending on where you want to connect the new keyboard or mouse, see "Locating controls and connectors on the front of your computer" on page 6 or - Lenovo ThinkStation C20 | (English) User Guide - Page 44
at http://support.lenovo.com. Installation instructions are provided in readme files with the device driver files. Basic security features There are several security options available to help you prevent hardware theft and unauthorized access to your computer. In addition to physical locks, you - Lenovo ThinkStation C20 | (English) User Guide - Page 45
a key. This is the same type of lock used with many notebook computers. You can order an integrated cable lock from Lenovo by searching for Kensington at: http://support.lenovo.com Your computer comes with a keylock 3 , which was built into the computer cover. The keys for the computer cover are - Lenovo ThinkStation C20 | (English) User Guide - Page 46
computer cannot be used until a valid password is typed in. Refer to Chapter 4 "Using the Setup Utility program" on page 49 for more information. 40 ThinkStation User Guide - Lenovo ThinkStation C20 | (English) User Guide - Page 47
or reinstalling device drivers" on page 46 • "Solving recovery problems" on page 46 data medium. Your Microsoft Windows license permits you to create only Windows 7 operating system, click Start ➙ All Programs ➙ Lenovo ThinkVantage Tools ➙ Factory Recovery Disks. Then, follow the instructions - Lenovo ThinkStation C20 | (English) User Guide - Page 48
Windows 7 operating system, do the following: 1. Depending on the type of your recovery media, connect the boot medium (memory process begins. 4. Follow the instructions on the screen to complete the drivers for some devices. See "Installing or reinstalling device drivers ThinkStation User Guide - Lenovo ThinkStation C20 | (English) User Guide - Page 49
All Programs ➙ Lenovo ThinkVantage Tools ➙ Enhanced Backup and Restore. The Rescue and Recovery program opens. 2. In the Rescue and Recovery main window, click the Launch advanced Rescue and Recovery arrow. 3. Click the Restore your system from a backup icon. 4. Follow the instructions on the screen - Lenovo ThinkStation C20 | (English) User Guide - Page 50
problems" on page 46. 4. Do one of the following: • To rescue files from your hard disk drive or from a backup, click Rescue files and follow the instructions might have to reinstall device drivers for some devices. See "Installing or reinstalling device drivers" on page 46. 2. ThinkStation User Guide - Lenovo ThinkStation C20 | (English) User Guide - Page 51
rescue medium This section provides instructions on how to create a rescue medium on different operating systems. • To create a rescue medium on the Windows 7 operating system, do the following: 1. From the Windows desktop, click Start ➙ All Programs ➙ Lenovo ThinkVantage Tools ➙ Enhanced Backup and - Lenovo ThinkStation C20 | (English) User Guide - Page 52
with the .inf extension and you want to install the device driver using the INF file, refer to your Windows Help and Support information system for detailed information about how to install the device driver. Solving recovery problems If you are unable to access the Rescue and Recovery workspace or - Lenovo ThinkStation C20 | (English) User Guide - Page 53
information about temporarily or permanently changing the startup device sequence. For more information about the Setup Utility program, see Chapter 4 "Using the Setup Utility program" on page 49. It is important to create a rescue medium and a set of recovery media as early as possible and store - Lenovo ThinkStation C20 | (English) User Guide - Page 54
48 ThinkStation User Guide - Lenovo ThinkStation C20 | (English) User Guide - Page 55
Setup Utility program. See "Starting the Setup Utility program" on page 49. Then, follow the instructions on the screen. When working with the Setup Utility program, you must use the keyboard. The keys If you decide to set a password, read the following sections. © Copyright Lenovo 2010, 2012 49 - Lenovo ThinkStation C20 | (English) User Guide - Page 56
password is typed in. Setting, changing, or deleting a password This section provides instructions on how to set, change, or delete a password. To set, change, or disabling a device This section provides instructions on how to enable or disable user access to a device. 50 ThinkStation User Guide - Lenovo ThinkStation C20 | (English) User Guide - Page 57
Support has an alternate boot method, such as LAN PXE boot, or a bootable memory key or disc. To enable or disable a device, do the following: the Setup Utility program main menu, select Devices ➙ USB Setup. Follow the instructions on the screen to enable or disable the USB connectors. • From the - Lenovo ThinkStation C20 | (English) User Guide - Page 58
you should always set HyperThreading to Disabled unless you are sure your operating system supports HyperThreading. Exiting the Setup Utility program After you finish viewing or changing settings, the default settings, press F9 or select Exit ➙ Load Default Settings. 52 ThinkStation User Guide - Lenovo ThinkStation C20 | (English) User Guide - Page 59
BIOS setup Windows environment. For information about configuring RAID in a Linux environment, contact your Linux software provider. Configuring RAID for machine types 4262, 4263, 4264, and 4265 This section contains information about the required number of SATA hard disk drives for the supported - Lenovo ThinkStation C20 | (English) User Guide - Page 60
10. Press Y when prompted to confirm the exit. Deleting RAID volumes This section describes how to use the Intel keys and the space key to mark individual physical hard disk drives to be reset, and then or SAS hard disk drives for the supported level of RAID and SATA or SAS ThinkStation User Guide - Lenovo ThinkStation C20 | (English) User Guide - Page 61
hard disk drives installed for the supported level of RAID below: • RAID BIOS Setup to configure SATA/SAS RAID. Configuring the Marvell BIOS Setup to enable SATA/SAS RAID 0, 1, or 5 functionality This section provides instructions the Array Name field. 10. Select Next and press Enter. 11. - Lenovo ThinkStation C20 | (English) User Guide - Page 62
the following: 1. Turn on your computer and press Ctrl+M when prompted to enter the Marvell BIOS Setup. 2. On the Marvell BIOS Setup screen, use the arrow keys to select RAID and press Enter. The RAID Config menu Enter. 6. Press Y when prompted to complete the deletion. 56 ThinkStation User Guide - Lenovo ThinkStation C20 | (English) User Guide - Page 63
section provides instructions on how to update (flash) the BIOS from a disc. Note: You can download a self-starting bootable disc image (known as an ISO image) with the system program updates to create a system-program-update disc. Go to: http://support.lenovo.com To update (flash) the BIOS from - Lenovo ThinkStation C20 | (English) User Guide - Page 64
click Go. b. Click Downloads and drivers. c. Select BIOS from the Refine results drop-down list box to easily locate all the BIOS related links. d. Click the BIOS update link. 3. Click the TXT file that contains the instructions for updating (flashing) the BIOS from your operating system. 4. Print - Lenovo ThinkStation C20 | (English) User Guide - Page 65
16. Turn on the computer and remove the disc from the optical drive. Chapter 6. Updating system programs 59 - Lenovo ThinkStation C20 | (English) User Guide - Page 66
60 ThinkStation User Guide - Lenovo ThinkStation C20 | (English) User Guide - Page 67
problem after doing the basic troubleshooting, have the computer serviced. Refer to the ThinkStation Safety and Warranty Guide that came with your computer for the safety and warranty information and the list of Lenovo Support or region. Verify that: • The power cord is correctly connected to the - Lenovo ThinkStation C20 | (English) User Guide - Page 68
media, update system drivers, and view system information. • To run the Lenovo ThinkVantage Toolbox program on the Windows 7 operating system, click Start ➙ All Programs ➙ Lenovo ThinkVantage Tools ➙ System Health and Diagnostics. Follow the instructions on the screen. 62 ThinkStation User Guide - Lenovo ThinkStation C20 | (English) User Guide - Page 69
Select the desired diagnostic test. Then, follow the instructions on the screen. For additional information about running the program from http://support.lenovo.com. The PC-Doctor for DOS diagnostic program runs independently of the Windows operating system. Troubleshooting and diagnostic programs 63 - Lenovo ThinkStation C20 | (English) User Guide - Page 70
disc from the optical drive after completing the diagnostic test. Cleaning an optical mouse This section provides instructions on how to clean an optical mouse. An optical mouse uses a LED and an optical sensor mouse cable to the computer. 6. Turn your computer back on. 64 ThinkStation User Guide - Lenovo ThinkStation C20 | (English) User Guide - Page 71
, a message will be displayed when you attempt to view the PDF file and you will be guided through the Adobe Reader installation. 2. The publication is available in other languages on the Lenovo Support Web site at: http://support.lenovo.com 3. If you want to install a different language version of - Lenovo ThinkStation C20 | (English) User Guide - Page 72
installations. • Purchase upgrades and extended hardware repair services. • Download the latest device drivers and software updates for your computer model. • Access the online manuals for your products. • Access the Lenovo Limited Warranty. • Access troubleshooting and support information for your - Lenovo ThinkStation C20 | (English) User Guide - Page 73
you identify hardware problems. For instructions on using the diagnostic programs, see "Diagnostic programs" on page 62. You can get the latest technical information and download device drivers and updates from the Lenovo Support Web site at: http://support.lenovo.com Calling for service During the - Lenovo ThinkStation C20 | (English) User Guide - Page 74
; network setup and configuration; upgraded or extended hardware repair services; and custom installations. Service availability and service name might vary by country or region. For more information about these services, go to the Lenovo Web site at: http://www.lenovo.com 68 ThinkStation User Guide - Lenovo ThinkStation C20 | (English) User Guide - Page 75
1 GB, 2 GB, 4 GB, 8 GB 1 to 3 Microprocessor model Intel Xeon E5502, E5503, E5504, E5506, E5507 Intel Xeon E5603, E5606, E5607, E5520, E5530, E5540, E5620, E5630, E5640 Intel Xeon E5645, E5649, X5550, X5560, X5570, Memory frequency 800 MHz 1066 MHz 1333 MHz © Copyright Lenovo 2010, 2012 69 - Lenovo ThinkStation C20 | (English) User Guide - Page 76
, E5630, E5640, X5550, X5560, X5570, X5647, W5580, W5590 Intel Xeon E5645, E5649, X5650, X5660, X5667, X5670, X5672, X5675, X5677, X5680, X5687, X5690 Memory frequency Memory frequency 800 MHz 1066 MHz Memory frequency 800 MHz 1066 MHz 1333 MHz 800 MHz 1066 MHz 1333 MHz 70 ThinkStation User Guide - Lenovo ThinkStation C20 | (English) User Guide - Page 77
X5690, W5580, W5590 Intel Xeon E5502, E5503, E5504, E5506, E5507 Intel Xeon E5603, E5606, E5607, E5520, E5530, E5540, E5620, E5630, E5640, X5550, X5560, X5570, X5647, W5580, W5590 Intel Xeon E5645, E5649, X5650, X5660, X5667, X5670, X5672, X5675, X5677, X5680, X5687, X5690 Memory frequency 800 MHz - Lenovo ThinkStation C20 | (English) User Guide - Page 78
X5687, X5690, W5580, W5590 Intel Xeon E5502, E5503, E5504, E5506, E5507, E5603, E5606, E5607, E5520, E5530, E5540, E5620, E5630, E5640, E5645, E5649, X5647, X5550, X5560, X5570, X5650, X5660, X5667, X5670, X5672, X5675, X5677, X5680, X5687, X5690, W5580, W5590 Memory frequency 800 MHz 1066 MHz 800 - Lenovo ThinkStation C20 | (English) User Guide - Page 79
or other life support applications where malfunction may result in injury or death to persons. The information contained in this document does not affect or change Lenovo product specifications or warranties. Nothing in this document shall operate as an express or implied license or indemnity under - Lenovo ThinkStation C20 | (English) User Guide - Page 80
countries, or both: Lenovo The Lenovo logo Rescue and Recovery ThinkStation ThinkVantage Microsoft, Windows, and Windows Vista are trademarks of the Microsoft group of companies. Intel and Xeon are trademarks of Intel Corporation in the United States, other countries, or both. Linux is a trademark - Lenovo ThinkStation C20 | (English) User Guide - Page 81
Appendix C. WEEE and recycling information Important WEEE Information The WEEE marking on Lenovo products applies to countries with WEEE and e-waste regulations (for example, European Directive 2002/96/EC, India E-Waste Management & Handling Rules, 2011). Appliances are labeled in accordance with - Lenovo ThinkStation C20 | (English) User Guide - Page 82
Lenovo em situação de descarte, ligue para o nosso SAC ou encaminhe um e-mail para: [email protected], informando o modelo, número de série e cidade, a fim de enviarmos as instruções para o correto descarte do seu produto Lenovo. Battery recycling information for Taiwan 76 ThinkStation User Guide - Lenovo ThinkStation C20 | (English) User Guide - Page 83
and accumulators on the environment and human health due to the potential presence of hazardous substances. For proper collection and treatment, go to: http://www.lenovo.com/recycling Appendix C. WEEE and recycling information 77 - Lenovo ThinkStation C20 | (English) User Guide - Page 84
78 ThinkStation User Guide - Lenovo ThinkStation C20 | (English) User Guide - Page 85
Appendix D. Restriction of Hazardous Substances Directive (RoHS) China RoHS Turkish RoHS The Lenovo product meets the requirements of the Republic of Turkey Directive on the Restriction of the Use of Certain Hazardous Substances in Electrical and Electronic Equipment ( - Lenovo ThinkStation C20 | (English) User Guide - Page 86
India RoHS RoHS compliant as per E-Waste (Management & Handling) Rules, 2011. 80 ThinkStation User Guide - Lenovo ThinkStation C20 | (English) User Guide - Page 87
media 41 CRU completing the installation 37 Customer Support Center 67 D device drivers 38 installing 46 reinstalling 46 diagnostic programs, troubleshooting 61 diagnostics programs, using 66 documentation, using 66 drivers, device 38 E environment, operating 4 eSATA connector 8 Ethernet 2 Ethernet - Lenovo ThinkStation C20 | (English) User Guide - Page 88
installing, replacing 21 slots 21 physical specifications 3 power supply features 3 power-on self-test (POST) 57 programs, updating system 57 protection, password 40 purchasing additional services 68 R rear fan assembly, replacing 34 recovering from a POST/BIOS update failure 58 software 41 recovery - Lenovo ThinkStation C20 | (English) User Guide - Page 89
diagnostic programs 66 documentation 66 other services 67 passwords 49 Setup Utility program 49 V video subsystem 1 viewing and changing settings 49 W warranty information 66 workspace, backup and recovery 44 © Copyright Lenovo 2010, 2012 83 - Lenovo ThinkStation C20 | (English) User Guide - Page 90
84 ThinkStation User Guide - Lenovo ThinkStation C20 | (English) User Guide - Page 91
- Lenovo ThinkStation C20 | (English) User Guide - Page 92
Part Number: 89Y7306 (1P) P/N: 89Y7306 *1P89Y7306*
-
 1
1 -
 2
2 -
 3
3 -
 4
4 -
 5
5 -
 6
6 -
 7
7 -
8
-
9
-
10
-
11
-
12
-
13
-
14
-
15
-
16
-
17
-
18
-
19
-
20
-
21
-
22
-
23
-
24
-
25
-
26
-
27
-
28
-
29
-
30
-
31
-
32
-
33
-
34
-
35
-
36
-
37
-
38
-
39
-
40
-
41
-
42
-
43
-
44
-
45
-
46
-
47
-
48
-
49
-
50
-
51
-
52
-
53
-
54
-
55
-
56
-
57
-
58
-
59
-
60
-
61
-
62
-
63
-
64
-
65
-
66
-
67
-
68
-
69
-
70
-
71
-
72
-
73
-
74
-
75
-
76
-
77
-
78
-
79
-
80
-
81
-
82
-
83
-
84
-
85
-
86
-
87
-
88
-
89
-
90
-
91
-
92
 |
 |
ThinkStation
User Guide
Machine Types:
4262, 4263, 4264, 4265, 4266, 4269, 4271, and 4272