Lenovo ThinkStation C20 (English) User Guide - Page 32
Replacing a hard disk drive, Rotating the air flow wall
 |
View all Lenovo ThinkStation C20 manuals
Add to My Manuals
Save this manual to your list of manuals |
Page 32 highlights
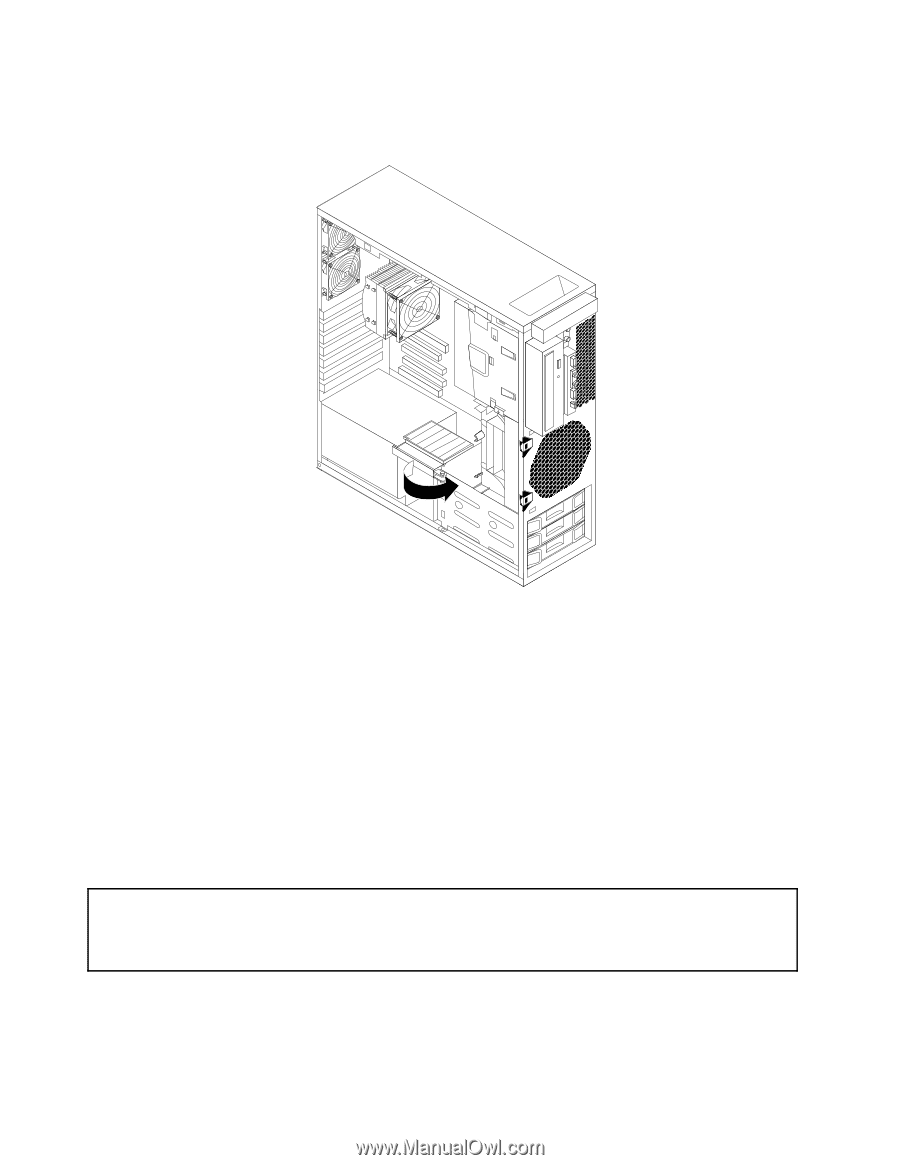
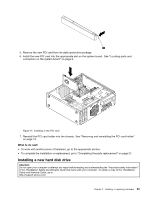
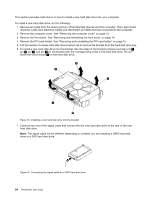
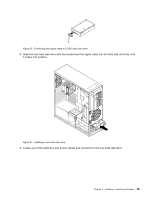
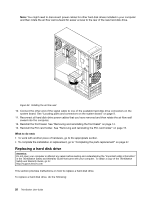
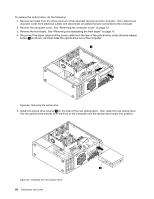
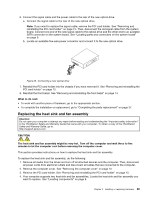
Note: You might need to disconnect power cables for other hard disk drives installed in your computer and then rotate the air flow wall outward for easier access to the rear of the new hard disk drive. Figure 22. Rotating the air flow wall 10. Connect the other end of the signal cable to one of the available hard disk drive connectors on the system board. See "Locating parts and connectors on the system board" on page 9. 11. Reconnect all hard disk drive power cables that you have removed and then rotate the air flow wall inward into the computer. 12. Reinstall the front bezel. See "Removing and reinstalling the front bezel" on page 14. 13. Reinstall the PCI card holder. See "Removing and reinstalling the PCI card holder" on page 15. What to do next: • To work with another piece of hardware, go to the appropriate section. • To complete the installation or replacement, go to "Completing the parts replacement" on page 37. Replacing a hard disk drive Attention: Do not open your computer or attempt any repair before reading and understanding the "Important safety information" in the ThinkStation Safety and Warranty Guide that came with your computer. To obtain a copy of the ThinkStation Safety and Warranty Guide, go to: http://support.lenovo.com This section provides instructions on how to replace a hard disk drive. To replace a hard disk drive, do the following: 26 ThinkStation User Guide
-
 1
1 -
2
-
3
-
4
-
5
-
6
-
7
-
8
-
9
-
10
-
11
-
12
-
13
-
14
-
15
-
16
-
17
-
18
-
19
-
20
-
21
-
22
-
23
-
24
-
25
-
26
-
 27
27 -
 28
28 -
 29
29 -
 30
30 -
 31
31 -
 32
32 -
 33
33 -
 34
34 -
 35
35 -
 36
36 -
 37
37 -
38
-
39
-
40
-
41
-
42
-
43
-
44
-
45
-
46
-
47
-
48
-
49
-
50
-
51
-
52
-
53
-
54
-
55
-
56
-
57
-
58
-
59
-
60
-
61
-
62
-
63
-
64
-
65
-
66
-
67
-
68
-
69
-
70
-
71
-
72
-
73
-
74
-
75
-
76
-
77
-
78
-
79
-
80
-
81
-
82
-
83
-
84
-
85
-
86
-
87
-
88
-
89
-
90
-
91
-
92
 |
 |