Lenovo ThinkStation C20 (English) User Guide - Page 61
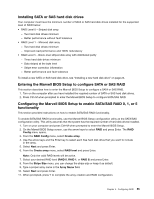
Installing SATA or SAS hard disk drives, Entering the Marvell BIOS Setup to con SATA or SAS RAID
 |
View all Lenovo ThinkStation C20 manuals
Add to My Manuals
Save this manual to your list of manuals |
Page 61 highlights
Installing SATA or SAS hard disk drives Your computer must have the minimum number of SATA or SAS hard disk drives installed for the supported level of RAID below: • RAID Level 0 - Striped disk array - Two hard disk drives minimum - Better performance without fault tolerance • RAID Level 1 - Mirrored disk array - Two hard disk drives minimum - Improved read performance and 100% redundancy • RAID Level 5 - Block-level striped disk array with distributed parity - Three hard disk drives minimum - Data striped at the byte level - Stripe error correction information - Better performance and fault tolerance To install a new SATA or SAS hard disk drive, see "Installing a new hard disk drive" on page 23. Entering the Marvell BIOS Setup to configure SATA or SAS RAID This section describes how to enter the Marvell BIOS Setup to configure a SATA or SAS RAID. 1. Turn on the computer after you have installed the required number of SATA or SAS hard disk drives. 2. Press Ctrl+M when prompted to enter the Marvell BIOS Setup to configure SATA/SAS RAID. Configuring the Marvell BIOS Setup to enable SATA/SAS RAID 0, 1, or 5 functionality This section provides instructions on how to enable SATA/SAS RAID functionality. To enable SATA/SAS RAID functionality, use the Marvell BIOS Setup configuration utility as the SATA/SAS configuration utility. This utility assumes that the system has the required number of hard disk drives installed. 1. Turn on your computer and press Ctrl+M when prompted to enter the Marvell BIOS Setup. 2. On the Marvell BIOS Setup screen, use the arrow keys to select RAID and press Enter. The RAID Config menu opens. 3. From the RAID Config menu, select Create array. 4. Use the arrow keys and the Enter key to select each free hard disk drive that you want to include in the array. 5. Select Next and press Enter. 6. From the Create array menu, select RAID level and press Enter. Note: Only the valid RAID levels will be active. 7. Select your desired RAID level (RAID 0, RAID 1, or RAID 5) and press Enter. 8. From the Stripe Size menu, you can change the stripe size or keep it as default. 9. Type a proper array name in the Array Name field. 10. Select Next and press Enter. 11. When prompted, press Y to complete the array creation and RAID configuration. Chapter 5. Configuring RAID 55
-
 1
1 -
2
-
3
-
4
-
5
-
6
-
7
-
8
-
9
-
10
-
11
-
12
-
13
-
14
-
15
-
16
-
17
-
18
-
19
-
20
-
21
-
22
-
23
-
24
-
25
-
26
-
27
-
28
-
29
-
30
-
31
-
32
-
33
-
34
-
35
-
36
-
37
-
38
-
39
-
40
-
41
-
42
-
43
-
44
-
45
-
46
-
47
-
48
-
49
-
50
-
51
-
52
-
53
-
54
-
55
-
 56
56 -
 57
57 -
 58
58 -
 59
59 -
 60
60 -
 61
61 -
 62
62 -
 63
63 -
 64
64 -
 65
65 -
 66
66 -
67
-
68
-
69
-
70
-
71
-
72
-
73
-
74
-
75
-
76
-
77
-
78
-
79
-
80
-
81
-
82
-
83
-
84
-
85
-
86
-
87
-
88
-
89
-
90
-
91
-
92
 |
 |