Lexmark C752 Quick Reference Pages - Page 2
Connection guide, Connect the cables and power cord - driver
 |
View all Lexmark C752 manuals
Add to My Manuals
Save this manual to your list of manuals |
Page 2 highlights
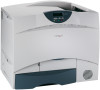
Connection guide Page 1 of 14 Connection guide Follow these steps to properly connect your printer to your computer or network system: 1 Connect the cables and power cord on page 1. 2 Install drivers for local printing on page 3. 3 Verify printer setup on page 8. 4 Configure for TCP/IP on page 9. 5 Install drivers for network printing on page 10 Connect the cables and power cord Attaching a local cable USB cable A USB port is standard on all models. Windows 98 SE, Windows Me, Windows 2000, Windows XP, and Windows Server 2003 operating systems support USB connections. Some UNIX, Linux, and Macintosh computers also support USB connections. Refer to your computer operating system documentation to see if your system supports USB. To attach the printer to a computer: 1 Connect the printer to the computer using a USB cable. Be sure to match the USB symbol on the cable to the USB symbol on the printer. 2 Plug one end of the printer power cord into the socket at the back of the printer and the other end into a properly grounded outlet. 3 Turn on your printer. After the printer completes its internal tests, the Ready message indicates that the printer is ready to receive jobs. If you see a message other than Ready on the display, refer to the publications CD for instructions on clearing the message. 4 Go on to Install drivers for local printing on page 3.
-
 1
1 -
 2
2 -
 3
3 -
 4
4 -
 5
5 -
 6
6 -
 7
7 -
 8
8 -
9
-
10
-
11
-
12
-
13
-
14
-
15
-
16
-
17
-
18
-
19
-
20
-
21
-
22
-
23
-
24
-
25
-
26
-
27
-
28
-
29
-
30
-
31
-
32
-
33
-
34
-
35
-
36
-
37
-
38
 |
 |
