Lexmark E210 Online Information - Page 27
Copy all disk images, Copy Selected, disk image, Close - windows 7 driver
 |
UPC - 734646229807
View all Lexmark E210 manuals
Add to My Manuals
Save this manual to your list of manuals |
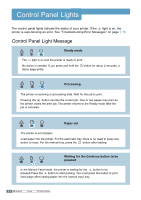
Page 27 highlights
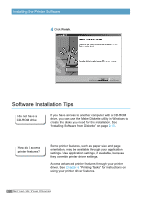
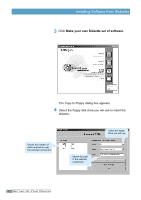
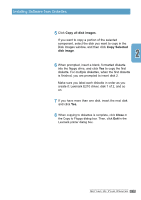
Installing Software from Diskettes 5 Click Copy all disk images. If you want to copy a portion of the selected component, select the disk you want to copy in the Disk Images window, and then click Copy Selected disk image. 6 When prompted, insert a blank, formatted diskette into the floppy drive, and click Yes to copy the first diskette. For multiple diskettes, when the first diskette is finished, you are prompted to insert disk 2. Make sure you label each diskette in order as you create it: Lexmark E210 driver, disk 1 of 2, and so on. 7 If you have more than one disk, insert the next disk and click Yes. 8 When copying to diskettes is complete, click Close in the Copy to Floppy dialog box. Then, click Exit in the Lexmark printer dialog box. SETTING UP YOUR PRINTER 2.17
-
 1
1 -
2
-
3
-
4
-
5
-
6
-
7
-
8
-
9
-
10
-
11
-
12
-
13
-
14
-
15
-
16
-
17
-
18
-
19
-
20
-
21
-
 22
22 -
 23
23 -
 24
24 -
 25
25 -
 26
26 -
 27
27 -
 28
28 -
 29
29 -
 30
30 -
 31
31 -
 32
32 -
33
-
34
-
35
-
36
-
37
-
38
-
39
-
40
-
41
-
42
-
43
-
44
-
45
-
46
-
47
-
48
-
49
-
50
-
51
-
52
-
53
-
54
-
55
-
56
-
57
-
58
-
59
-
60
-
61
-
62
-
63
-
64
-
65
-
66
-
67
-
68
-
69
-
70
-
71
-
72
-
73
-
74
-
75
-
76
-
77
-
78
-
79
-
80
-
81
-
82
-
83
-
84
-
85
-
86
-
87
-
88
-
89
-
90
-
91
-
92
-
93
-
94
-
95
-
96
-
97
-
98
-
99
-
100
-
101
-
102
-
103
-
104
-
105
-
106
-
107
-
108
-
109
-
110
-
111
-
112
-
113
-
114
-
115
-
116
-
117
-
118
-
119
-
120
-
121
-
122
-
123
-
124
-
125
-
126
-
127
-
128
-
129
-
130
-
131
-
132
-
133
-
134
-
135
-
136
-
137
 |
 |