Lexmark X6575 User's Guide - Page 101
Copying a photo using the computer, Adjusting copy quality, Productivity Studio, Photo, Start
 |
UPC - 734646066440
View all Lexmark X6575 manuals
Add to My Manuals
Save this manual to your list of manuals |
Page 101 highlights
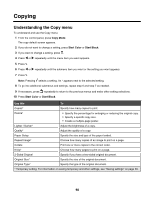
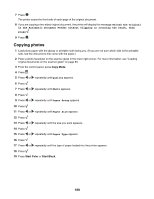
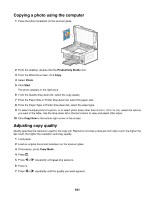
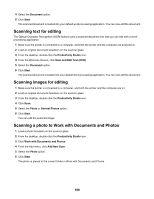
Copying a photo using the computer 1 Place the photo facedown on the scanner glass. 2 From the desktop, double-click the Productivity Studio icon. 3 From the Welcome screen, click Copy. 4 Select Photo. 5 Click Start. The photo appears in the right pane. 6 From the Quality drop-down list, select the copy quality. 7 From the Paper Size in Printer drop-down list, select the paper size. 8 From the Paper Type in Printer drop-down list, select the paper type. 9 To select multiple prints of a photo, or to select photo sizes other than 4 x 6 in. (10 x 15 cm), select the options you want in the table. Use the drop-down list in the last column to view and select other sizes. 10 Click Copy Now in the bottom right corner of the screen. Adjusting copy quality Quality specifies the resolution used for the copy job. Resolution involves a dots-per-inch (dpi) count; the higher the dpi count, the higher the resolution and copy quality. 1 Load paper. 2 Load an original document facedown on the scanner glass. 3 If necessary, press Copy Mode. 4 Press . 5 Press or repeatedly until Quality appears. 6 Press . 7 Press or repeatedly until the quality you want appears. 101
-
 1
1 -
2
-
3
-
4
-
5
-
6
-
7
-
8
-
9
-
10
-
11
-
12
-
13
-
14
-
15
-
16
-
17
-
18
-
19
-
20
-
21
-
22
-
23
-
24
-
25
-
26
-
27
-
28
-
29
-
30
-
31
-
32
-
33
-
34
-
35
-
36
-
37
-
38
-
39
-
40
-
41
-
42
-
43
-
44
-
45
-
46
-
47
-
48
-
49
-
50
-
51
-
52
-
53
-
54
-
55
-
56
-
57
-
58
-
59
-
60
-
61
-
62
-
63
-
64
-
65
-
66
-
67
-
68
-
69
-
70
-
71
-
72
-
73
-
74
-
75
-
76
-
77
-
78
-
79
-
80
-
81
-
82
-
83
-
84
-
85
-
86
-
87
-
88
-
89
-
90
-
91
-
92
-
93
-
94
-
95
-
 96
96 -
 97
97 -
 98
98 -
 99
99 -
 100
100 -
 101
101 -
 102
102 -
 103
103 -
 104
104 -
 105
105 -
 106
106 -
107
-
108
-
109
-
110
-
111
-
112
-
113
-
114
-
115
-
116
-
117
-
118
-
119
-
120
-
121
-
122
-
123
-
124
-
125
-
126
-
127
-
128
-
129
-
130
-
131
-
132
-
133
-
134
-
135
-
136
-
137
-
138
-
139
-
140
-
141
-
142
-
143
-
144
-
145
-
146
-
147
-
148
-
149
-
150
-
151
-
152
-
153
-
154
-
155
-
156
-
157
-
158
-
159
-
160
-
161
-
162
-
163
-
164
-
165
-
166
-
167
-
168
-
169
-
170
-
171
-
172
-
173
-
174
-
175
-
176
-
177
-
178
-
179
-
180
-
181
-
182
-
183
-
184
-
185
-
186
-
187
-
188
-
189
-
190
-
191
-
192
-
193
-
194
-
195
-
196
-
197
-
198
-
199
-
200
-
201
-
202
-
203
-
204
-
205
-
206
-
207
-
208
-
209
-
210
-
211
-
212
-
213
-
214
-
215
-
216
-
217
-
218
-
219
-
220
-
221
-
222
-
223
 |
 |
