Lexmark X6575 User's Guide - Page 86
Changing the Productivity Studio temporary files preferences, Notes, Start Color, Start Black, Warning
 |
UPC - 734646066440
View all Lexmark X6575 manuals
Add to My Manuals
Save this manual to your list of manuals |
Page 86 highlights
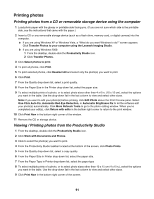
Notes: • If photos on the memory card were taken on more than one date, selections will include Last Date and Date Range. • To choose a date range, press and then press or repeatedly until the desired date is displayed. Date ranges are displayed by month and year starting with the most recent month. 10 Press Start Color or Start Black. Notes: • If there is not enough memory on the flash drive, a prompt appears on the display. • Do not remove the flash drive until a message appears on the display indicating that copying is complete. Warning: Do not touch cables, any network adapter, the memory card or flash drive, or the printer in the area shown while actively printing, reading, or writing from a memory card or flash drive. A loss of data can occur. Also, do not remove a memory card or flash drive while actively printing, reading, or writing from a memory card or flash drive. Changing the Productivity Studio temporary files preferences 1 From the desktop, double-click the Productivity Studio icon. 2 From the Tools menu, click Preferences. 3 Click Temporary Files. a Use the slider to set the maximum disk space you want to allocate for temporary files created by the Productivity Studio. b Click Browse to choose a different folder for saving the temporary files. 4 Click OK. Changing the Productivity Studio searched folders preferences 1 From the desktop, double-click the Productivity Studio icon. 2 From the Tools menu, click Preferences. 3 Click Searched Folders. 4 If you want to exclude system folders when looking for photos, select Ignore system folders. 5 Click OK. 86
-
 1
1 -
2
-
3
-
4
-
5
-
6
-
7
-
8
-
9
-
10
-
11
-
12
-
13
-
14
-
15
-
16
-
17
-
18
-
19
-
20
-
21
-
22
-
23
-
24
-
25
-
26
-
27
-
28
-
29
-
30
-
31
-
32
-
33
-
34
-
35
-
36
-
37
-
38
-
39
-
40
-
41
-
42
-
43
-
44
-
45
-
46
-
47
-
48
-
49
-
50
-
51
-
52
-
53
-
54
-
55
-
56
-
57
-
58
-
59
-
60
-
61
-
62
-
63
-
64
-
65
-
66
-
67
-
68
-
69
-
70
-
71
-
72
-
73
-
74
-
75
-
76
-
77
-
78
-
79
-
80
-
 81
81 -
 82
82 -
 83
83 -
 84
84 -
 85
85 -
 86
86 -
 87
87 -
 88
88 -
 89
89 -
 90
90 -
 91
91 -
92
-
93
-
94
-
95
-
96
-
97
-
98
-
99
-
100
-
101
-
102
-
103
-
104
-
105
-
106
-
107
-
108
-
109
-
110
-
111
-
112
-
113
-
114
-
115
-
116
-
117
-
118
-
119
-
120
-
121
-
122
-
123
-
124
-
125
-
126
-
127
-
128
-
129
-
130
-
131
-
132
-
133
-
134
-
135
-
136
-
137
-
138
-
139
-
140
-
141
-
142
-
143
-
144
-
145
-
146
-
147
-
148
-
149
-
150
-
151
-
152
-
153
-
154
-
155
-
156
-
157
-
158
-
159
-
160
-
161
-
162
-
163
-
164
-
165
-
166
-
167
-
168
-
169
-
170
-
171
-
172
-
173
-
174
-
175
-
176
-
177
-
178
-
179
-
180
-
181
-
182
-
183
-
184
-
185
-
186
-
187
-
188
-
189
-
190
-
191
-
192
-
193
-
194
-
195
-
196
-
197
-
198
-
199
-
200
-
201
-
202
-
203
-
204
-
205
-
206
-
207
-
208
-
209
-
210
-
211
-
212
-
213
-
214
-
215
-
216
-
217
-
218
-
219
-
220
-
221
-
222
-
223
 |
 |
