Lexmark X6575 User's Guide - Page 139
does not print, Uninstall and reinstall software, Check messages, Check power, Reload paper - cartridge error
 |
UPC - 734646066440
View all Lexmark X6575 manuals
Add to My Manuals
Save this manual to your list of manuals |
Page 139 highlights
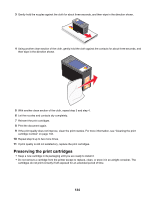
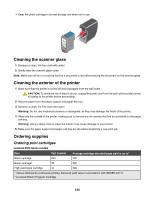
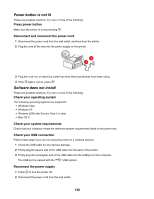
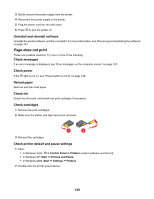
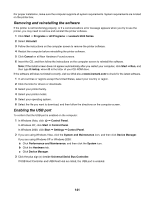
3 Gently remove the power supply from the printer. 4 Reconnect the power supply to the printer. 5 Plug the power cord into the wall outlet. 6 Press to turn the printer on. Uninstall and reinstall software Uninstall the printer software, and then reinstall it. For more information, see "Removing and reinstalling the software" on page 141. Page does not print These are possible solutions. Try one or more of the following: Check messages If an error message is displayed, see "Error messages on the computer screen" on page 197. Check power If the light is not on, see "Power button is not lit" on page 138. Reload paper Remove and then load paper. Check ink Check the ink levels, and install new print cartridges if necessary. Check cartridges 1 Remove the print cartridges. 2 Make sure the sticker and tape have been removed. 1 2 3 Reinsert the cartridges. Check printer default and pause settings 1 Click: • In Windows Vista: Œ Control Panel Œ Printers (under Hardware and Sound). • In Windows XP: Start Œ Printers and Faxes. • In Windows 2000: Start Œ Settings Œ Printers. 2 Double-click the printer queue device. 139
-
 1
1 -
2
-
3
-
4
-
5
-
6
-
7
-
8
-
9
-
10
-
11
-
12
-
13
-
14
-
15
-
16
-
17
-
18
-
19
-
20
-
21
-
22
-
23
-
24
-
25
-
26
-
27
-
28
-
29
-
30
-
31
-
32
-
33
-
34
-
35
-
36
-
37
-
38
-
39
-
40
-
41
-
42
-
43
-
44
-
45
-
46
-
47
-
48
-
49
-
50
-
51
-
52
-
53
-
54
-
55
-
56
-
57
-
58
-
59
-
60
-
61
-
62
-
63
-
64
-
65
-
66
-
67
-
68
-
69
-
70
-
71
-
72
-
73
-
74
-
75
-
76
-
77
-
78
-
79
-
80
-
81
-
82
-
83
-
84
-
85
-
86
-
87
-
88
-
89
-
90
-
91
-
92
-
93
-
94
-
95
-
96
-
97
-
98
-
99
-
100
-
101
-
102
-
103
-
104
-
105
-
106
-
107
-
108
-
109
-
110
-
111
-
112
-
113
-
114
-
115
-
116
-
117
-
118
-
119
-
120
-
121
-
122
-
123
-
124
-
125
-
126
-
127
-
128
-
129
-
130
-
131
-
132
-
133
-
 134
134 -
 135
135 -
 136
136 -
 137
137 -
 138
138 -
 139
139 -
 140
140 -
 141
141 -
 142
142 -
 143
143 -
 144
144 -
145
-
146
-
147
-
148
-
149
-
150
-
151
-
152
-
153
-
154
-
155
-
156
-
157
-
158
-
159
-
160
-
161
-
162
-
163
-
164
-
165
-
166
-
167
-
168
-
169
-
170
-
171
-
172
-
173
-
174
-
175
-
176
-
177
-
178
-
179
-
180
-
181
-
182
-
183
-
184
-
185
-
186
-
187
-
188
-
189
-
190
-
191
-
192
-
193
-
194
-
195
-
196
-
197
-
198
-
199
-
200
-
201
-
202
-
203
-
204
-
205
-
206
-
207
-
208
-
209
-
210
-
211
-
212
-
213
-
214
-
215
-
216
-
217
-
218
-
219
-
220
-
221
-
222
-
223
 |
 |
