Lexmark X6575 User's Guide - Page 182
Poor scanned image quality, Partial document or photo scans, Cannot scan to a computer over a network
 |
UPC - 734646066440
View all Lexmark X6575 manuals
Add to My Manuals
Save this manual to your list of manuals |
Page 182 highlights
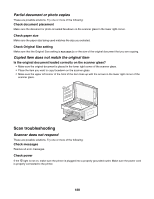
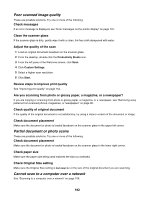
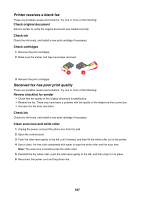
Poor scanned image quality These are possible solutions. Try one or more of the following: Check messages If an error message is displayed, see "Error messages on the printer display" on page 191. Clean the scanner glass If the scanner glass is dirty, gently wipe it with a clean, lint-free cloth dampened with water. Adjust the quality of the scan 1 Load an original document facedown on the scanner glass. 2 From the desktop, double-click the Productivity Studio icon. 3 From the left pane of the Welcome screen, click Scan. 4 Click Custom Settings. 5 Select a higher scan resolution. 6 Click Start. Review steps to improve print quality See "Improving print quality" on page 154. Are you scanning from photo or glossy paper, a magazine, or a newspaper? If you are copying or scanning from photo or glossy paper, a magazine, or a newspaper, see "Removing wavy patterns from scanned photos, magazines, or newspapers" on page 90. Check quality of original document If the quality of the original document is not satisfactory, try using a clearer version of the document or image. Check document placement Make sure the document or photo is loaded facedown on the scanner glass in the upper left corner. Partial document or photo scans These are possible solutions. Try one or more of the following: Check document placement Make sure the document or photo is loaded facedown on the scanner glass in the lower right corner. Check paper size Make sure the paper size being used matches the size you selected. Check Original Size setting Make sure the Original Size setting is Automatic or the size of the original document you are scanning. Cannot scan to a computer over a network See "Scanning to a computer over a network" on page 109. 182
-
 1
1 -
2
-
3
-
4
-
5
-
6
-
7
-
8
-
9
-
10
-
11
-
12
-
13
-
14
-
15
-
16
-
17
-
18
-
19
-
20
-
21
-
22
-
23
-
24
-
25
-
26
-
27
-
28
-
29
-
30
-
31
-
32
-
33
-
34
-
35
-
36
-
37
-
38
-
39
-
40
-
41
-
42
-
43
-
44
-
45
-
46
-
47
-
48
-
49
-
50
-
51
-
52
-
53
-
54
-
55
-
56
-
57
-
58
-
59
-
60
-
61
-
62
-
63
-
64
-
65
-
66
-
67
-
68
-
69
-
70
-
71
-
72
-
73
-
74
-
75
-
76
-
77
-
78
-
79
-
80
-
81
-
82
-
83
-
84
-
85
-
86
-
87
-
88
-
89
-
90
-
91
-
92
-
93
-
94
-
95
-
96
-
97
-
98
-
99
-
100
-
101
-
102
-
103
-
104
-
105
-
106
-
107
-
108
-
109
-
110
-
111
-
112
-
113
-
114
-
115
-
116
-
117
-
118
-
119
-
120
-
121
-
122
-
123
-
124
-
125
-
126
-
127
-
128
-
129
-
130
-
131
-
132
-
133
-
134
-
135
-
136
-
137
-
138
-
139
-
140
-
141
-
142
-
143
-
144
-
145
-
146
-
147
-
148
-
149
-
150
-
151
-
152
-
153
-
154
-
155
-
156
-
157
-
158
-
159
-
160
-
161
-
162
-
163
-
164
-
165
-
166
-
167
-
168
-
169
-
170
-
171
-
172
-
173
-
174
-
175
-
176
-
 177
177 -
 178
178 -
 179
179 -
 180
180 -
 181
181 -
 182
182 -
 183
183 -
 184
184 -
 185
185 -
 186
186 -
 187
187 -
188
-
189
-
190
-
191
-
192
-
193
-
194
-
195
-
196
-
197
-
198
-
199
-
200
-
201
-
202
-
203
-
204
-
205
-
206
-
207
-
208
-
209
-
210
-
211
-
212
-
213
-
214
-
215
-
216
-
217
-
218
-
219
-
220
-
221
-
222
-
223
 |
 |
