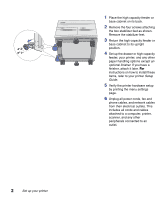
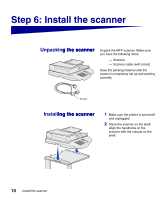
Lexmark X7500 Setup Guide - Page 13
Assembling the stand, ling the stand
 |
UPC - 734646391306
View all Lexmark X7500 manuals
Add to My Manuals
Save this manual to your list of manuals |
Page 13 highlights
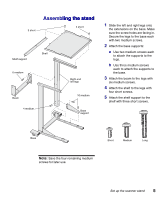
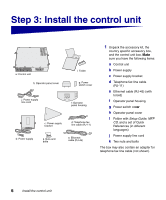
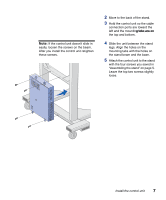
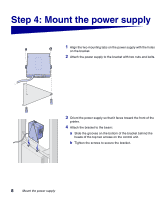
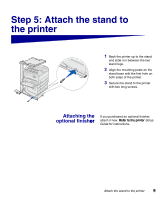
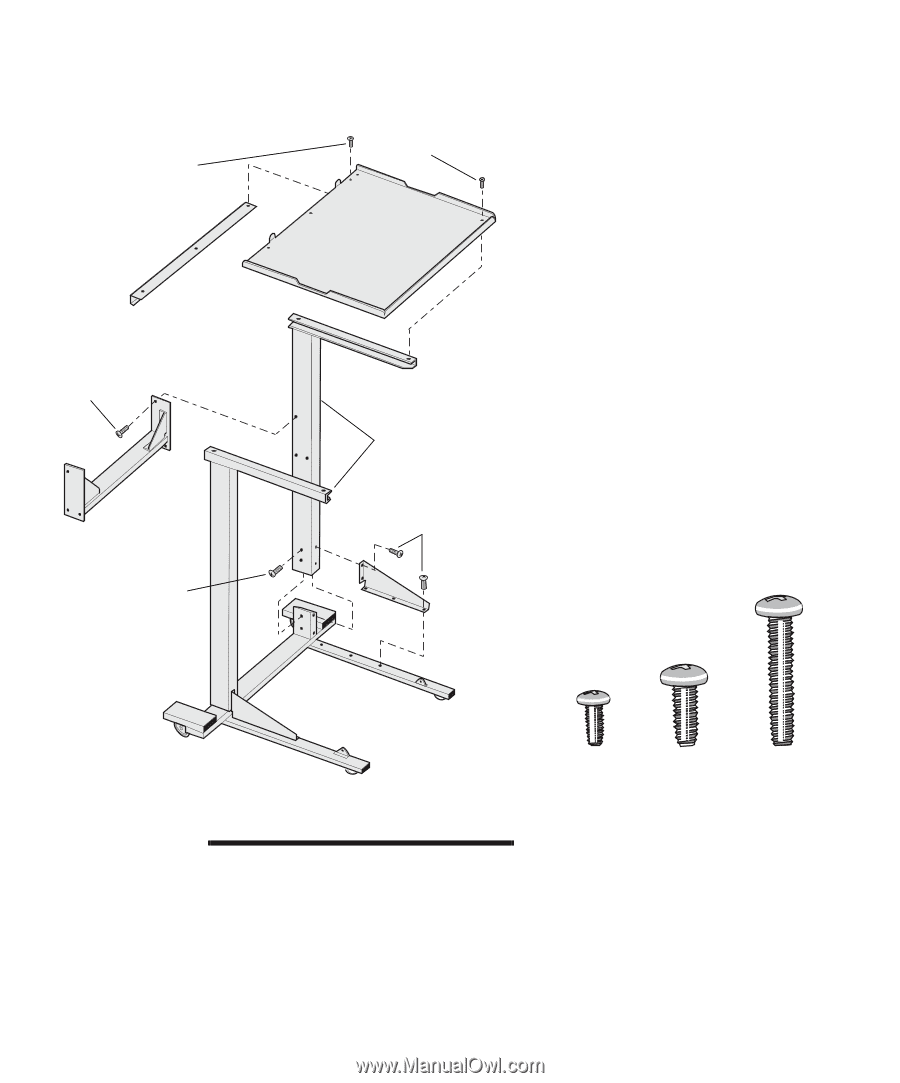
Assembling the stand 3 short 4 short Shelf support 6 medium Shelf Beam 4 medium Right and left legs 10 medium Base support 1 Slide the left and right legs onto the extensions on the base. Make sure the screw holes are facing in. Secure the legs to the base each with two medium screws. 2 Attach the base supports: a Use two medium screws each to attach the supports to the legs. b Use three medium screws each to attach the supports to the base. 3 Attach the beam to the legs with six medium screws. 4 Attach the shelf to the legs with four short screws. 5 Attach the shelf support to the shelf with three short screws. Base Short Medium Long Note: Save the four remaining medium screws for later use. Set up the scanner stand 5
-
 1
1 -
2
-
3
-
4
-
5
-
6
-
7
-
 8
8 -
 9
9 -
 10
10 -
 11
11 -
 12
12 -
 13
13 -
 14
14 -
 15
15 -
 16
16 -
 17
17 -
 18
18 -
19
-
20
-
21
-
22
-
23
-
24
-
25
-
26
-
27
-
28
-
29
-
30
-
31
-
32
-
33
-
34
-
35
-
36
-
37
-
38
-
39
-
40
-
41
-
42
-
43
-
44
-
45
-
46
-
47
-
48
-
49
-
50
-
51
-
52
-
53
-
54
-
55
-
56
-
57
-
58
-
59
-
60
-
61
-
62
-
63
-
64
-
65
-
66
-
67
-
68
-
69
-
70
-
71
-
72
-
73
-
74
-
75
-
76
-
77
-
78
-
79
-
80
-
81
-
82
-
83
-
84
-
85
-
86
-
87
-
88
-
89
-
90
-
91
-
92
-
93
-
94
-
95
-
96
-
97
-
98
-
99
-
100
-
101
-
102
-
103
-
104
-
105
-
106
-
107
-
108
-
109
-
110
-
111
-
112
-
113
-
114
-
115
-
116
-
117
-
118
-
119
-
120
-
121
-
122
-
123
-
124
-
125
-
126
-
127
-
128
-
129
-
130
-
131
-
132
-
133
-
134
-
135
-
136
-
137
-
138
-
139
-
140
-
141
-
142
-
143
-
144
-
145
-
146
-
147
-
148
-
149
-
150
-
151
-
152
-
153
-
154
-
155
-
156
-
157
-
158
-
159
-
160
-
161
-
162
-
163
-
164
-
165
-
166
-
167
-
168
-
169
-
170
-
171
-
172
-
173
-
174
-
175
-
176
-
177
-
178
-
179
-
180
-
181
-
182
-
183
-
184
-
185
-
186
-
187
-
188
-
189
-
190
-
191
-
192
-
193
-
194
-
195
-
196
-
197
-
198
-
199
-
200
-
201
-
202
-
203
-
204
-
205
-
206
-
207
-
208
-
209
-
210
-
211
-
212
-
213
-
214
-
215
-
216
-
217
-
218
-
219
-
220
-
221
-
222
-
223
-
224
-
225
-
226
-
227
-
228
-
229
-
230
-
231
-
232
-
233
-
234
-
235
-
236
-
237
-
238
-
239
-
240
-
241
-
242
-
243
-
244
-
245
-
246
-
247
-
248
-
249
-
250
-
251
 |
 |
5
Set up the scanner stand
Assembling the stand
ling the stand
1
Slide the left and right legs onto
the extensions on the base. Make
sure the screw holes are facing in.
Secure the legs to the base each
with two medium screws.
2
Attach the base supports:
a
Use two medium screws each
to attach the supports to the
legs.
b
Use three medium screws
each to attach the supports to
the base.
3
Attach the beam to the legs with
six medium screws.
4
Attach the shelf to the legs with
four short screws.
5
Attach the shelf support to the
shelf with three short screws.
Note:
Save the four remaining medium
screws for later use.
Shelf support
Shelf
Beam
Base
Base
support
3 short
4 short
6 medium
4 medium
10 medium
Right and
left legs
Short
Medium
Long