Lexmark XC6153 .Users Guide PDF - Page 224
Non-Lexmark supply, Scanner maintenance required, use ADF Kit, Region, Numeric code
 |
View all Lexmark XC6153 manuals
Add to My Manuals
Save this manual to your list of manuals |
Page 224 highlights
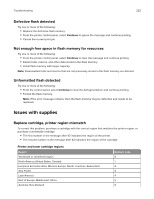
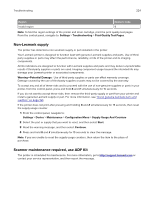
Troubleshooting 224 Region Invalid region Numeric code 9 Note: To find the region settings of the printer and toner cartridge, print the print quality test pages. From the control panel, navigate to: Settings > Troubleshooting > Print Quality Test Pages. Non‑Lexmark supply The printer has detected a non‑Lexmark supply or part installed in the printer. Your Lexmark printer is designed to function best with genuine Lexmark supplies and parts. Use of thirdparty supplies or parts may affect the performance, reliability, or life of the printer and its imaging components. All life indicators are designed to function with Lexmark supplies and parts and may deliver unpredictable results if third-party supplies or parts are used. Imaging component usage beyond the intended life may damage your Lexmark printer or associated components. Warning-Potential Damage: Use of third-party supplies or parts can affect warranty coverage. Damage caused by the use of third-party supplies or parts may not be covered by the warranty. To accept any and all of these risks and to proceed with the use of non-genuine supplies or parts in your printer, from the control panel, press and hold X and # simultaneously for 15 seconds. If you do not want to accept these risks, then remove the third-party supply or part from your printer and install a genuine Lexmark supply or part. For more information, see "Using genuine Lexmark parts and supplies" on page 164. If the printer does not print after pressing and holding X and # simultaneously for 15 seconds, then reset the supply usage counter. 1 From the control panel, navigate to: Settings > Device > Maintenance > Configuration Menu > Supply Usage And Counters 2 Select the part or supply that you want to reset, and then select Start. 3 Read the warning message, and then select Continue. 4 Press and hold X and # simultaneously for 15 seconds to clear the message. Note: If you are unable to reset the supply usage counters, then return the item to the place of purchase. Scanner maintenance required, use ADF Kit The printer is scheduled for maintenance. For more information, go to http://support.lexmark.com or contact your service representative, and then report the message.
-
 1
1 -
2
-
3
-
4
-
5
-
6
-
7
-
8
-
9
-
10
-
11
-
12
-
13
-
14
-
15
-
16
-
17
-
18
-
19
-
20
-
21
-
22
-
23
-
24
-
25
-
26
-
27
-
28
-
29
-
30
-
31
-
32
-
33
-
34
-
35
-
36
-
37
-
38
-
39
-
40
-
41
-
42
-
43
-
44
-
45
-
46
-
47
-
48
-
49
-
50
-
51
-
52
-
53
-
54
-
55
-
56
-
57
-
58
-
59
-
60
-
61
-
62
-
63
-
64
-
65
-
66
-
67
-
68
-
69
-
70
-
71
-
72
-
73
-
74
-
75
-
76
-
77
-
78
-
79
-
80
-
81
-
82
-
83
-
84
-
85
-
86
-
87
-
88
-
89
-
90
-
91
-
92
-
93
-
94
-
95
-
96
-
97
-
98
-
99
-
100
-
101
-
102
-
103
-
104
-
105
-
106
-
107
-
108
-
109
-
110
-
111
-
112
-
113
-
114
-
115
-
116
-
117
-
118
-
119
-
120
-
121
-
122
-
123
-
124
-
125
-
126
-
127
-
128
-
129
-
130
-
131
-
132
-
133
-
134
-
135
-
136
-
137
-
138
-
139
-
140
-
141
-
142
-
143
-
144
-
145
-
146
-
147
-
148
-
149
-
150
-
151
-
152
-
153
-
154
-
155
-
156
-
157
-
158
-
159
-
160
-
161
-
162
-
163
-
164
-
165
-
166
-
167
-
168
-
169
-
170
-
171
-
172
-
173
-
174
-
175
-
176
-
177
-
178
-
179
-
180
-
181
-
182
-
183
-
184
-
185
-
186
-
187
-
188
-
189
-
190
-
191
-
192
-
193
-
194
-
195
-
196
-
197
-
198
-
199
-
200
-
201
-
202
-
203
-
204
-
205
-
206
-
207
-
208
-
209
-
210
-
211
-
212
-
213
-
214
-
215
-
216
-
217
-
218
-
 219
219 -
 220
220 -
 221
221 -
 222
222 -
 223
223 -
 224
224 -
 225
225 -
 226
226 -
 227
227 -
 228
228 -
 229
229 -
230
-
231
-
232
-
233
-
234
-
235
-
236
-
237
-
238
-
239
-
240
-
241
-
242
-
243
-
244
-
245
-
246
-
247
-
248
-
249
-
250
-
251
-
252
-
253
-
254
-
255
-
256
-
257
-
258
-
259
-
260
-
261
-
262
-
263
-
264
-
265
-
266
-
267
-
268
-
269
-
270
-
271
-
272
-
273
-
274
-
275
-
276
-
277
-
278
-
279
-
280
-
281
-
282
-
283
-
284
-
285
-
286
-
287
-
288
-
289
-
290
-
291
-
292
-
293
-
294
-
295
-
296
-
297
-
298
-
299
-
300
-
301
 |
 |
