Linksys WCG200 User Guide - Page 15
Power Connection - modem
 |
UPC - 745883583935
View all Linksys WCG200 manuals
Add to My Manuals
Save this manual to your list of manuals |
Page 15 highlights
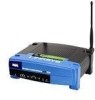
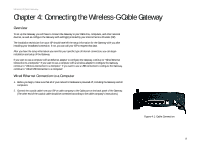
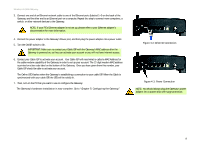
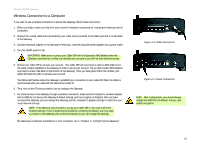
Wireless-G Cable Gateway 3. Connect one end of an Ethernet network cable to one of the Ethernet ports (labeled 1-4) on the back of the Gateway, and the other end to an Ethernet port on a computer. Repeat this step to connect more computers, a switch, or other network devices to the Gateway. NOTE: If your PC's Ethernet adapter is not set up, please refer to your Ethernet adapter's documentation for more information. 4. Connect the power adapter to the Gateway's Power port, and then plug the power adapter into a power outlet. 5. Turn the On/Off switch to On. IMPORTANT: Make sure to contact your Cable ISP with the Gateway's MAC address after the Gateway is powered on, so they can activate your account or you will not have Internet access. 6. Contact your Cable ISP to activate your account. Your Cable ISP will need what is called a MAC Address for the cable modem capability of the Gateway in order to set up your account. The 12-digit modem MAC address is printed on a bar code label on the bottom of the Gateway. Once you have given them this number, your Cable ISP should be able to activate your account. The Online LED flashes when the Gateway is establishing a connection to your cable ISP. When the Cable is synchronized with your cable ISP, the LED will be solidly lit. 7. Then, turn on the PC that you want to use to configure the Gateway. The Gateway's hardware installation is now complete. Go to "Chapter 5: Configuring the Gateway." Figure 4-2: Ethernet Connection Figure 4-3: Power Connection NOTE: You should always plug the Gateway's power adapter into a power strip with surge protection. Chapter 4: Connecting the Wireless-G Cable Gateway 9 Wired Ethernet Connection to a Computer
-
 1
1 -
2
-
3
-
4
-
5
-
6
-
7
-
8
-
9
-
 10
10 -
 11
11 -
 12
12 -
 13
13 -
 14
14 -
 15
15 -
 16
16 -
 17
17 -
 18
18 -
 19
19 -
 20
20 -
21
-
22
-
23
-
24
-
25
-
26
-
27
-
28
-
29
-
30
-
31
-
32
-
33
-
34
-
35
-
36
-
37
-
38
-
39
-
40
-
41
-
42
-
43
-
44
-
45
-
46
-
47
-
48
-
49
-
50
-
51
-
52
-
53
-
54
-
55
-
56
-
57
-
58
-
59
-
60
-
61
-
62
-
63
-
64
-
65
-
66
-
67
-
68
-
69
-
70
-
71
 |
 |
