Linksys WCG200 User Guide - Page 40
The Access Restrictions Tab, Website Blocking Tab, Timed Access Tab - specifications
 |
UPC - 745883583935
View all Linksys WCG200 manuals
Add to My Manuals
Save this manual to your list of manuals |
Page 40 highlights
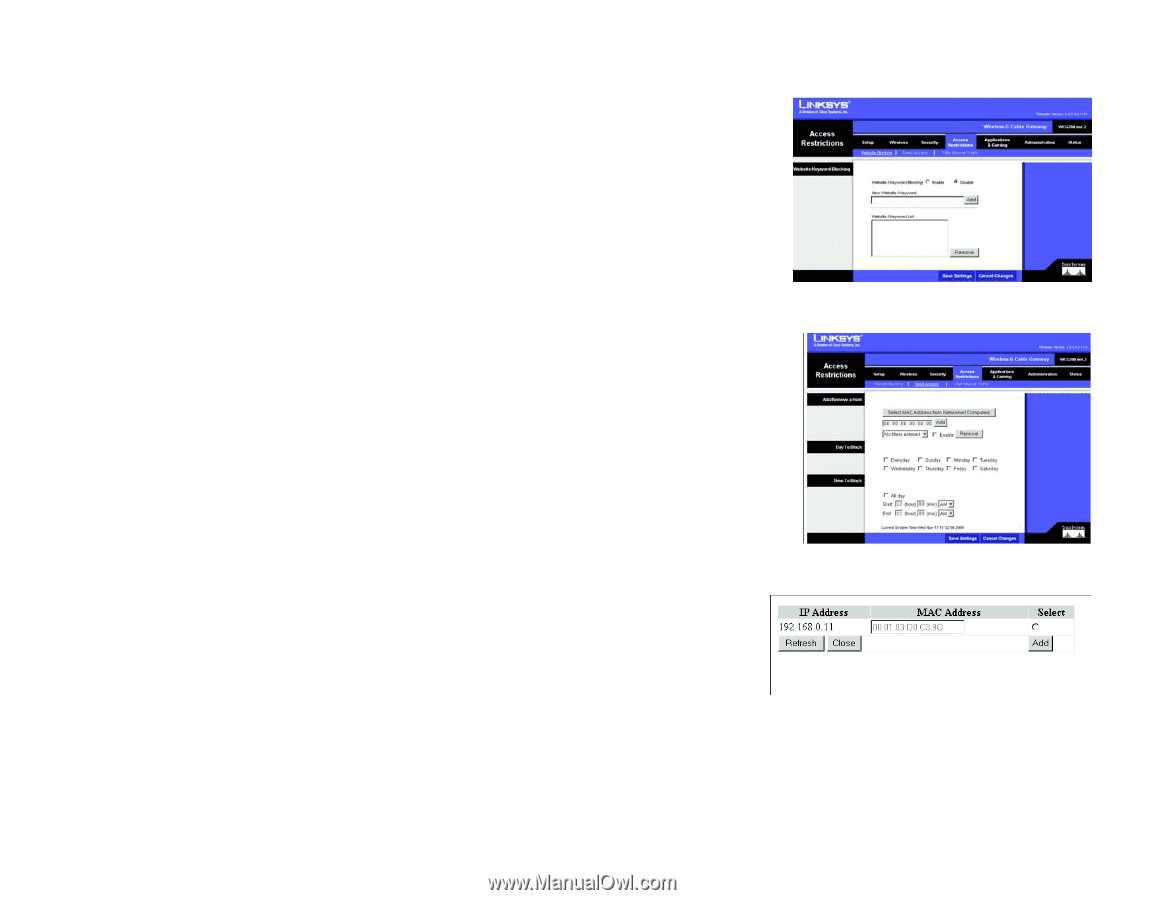
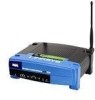
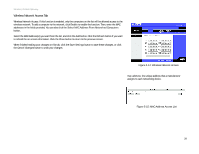
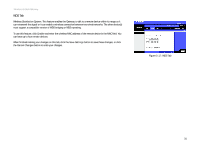
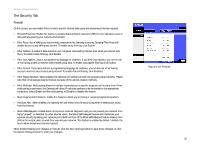
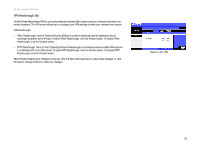
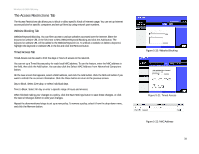
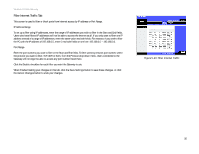
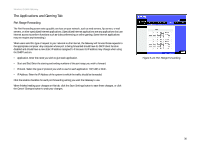
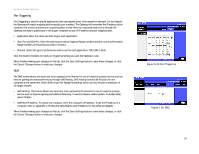
Wireless-G Cable Gateway The Access Restrictions Tab The Access Restrictions tab allows you to block or allow specific kinds of Internet usage. You can set up Internet access policies for specific computers and set up filters by using network port numbers. Website Blocking Tab Website/Keyword Blocking. You can filter access to various websites accessed over the Internet. Enter the keyword or website URL in the field next to New Website/Keyword Blocking and click the Add button. The keyword or website URL will be added to the Website/Keyword List. To unblock a website or delete a keyword, highlight the keyword or website URL in the list and click the Remove button. Timed Access Tab Timed Access can be used to limit the days or hours of access to the network. You can set up a Timed Access policy for each local MAC address. To use the feature, enter the MAC address in the field, then click the Add button. You can also click the Select MAC Address from Networked Computers button. On the new screen that appears, select a MAC address, and click the Add button. Click the Refresh button if you want to refresh the on-screen information. Click the Close button to return to the previous screen. Day to Block. Select Everyday, or select individual days. Time to Block. Select All day or enter a specific range of hours and minutes. When finished making your changes to a policy, click the Save Settings button to save these changes, or click the Cancel Changes button to undo your changes. Repeat the aforementioned steps to set up a new policy. To remove a policy, select it from the drop-down menu, and click the Remove button. Chapter 5: Configuring the Wireless-G Cable Gateway The Access Restrictions Tab Figure 5-20: Website Blocking Figure 5-21: Timed Access Figure 5-22: MAC Address 34
-
 1
1 -
2
-
3
-
4
-
5
-
6
-
7
-
8
-
9
-
10
-
11
-
12
-
13
-
14
-
15
-
16
-
17
-
18
-
19
-
20
-
21
-
22
-
23
-
24
-
25
-
26
-
27
-
28
-
29
-
30
-
31
-
32
-
33
-
34
-
 35
35 -
 36
36 -
 37
37 -
 38
38 -
 39
39 -
 40
40 -
 41
41 -
 42
42 -
 43
43 -
 44
44 -
 45
45 -
46
-
47
-
48
-
49
-
50
-
51
-
52
-
53
-
54
-
55
-
56
-
57
-
58
-
59
-
60
-
61
-
62
-
63
-
64
-
65
-
66
-
67
-
68
-
69
-
70
-
71
 |
 |