Linksys WPS54GU2 User Guide - Page 15
Automatically obtain an IP address DHCP, Set IP configuration manually
 |
UPC - 745883557806
View all Linksys WPS54GU2 manuals
Add to My Manuals
Save this manual to your list of manuals |
Page 15 highlights
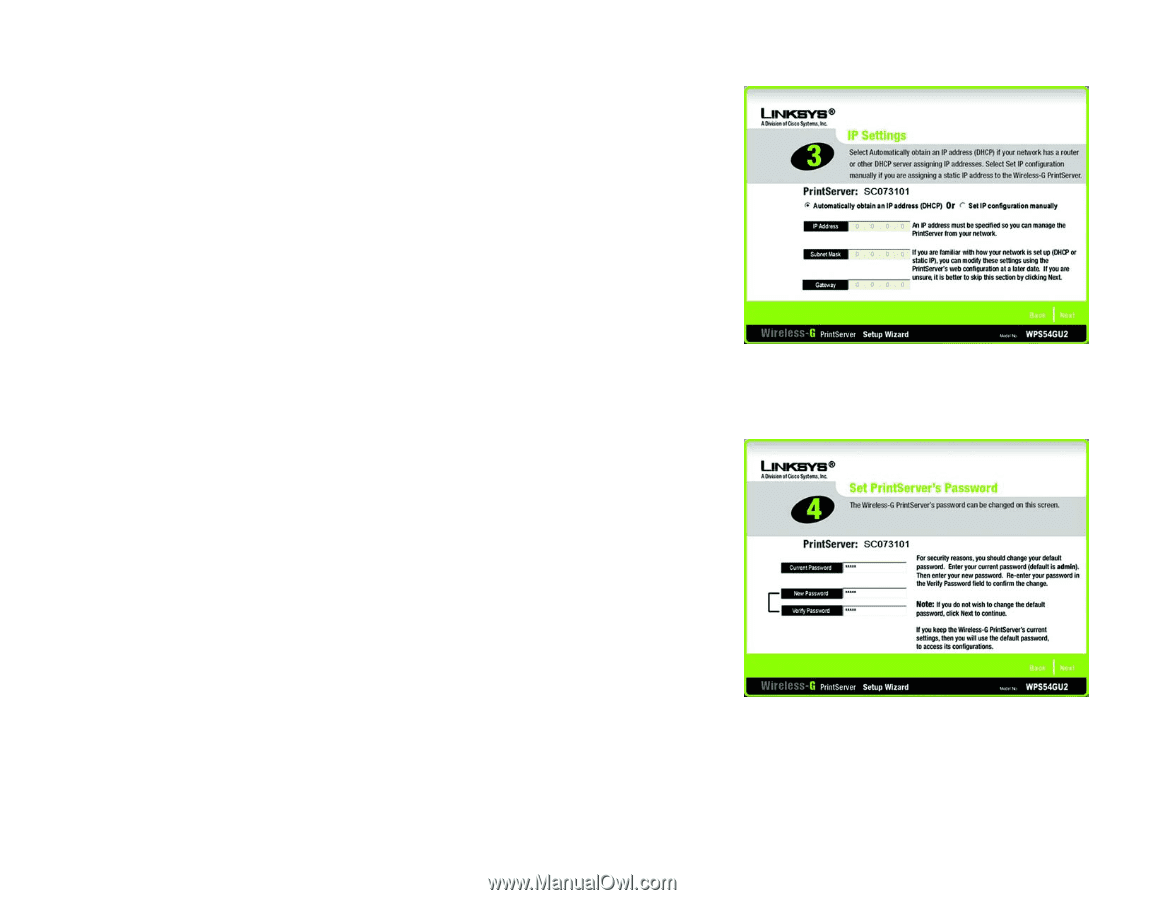
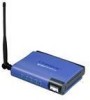
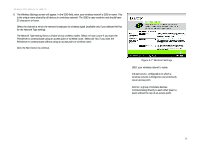
Wireless-G PrintServer for USB 2.0 6. The IP Settings screen, Figure 4-5, will appear. If your network uses a router with a DHCP setting that automatically assigns IP addresses, select Automatically obtain an IP address (DHCP). If your network uses a static IP address, select Set IP configuration manually, and enter the IP Address, Subnet Mask, and Gateway in the fields provided. Click Next. Click Back to return to the previous screen. 7. The Set PrintServer's Password screen, shown in Figure 4-6 will appear. If you want to change your password, enter your current password in the Current Password field. Enter the new password in the New Password field, then enter it again in the Verify Password field. Click Next. Click Back to return to the previous screen. Figure 4-5: IP Settings Static IP address: a fixed address assigned to a computer or device connected to a network. Chapter 4: Configuring the PrintServer Using the Setup Wizard Installation Figure 4-6: Set PrintServer's Password 8
-
 1
1 -
2
-
3
-
4
-
5
-
6
-
7
-
8
-
9
-
 10
10 -
 11
11 -
 12
12 -
 13
13 -
 14
14 -
 15
15 -
 16
16 -
 17
17 -
 18
18 -
 19
19 -
 20
20 -
21
-
22
-
23
-
24
-
25
-
26
-
27
-
28
-
29
-
30
-
31
-
32
-
33
-
34
-
35
-
36
-
37
-
38
-
39
-
40
-
41
-
42
-
43
-
44
-
45
-
46
-
47
-
48
-
49
-
50
-
51
-
52
-
53
-
54
-
55
-
56
-
57
-
58
-
59
-
60
-
61
-
62
-
63
-
64
-
65
-
66
-
67
-
68
-
69
-
70
-
71
-
72
-
73
-
74
-
75
-
76
 |
 |