MSI H67MS User Guide - Page 68
Intel RAID, Create RAID Volume, <TAB> or <Enter> key to go to the next field., RAID Level
 |
View all MSI H67MS manuals
Add to My Manuals
Save this manual to your list of manuals |
Page 68 highlights
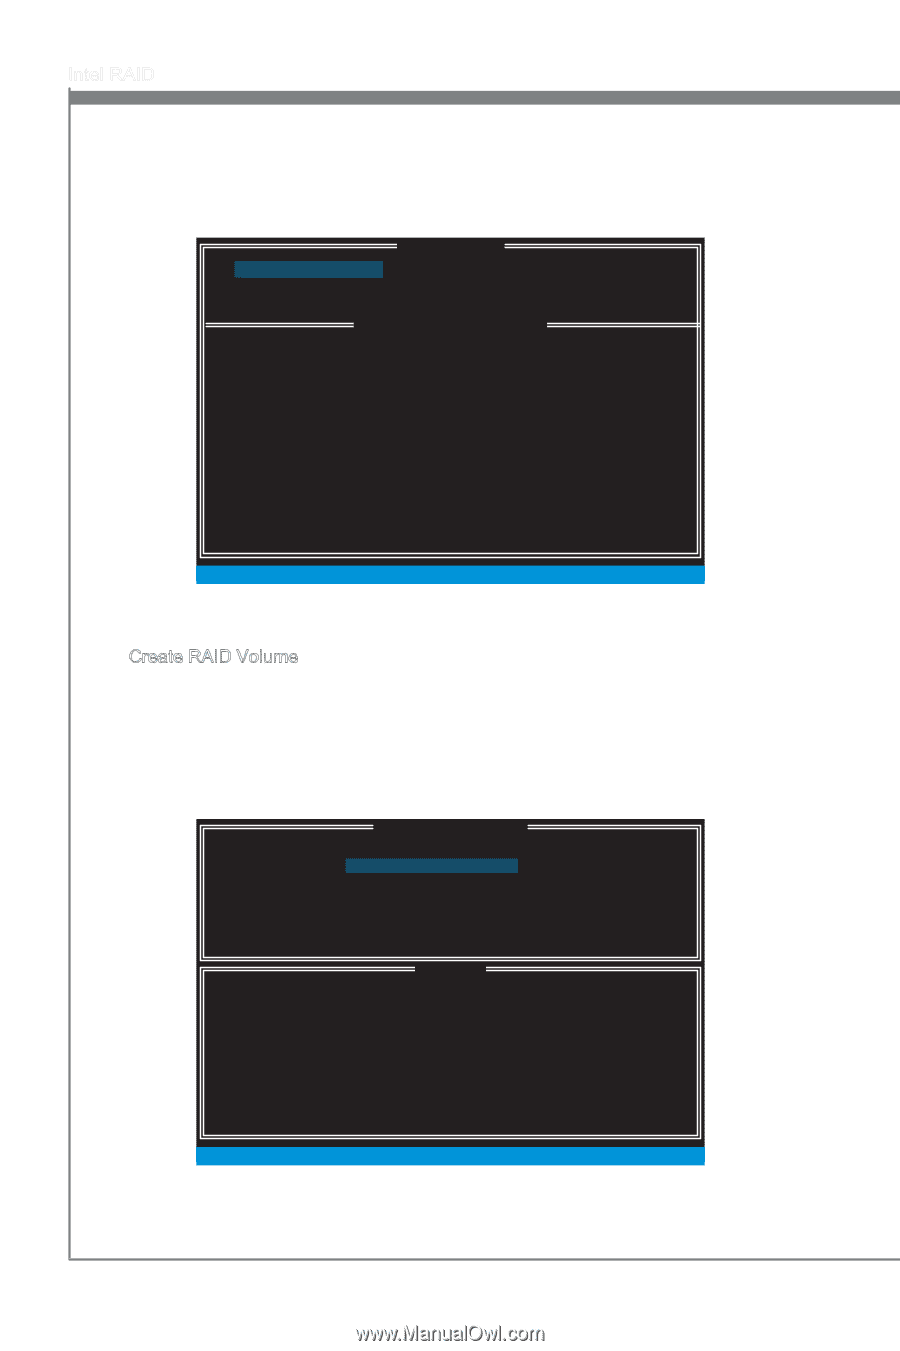
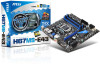
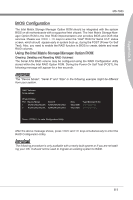
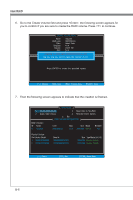
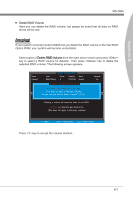
Intel RAID After pressing the and keys simultaneously, the following window will appear: [ [ MMAAININ MENU ]] 1. Create RAID Volume 3. Reset Disks to Non-RAID 2. Delete RAID Volume 4. Recovery Volume Options 5. Exit [ DISK / VOLUME INFORMATION ] RAID Volumes : None defined. Physical Devices : Port Device Model 1 XXXX-XXXXXXXX 2 XXXX-XXXXXXXX Serial # XXXXXXXXXXXXXX XXXXXXXXXXXXXX Size Type/Status (Vol ID) XXX.XGB Non-RAID Disk XXX.XGB Non-RAID Disk [ ↑↓] - Select [ESC] - Exit [ENTER] - Select Menu ■ Create RAID Volume 1. Select option 1 "Create RAID Volume" and press key. The following screen appears. Then in the Name field, specify a RAID Volume name and then press the or key to go to the next field. 2. Use the arrow keys to select the RAID level best suited to your usage model in RAID Level. [ CREATE VOLUME MENU ] Name : RAID Level : Disks : Strip Size : Capacity : Sync : Volume0 RAID1(Mirror) Select Disks N / A XXX.X GB N / A Create Volume [ HELP ] RAID 1 : Mirrors data (redundancy) . [ ↑↓] - Change [TAB] - Next [ESC] - Previous Menu [ENTER] - Select B-4
-
 1
1 -
2
-
3
-
4
-
5
-
6
-
7
-
8
-
9
-
10
-
11
-
12
-
13
-
14
-
15
-
16
-
17
-
18
-
19
-
20
-
21
-
22
-
23
-
24
-
25
-
26
-
27
-
28
-
29
-
30
-
31
-
32
-
33
-
34
-
35
-
36
-
37
-
38
-
39
-
40
-
41
-
42
-
43
-
44
-
45
-
46
-
47
-
48
-
49
-
50
-
51
-
52
-
53
-
54
-
55
-
56
-
57
-
58
-
59
-
60
-
61
-
62
-
 63
63 -
 64
64 -
 65
65 -
 66
66 -
 67
67 -
 68
68 -
 69
69 -
 70
70 -
 71
71 -
 72
72 -
 73
73 -
74
-
75
-
76
-
77
-
78
 |
 |