Maytag MGR5752BDW Use and Care Guide - Page 8
Maintenance - model manual
 |
View all Maytag MGR5752BDW manuals
Add to My Manuals
Save this manual to your list of manuals |
Page 8 highlights
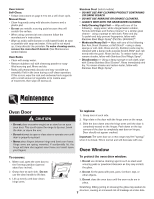
Oven Interior Self-Clean: • Follow instructions on page 4-5 to set a self-clean cycle. Manual Clean: • Clean frequently using mild abrasive cleaners and a plastic pad. • Do not use metallic scouring pads because they will scratch the surface. • When using commercial oven cleaners follow the manufacturer's instructions. • Wipe up acidic spills (tomato or milk based foods) as soon as possible with soap and water. If the spill is not wiped up, it may discolor the porcelain. To make cleaning easier, remove the oven door if desired. (See Maintenance section below.) Oven Racks • Clean with soapy water. • Remove stubborn soil with cleansing powder or soap- filled scouring pad. Rinse and dry. • Racks will permanently discolor and may not slide out smoothly if left in the oven during a self-clean operation. If this occurs, wipe the rack and embossed rack supports with a small amount of vegetable oil to restore ease of movement, then wipe off excess oil. Stainless Steel (select models) • DO NOT USE ANY CLEANING PRODUCT CONTAINING CHLORINE BLEACH. • DO NOT USE ABRASIVE OR ORANGE CLEANERS. • ALWAYS WIPE WITH THE GRAIN WHEN CLEANING. • Daily Cleaning/Light Soil -- Wipe with one of the following - soapy water, white vinegar/water solution, Formula 409 Glass and Surface Cleaner* or a similar glass cleaner - using a sponge or soft cloth. Rinse and dry. To polish and help prevent fingerprints, follow with Stainless Steel Magic Spray* (Part No. 20000008)**. • Moderate/Heavy Soil -- Wipe with one of the following Bon Ami, Smart Cleanser, or Soft Scrub* - using a damp sponge or soft cloth. Rinse and dry. Stubborn soils may be removed with a damp multi-purpose Scotch-Brite* pad; rub evenly with the grain. Rinse and dry. To restore luster and remove streaks, follow with Stainless Steel Magic Spray*. • Discoloration -- Using a damp sponge or soft cloth, wipe with Cameo Stainless Steel Cleaner*. Rinse immediately and dry. To remove streaks and restore luster, follow with Stainless Steel Magic Spray*. Maintenance Oven Door CAUTION • Do not place excessive weight on or stand on an open oven door. This could cause the range to tip over, break the door, or injure the user. • Do not attempt to open or close door or operate oven until door is properly replaced. • Never place fingers between hinge and front oven frame. Hinge arms are spring mounted. If accidentally hit, the hinge will slam shut against oven frame and could injure your fingers. To replace: 1. Grasp door at each side. 2. Align slots in the door with the hinge arms on the range. 3. Slide the door down onto the hinge arms until the door is completely seated on the hinges. Push down on the top corners of the door to completely seat door on hinges. Door should not appear crooked. Important: The oven door on a new range may feel "spongy" when it is closed. This is normal and will decrease with use. Oven Window To remove: 1. When cool, open the oven door to the first stop position (opened about four inches). 2. Grasp door at each side. Do not use the door handle to lift door. 3. Lift up evenly until door clears hinge arms. To protect the oven door window: 1. Do not use abrasive cleaning agents such as steel wool scouring pads or powdered cleansers as they may scratch the glass. 2. Do not hit the glass with pots, pans, furniture, toys, or other objects. 3. Do not close the oven door until the oven racks are in place. Scratching, hitting, jarring or stressing the glass may weaken its structure, causing an increased risk of breakage at a later date. 7
-
 1
1 -
2
-
 3
3 -
 4
4 -
 5
5 -
 6
6 -
 7
7 -
 8
8 -
 9
9 -
 10
10 -
 11
11 -
 12
12 -
 13
13 -
14
-
15
-
16
-
17
-
18
-
19
-
20
-
21
-
22
-
23
-
24
-
25
-
26
-
27
-
28
-
29
-
30
-
31
-
32
-
33
-
34
-
35
-
36
-
37
-
38
-
39
-
40
-
41
-
42
-
43
-
44
-
45
-
46
-
47
-
48
-
49
-
50
-
51
-
52
-
53
-
54
-
55
-
56
-
57
-
58
-
59
-
60
-
61
-
62
-
63
-
64
-
65
-
66
-
67
-
68
 |
 |