Maytag MTW6700TQ Use and Care Guide - Page 11
Benefits - top load washer
 |
UPC - 883049121017
View all Maytag MTW6700TQ manuals
Add to My Manuals
Save this manual to your list of manuals |
Page 11 highlights
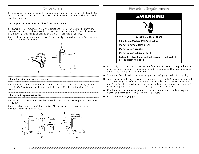
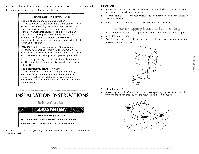
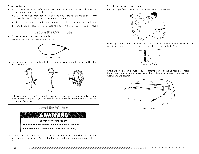
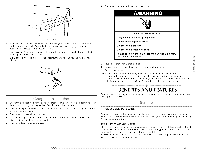
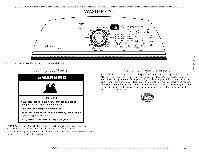
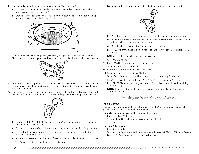
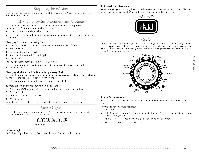
6. Checfkorleakasrounfdaucetasndinlethoses. Level the side. 5. If the washer is not level, move the washer out slightly, tip back, prop up the front of the washer on a wood block. Adjust the feet up or down as necessary by twisting the feet. Repeat steps 1 through 4 until washer is level. 6. Use a 9/16" or 14 mm open-end wrench to turn the Iocknut counterclockwise tightly against the washer cabinet. on the foot IMPORTANT: [f the Iocknut is not tight against the washer cabinet, the washer may vibrate. Electrical Shock Hazard Plug into a grounded 3 prong outlet. Do not remove ground prong. Do not use an adapter. Do not use an extension cord. Failure to follow these instructions can result in death, fire, or electrical shock. 7. Plug into a grounded 3 prong outlet. 8. Remove any protective film or tape remaining on the washer. 9. Read "Washer Use." 10. [b test and to clean your washer, measure 1/2of the detergent manufacturer's recommended amount of High Efficiency (HE) powdered or liquid detergent for a medium-size load and pour it into the detergent dispenser. Close the lid. Press POWER. Select a normal cycle and press Start. Allow it to complete one whole cycle. 1. Check the electrical requirements. Be sure that you have the correct electrical supply and the recommended grounding method. See "Electrical Requirements." 2. Check that all parts are now instal led. if there is an extra part, go back through the steps to see which step was skipped. 3. Check that you have all of your tools. 4. Keep the foam packing ring from the washer tub for future relocation of the washer. Dispose of/recycle all packaging materials. 5. Check that the water faucets are on. BENEFITS AND FEATURES Your washer has several benefits and features which are summarized here. Some items may not apply to your model. High-Efficiency Wash System Your new top loading, high-efficiency washer saves you time by allowing you to do fewer, larger loads. It also conserves resources and also lowers your water and energy bills by using the following innovations. IntelliFill 'M Water Level Control This washer senses the load size and composition through a series of fills and wash motion. [t then adjusts the water level for the best cleaning and rinsing performance. It eliminates the guesswork. The water level is just right for every wash load size. NOTE: You may notice during a cycle that the wash load is not completely submerged in water. This is normal for your washer.
-
 1
1 -
2
-
3
-
4
-
5
-
 6
6 -
 7
7 -
 8
8 -
 9
9 -
 10
10 -
 11
11 -
 12
12 -
 13
13 -
 14
14 -
 15
15 -
 16
16 -
17
-
18
-
19
-
20
-
21
-
22
-
23
-
24
-
25
-
26
-
27
-
28
-
29
-
30
-
31
-
32
-
33
-
34
-
35
-
36
-
37
-
38
-
39
-
40
-
41
-
42
-
43
-
44
-
45
-
46
-
47
-
48
-
49
-
50
-
51
-
52
-
53
-
54
-
55
-
56
 |
 |
