McAfee PSMCDE-AB-AA User Guide - Page 26
Advanced View, Creating a Subpolicy
 |
View all McAfee PSMCDE-AB-AA manuals
Add to My Manuals
Save this manual to your list of manuals |
Page 26 highlights
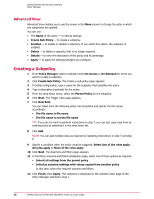
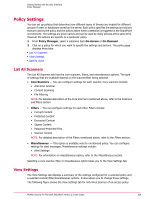
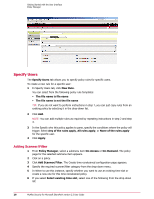
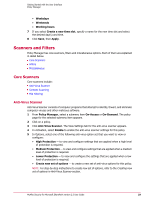
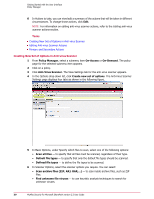
Getting Started with the User Interface Policy Manager Advanced View Advanced View enables you to use the arrows in the Move column to change the order in which any subpolicies are applied. You can use: • The Name of the policy - to edit its settings. • Create Sub-Policy - to create a subpolicy. • Enabled - to enable or disable a subpolicy. If you select this option, the subpolicy is enabled. • Delete - to delete a subpolicy that is no longer required. • Details - to view the description of the policy and its parentage. • Apply - to apply the settings/changes you configure. Creating a Subpolicy 1 From Policy Manager, select a submenu item On-Access or On-Demand for which you want to create a subpolicy. 2 Click Create Sub-Policy. The Create a sub-policy page appears. 3 In Initial configuration, type a name for the subpolicy that identifies the policy. 4 Type a description (optional) for the policy. 5 From the drop-down menu, select the Parent Policy for the subpolicy. 6 Click Next. The Trigger rules page appears. 7 Click New Rule. You can select from the following policy rule templates and specify the file names accordingly: • The file name is file name • The file name is not the file name TIP: If you do not want to perform instructions in step 7, you can just copy rules from an existing policy by selecting it in the drop-down list. 8 Click Add. NOTE: You can add multiple rules as required by repeating instructions in step 7 and step 8. 9 Specify a condition when the policy must be triggered. Select Any of the rules apply, All rules apply or None of the rules apply. 10 Click Next. The Scanners and filters page appears. 11 In the Policy scanners and Filters initialization page, select one of these options as required: • Inherit all settings from the parent policy • Initialize selected settings with values copied from another policy In this case, select the required scanners and filters. 12 Click Finish, then Apply. The subpolicy is displayed on the submenu item page of the Policy Manager selected in step 1. 26 McAfee Security for Microsoft SharePoint version 2.5 User Guide
-
 1
1 -
2
-
3
-
4
-
5
-
6
-
7
-
8
-
9
-
10
-
11
-
12
-
13
-
14
-
15
-
16
-
17
-
18
-
19
-
20
-
 21
21 -
 22
22 -
 23
23 -
 24
24 -
 25
25 -
 26
26 -
 27
27 -
 28
28 -
 29
29 -
 30
30 -
 31
31 -
32
-
33
-
34
-
35
-
36
-
37
-
38
-
39
-
40
-
41
-
42
-
43
-
44
-
45
-
46
-
47
-
48
-
49
-
50
-
51
-
52
-
53
-
54
-
55
-
56
-
57
-
58
-
59
-
60
-
61
-
62
-
63
-
64
-
65
-
66
-
67
-
68
-
69
-
70
-
71
-
72
-
73
-
74
 |
 |
