McAfee PSMCDE-AB-AA User Guide - Page 29
Scanners and Filters, Core Scanners, Anti-Virus Scanner
 |
View all McAfee PSMCDE-AB-AA manuals
Add to My Manuals
Save this manual to your list of manuals |
Page 29 highlights
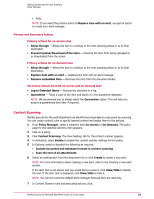
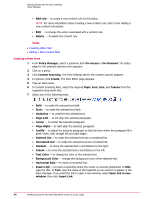
Getting Started with the User Interface Policy Manager • Weekdays • Weekends • Working hours 7 If you select Create a new time slot, specify a name for the new time slot and select the desired day(s) and time. 8 Click Save, then Apply. Scanners and Filters Policy Manager has core scanners, filters and miscellaneous options. Each of them are explained in detail below. Core Scanners Filters Miscellaneous Core Scanners Core scanners include: Anti-Virus Scanner Content Scanning File Filtering Anti-Virus Scanner Anti-Virus Scanner consists of computer programs that attempt to identify, thwart, and eliminate computer viruses and other malicious software. 1 From Policy Manager, select a submenu item On-Access or On-Demand. The policy page for the selected submenu item appears. 2 Click on a policy. 3 Click Anti-Virus Scanner. The View Settings tab for the anti-virus scanner appears. 4 In Activation, select Enable to enable the anti-virus scanner settings for this policy. 5 In Options, select one of the following anti-virus option set that you want to view or configure: • High Protection - to view and configure settings that are applied when a high level of protection is required. • Medium Protection - to view and configure settings that are applied when a medium level of protection is required. • Lower Protection - to view and configure the settings that are applied when a low level of protection is required. • Create new set of options - to create a new set of anti-virus options for this policy. NOTE: For step-by-step instructions to create new set of options, refer to the Creating new set of options in Anti-Virus Scanner section. McAfee Security for Microsoft SharePoint version 2.5 User Guide 29
-
 1
1 -
2
-
3
-
4
-
5
-
6
-
7
-
8
-
9
-
10
-
11
-
12
-
13
-
14
-
15
-
16
-
17
-
18
-
19
-
20
-
21
-
22
-
23
-
 24
24 -
 25
25 -
 26
26 -
 27
27 -
 28
28 -
 29
29 -
 30
30 -
 31
31 -
 32
32 -
 33
33 -
 34
34 -
35
-
36
-
37
-
38
-
39
-
40
-
41
-
42
-
43
-
44
-
45
-
46
-
47
-
48
-
49
-
50
-
51
-
52
-
53
-
54
-
55
-
56
-
57
-
58
-
59
-
60
-
61
-
62
-
63
-
64
-
65
-
66
-
67
-
68
-
69
-
70
-
71
-
72
-
73
-
74
 |
 |
