McAfee PSMCDE-AB-AA User Guide - Page 35
Adding a New Content Rule, File Filtering, HTML content WYSIWYG
 |
View all McAfee PSMCDE-AB-AA manuals
Add to My Manuals
Save this manual to your list of manuals |
Page 35 highlights
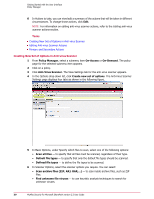
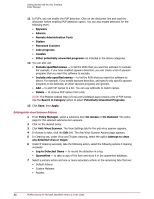
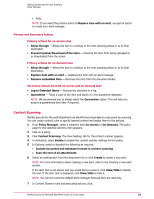
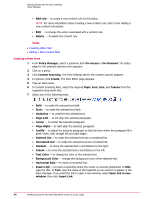
Getting Started with the User Interface Policy Manager • Insert Image - to insert an image where the cursor is currently positioned. In Image URL, type the location of the image. In Alternative text, type the text you want to use in place of the image when images are suppressed, or the alert message is displayed in a text-only browser. If you want to give the image a title, type the title name in Use this text as the image title. Click Insert Image. • Insert Table - to insert a table at the current cursor position. Use the table settings to configure the table, and then click Insert Table. 8 From the Show drop-down menu, specify how the alert message should be displayed within the user interface. You can select: • HTML content (WYSIWYG) - to hide the underlying HTML code and display only the content of the alert message. • HTML content (source) - to display the HTML code as it appears before it has been compiled. • Plain-text content - to view the text as plain text. 9 Click Save, then Apply. NOTE: Click Reset to undo all changes you have made since you last saved the alert message. Adding a New Content Rule 1 From Policy Manager, select a submenu item On-Access or On-Demand. The policy page for the selected submenu item appears. 2 Click on a policy. 3 Click Content Scanning. The View Settings tab for the content scanner appears. 4 In Content Scanner rules and associated actions, click Add rule. The Content Rules page appears. 5 In Specify actions for a selection of content rules: • Select a rule group from the drop-down menu that will trigger an action if one or more of its rules are broken. • In Select rules from this group, specify if all rules or only rules with a specific severity rating should be included. The options are: • Severity - Low • Severity - Medium • Severity - High 6 Select the required primary and secondary filtering actions. NOTE: See Primary and Secondary Actions. File Filtering You can configure the file filtering settings for a selected policy. 1 From Policy Manager, select a submenu item On-Access or On-Demand. The policy page for the selected submenu item appears. 2 Click on a policy. 3 Click File Filtering. The View Settings tab for the file filtering scanner appears. McAfee Security for Microsoft SharePoint version 2.5 User Guide 35
-
 1
1 -
2
-
3
-
4
-
5
-
6
-
7
-
8
-
9
-
10
-
11
-
12
-
13
-
14
-
15
-
16
-
17
-
18
-
19
-
20
-
21
-
22
-
23
-
24
-
25
-
26
-
27
-
28
-
29
-
 30
30 -
 31
31 -
 32
32 -
 33
33 -
 34
34 -
 35
35 -
 36
36 -
 37
37 -
 38
38 -
 39
39 -
 40
40 -
41
-
42
-
43
-
44
-
45
-
46
-
47
-
48
-
49
-
50
-
51
-
52
-
53
-
54
-
55
-
56
-
57
-
58
-
59
-
60
-
61
-
62
-
63
-
64
-
65
-
66
-
67
-
68
-
69
-
70
-
71
-
72
-
73
-
74
 |
 |
