Motorola I860 User Guide - Page 111
Pictures, Viewing, Sending in a Message, Assigning to Contacts
 |
View all Motorola I860 manuals
Add to My Manuals
Save this manual to your list of manuals |
Page 111 highlights
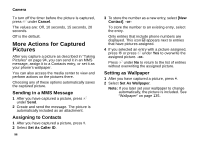
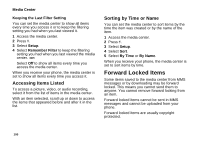
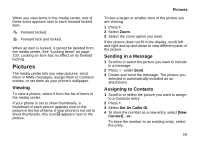
When you view items in the media center, one of these icons appears next to each forward locked item: f Forward locked. c Forward lock and locked. When an item is locked, it cannot be deleted from the media center. See "Locking Items" on page 103. Locking an item has no effect on its forward locking. Pictures The media center lets you view pictures, send them in MMS messages, assign them to Contacts entries, or set them as your phone's wallpaper. Viewing To view a picture, select it from the list of items in the media center. If your phone is set to show thumbnails, a thumbnail of each picture appears next to the picture in the list of items. If your phone is not set to show thumbnails, this icon g appears next to the picture. Pictures To see a larger or smaller view of the picture you are viewing: 1 Press m. 2 Select Zoom. 3 Select the zoom option you want. If the picture does not fit in the display, scroll left and right and up and down to view different parts of the picture. Sending in a Message 1 Scroll to or select the picture you want to include in a message. 2 Press A under Send. 3 Create and send the message. The picture you selected is automatically included as an attachment. Assigning to Contacts 1 Scroll to or select the picture you want to assign to a Contacts entry. 2 Press m. 3 Select Set As Caller ID. 4 To store the number as a new entry, select [New Contact]. -or- To store the number to an existing entry, select the entry. 101
-
 1
1 -
2
-
3
-
4
-
5
-
6
-
7
-
8
-
9
-
10
-
11
-
12
-
13
-
14
-
15
-
16
-
17
-
18
-
19
-
20
-
21
-
22
-
23
-
24
-
25
-
26
-
27
-
28
-
29
-
30
-
31
-
32
-
33
-
34
-
35
-
36
-
37
-
38
-
39
-
40
-
41
-
42
-
43
-
44
-
45
-
46
-
47
-
48
-
49
-
50
-
51
-
52
-
53
-
54
-
55
-
56
-
57
-
58
-
59
-
60
-
61
-
62
-
63
-
64
-
65
-
66
-
67
-
68
-
69
-
70
-
71
-
72
-
73
-
74
-
75
-
76
-
77
-
78
-
79
-
80
-
81
-
82
-
83
-
84
-
85
-
86
-
87
-
88
-
89
-
90
-
91
-
92
-
93
-
94
-
95
-
96
-
97
-
98
-
99
-
100
-
101
-
102
-
103
-
104
-
105
-
 106
106 -
 107
107 -
 108
108 -
 109
109 -
 110
110 -
 111
111 -
 112
112 -
 113
113 -
 114
114 -
 115
115 -
 116
116 -
117
-
118
-
119
-
120
-
121
-
122
-
123
-
124
-
125
-
126
-
127
-
128
-
129
-
130
-
131
-
132
-
133
-
134
-
135
-
136
-
137
-
138
-
139
-
140
-
141
-
142
-
143
-
144
-
145
-
146
-
147
-
148
-
149
-
150
-
151
-
152
-
153
-
154
-
155
-
156
-
157
-
158
-
159
-
160
-
161
-
162
-
163
-
164
-
165
-
166
-
167
-
168
-
169
-
170
-
171
-
172
-
173
-
174
-
175
-
176
-
177
-
178
-
179
-
180
-
181
-
182
-
183
-
184
-
185
-
186
-
187
-
188
-
189
-
190
-
191
-
192
-
193
-
194
-
195
-
196
-
197
-
198
-
199
-
200
 |
 |
