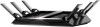
Netgear AC3200-Nighthawk User Manual - Page 131
Set Up a Guest Network, To change the WPA settings, admin, password, Wireless, WPA-PSK [TKIP]
 |
View all Netgear AC3200-Nighthawk manuals
Add to My Manuals
Save this manual to your list of manuals |
Page 131 highlights
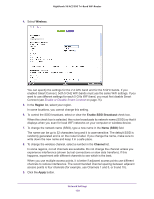
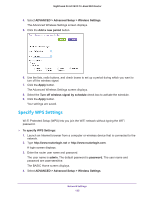
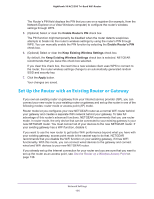
Nighthawk X6 AC3200 Tri-Band WiFi Router To change the WPA settings: 1. Launch an Internet browser from a computer or wireless device that is connected to the network. 2. Type http://www.routerlogin.net or http://www.routerlogin.com. A login screen displays. 3. Enter the router user name and password. The user name is admin. The default password is password. The user name and password are case-sensitive. The BASIC Home screen displays. 4. Select Wireless. The Wireless Setup screen displays. 5. Under Security Options, select a radio button for a WPA options. The WPA2 options use the newest standard for the strongest security, but some older computers and wireless devices cannot use WPA2. By default, the WPA-PSK [TKIP] + WPA2-PSK [AES] radio button is selected so that new or old computers and wireless devices can connect to the WiFi network by using either WPA2 or WPA security. The Passphrase field displays. 6. In the Passphrase field, enter the network key (password). It is a text string from 8 to 63 characters. 7. Write down the new password and keep it in a secure place for future reference. 8. Click the Apply button. Your changes are saved. Set Up a Guest Network Guest networks allows visitors at your home to use the Internet without using your wireless security key. You can add a guest network for the 2.4 GHz WiFi band and for each of the two 5.0 GHz WiFi bands. To set up a guest network: 1. Launch an Internet browser from a computer or wireless device that is connected to the network. 2. Type http://www.routerlogin.net or http://www.routerlogin.com. A login screen displays. 3. Enter the router user name and password. The user name is admin. The default password is password. The user name and password are case-sensitive. Network Settings 131
-
 1
1 -
2
-
3
-
4
-
5
-
6
-
7
-
8
-
9
-
10
-
11
-
12
-
13
-
14
-
15
-
16
-
17
-
18
-
19
-
20
-
21
-
22
-
23
-
24
-
25
-
26
-
27
-
28
-
29
-
30
-
31
-
32
-
33
-
34
-
35
-
36
-
37
-
38
-
39
-
40
-
41
-
42
-
43
-
44
-
45
-
46
-
47
-
48
-
49
-
50
-
51
-
52
-
53
-
54
-
55
-
56
-
57
-
58
-
59
-
60
-
61
-
62
-
63
-
64
-
65
-
66
-
67
-
68
-
69
-
70
-
71
-
72
-
73
-
74
-
75
-
76
-
77
-
78
-
79
-
80
-
81
-
82
-
83
-
84
-
85
-
86
-
87
-
88
-
89
-
90
-
91
-
92
-
93
-
94
-
95
-
96
-
97
-
98
-
99
-
100
-
101
-
102
-
103
-
104
-
105
-
106
-
107
-
108
-
109
-
110
-
111
-
112
-
113
-
114
-
115
-
116
-
117
-
118
-
119
-
120
-
121
-
122
-
123
-
124
-
125
-
 126
126 -
 127
127 -
 128
128 -
 129
129 -
 130
130 -
 131
131 -
 132
132 -
 133
133 -
 134
134 -
 135
135 -
 136
136 -
137
-
138
-
139
-
140
-
141
-
142
-
143
-
144
-
145
-
146
-
147
-
148
-
149
-
150
-
151
-
152
-
153
-
154
-
155
-
156
-
157
-
158
-
159
-
160
-
161
-
162
-
163
-
164
-
165
-
166
-
167
-
168
-
169
-
170
-
171
-
172
-
173
-
174
-
175
-
176
-
177
-
178
-
179
-
180
-
181
-
182
-
183
-
184
-
185
-
186
-
187
-
188
-
189
-
190
-
191
 |
 |
