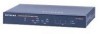
Netgear FVS336G FVS336G Reference Manual - Page 29
Manually Configuring the Internet Connection, WAN1 ISP, Settings, ISP Login - default ip
 |
UPC - 606449052015
View all Netgear FVS336G manuals
Add to My Manuals
Save this manual to your list of manuals |
Page 29 highlights
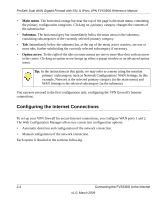
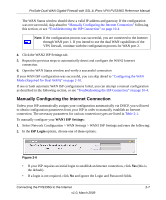
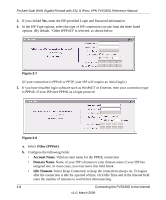
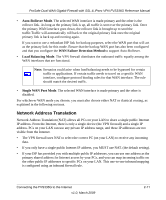
ProSafe Dual WAN Gigabit Firewall with SSL & IPsec VPN FVS336G Reference Manual The WAN Status window should show a valid IP address and gateway. If the configuration was not successful, skip ahead to "Manually Configuring the Internet Connection" following this section, or see "Troubleshooting the ISP Connection" on page 10-4. Note: If the configuration process was successful, you are connected to the Internet through WAN port 1. If you intend to use the dual WAN capabilities of the VPN firewall, continue with the configuration process for WAN port 2. 4. Click the WAN2 ISP Settings tab. 5. Repeat the previous steps to automatically detect and configure the WAN2 Internet connection. 6. Open the WAN Status window and verify a successful connection If your WAN ISP configuration was successful, you can skip ahead to "Configuring the WAN Mode (Required for Dual WAN)" on page 2-10. If one or both automatic WAN ISP configurations failed, you can attempt a manual configuration as described in the following section, or see "Troubleshooting the ISP Connection" on page 10-4. Manually Configuring the Internet Connection Unless your ISP automatically assigns your configuration automatically via DHCP, you will need to obtain configuration parameters from your ISP in order to manually establish an Internet connection. The necessary parameters for various connection types are listed in Table 2-1. To manually configure your WAN1 ISP Settings: 1. Select Network Configuration > WAN Settings > WAN1 ISP Settings and enter the following: 2. In the ISP Login options, choose one of these options: Figure 2-6 • If your ISP requires an initial login to establish an Internet connection, click Yes (this is the default). • If a login is not required, click No and ignore the Login and Password fields. Connecting the FVS336G to the Internet 2-7 v1.0, March 2009
-
 1
1 -
2
-
3
-
4
-
5
-
6
-
7
-
8
-
9
-
10
-
11
-
12
-
13
-
14
-
15
-
16
-
17
-
18
-
19
-
20
-
21
-
22
-
23
-
 24
24 -
 25
25 -
 26
26 -
 27
27 -
 28
28 -
 29
29 -
 30
30 -
 31
31 -
 32
32 -
 33
33 -
 34
34 -
35
-
36
-
37
-
38
-
39
-
40
-
41
-
42
-
43
-
44
-
45
-
46
-
47
-
48
-
49
-
50
-
51
-
52
-
53
-
54
-
55
-
56
-
57
-
58
-
59
-
60
-
61
-
62
-
63
-
64
-
65
-
66
-
67
-
68
-
69
-
70
-
71
-
72
-
73
-
74
-
75
-
76
-
77
-
78
-
79
-
80
-
81
-
82
-
83
-
84
-
85
-
86
-
87
-
88
-
89
-
90
-
91
-
92
-
93
-
94
-
95
-
96
-
97
-
98
-
99
-
100
-
101
-
102
-
103
-
104
-
105
-
106
-
107
-
108
-
109
-
110
-
111
-
112
-
113
-
114
-
115
-
116
-
117
-
118
-
119
-
120
-
121
-
122
-
123
-
124
-
125
-
126
-
127
-
128
-
129
-
130
-
131
-
132
-
133
-
134
-
135
-
136
-
137
-
138
-
139
-
140
-
141
-
142
-
143
-
144
-
145
-
146
-
147
-
148
-
149
-
150
-
151
-
152
-
153
-
154
-
155
-
156
-
157
-
158
-
159
-
160
-
161
-
162
-
163
-
164
-
165
-
166
-
167
-
168
-
169
-
170
-
171
-
172
-
173
-
174
-
175
-
176
-
177
-
178
-
179
-
180
-
181
-
182
-
183
-
184
-
185
-
186
-
187
-
188
-
189
-
190
-
191
-
192
-
193
-
194
-
195
-
196
-
197
-
198
-
199
-
200
-
201
-
202
-
203
-
204
-
205
-
206
-
207
-
208
-
209
-
210
-
211
-
212
-
213
-
214
-
215
-
216
-
217
-
218
-
219
-
220
-
221
-
222
-
223
-
224
-
225
-
226
-
227
-
228
-
229
-
230
-
231
-
232
-
233
-
234
-
235
-
236
-
237
-
238
-
239
-
240
-
241
 |
 |
