Netgear GA311 GA311 User Manual - Page 24
Moving the GA311 to a Different Slot in Windows Vista, XP - xp drivers
 |
UPC - 606449033274
View all Netgear GA311 manuals
Add to My Manuals
Save this manual to your list of manuals |
Page 24 highlights
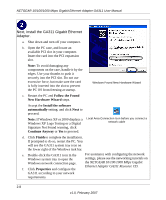
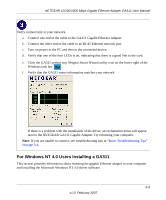
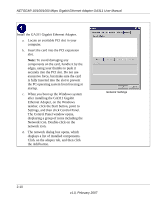
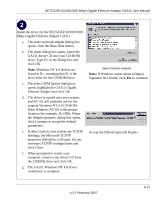
NETGEAR 10/100/1000 Mbps Gigabit Ethernet Adapter GA311 User Manual Verify connectivity to your network. a. Connect one end of the cable to the GA311 Gigabit Ethernet Adapter. b. Connect the other end of the cable to an RJ-45 Ethernet network port. c. Turn on power to the PC and then to the connected device. d. Verify that one of the four LEDs is on, indicating that there is a good link to the card. See "Determining the GA311 Connection Status" on page 2-14 for more information. e. Verify connectivity to the Internet or network resources: • Double-click My Computer on the desktop, double-click Control Panel, and then double-click System. • Click Hardware and click Device Manager tab, and then double-click Network adapters. • Double-click NETGEAR GA311 Gigabit Ethernet Adapter. A message appears describing the status of the device. If there is a problem with the installation of the driver, an exclamation point will appear next to the NETGEAR GA311 Gigabit Ethernet Adapter. Try rebooting your computer. Note: The Netgear Smart Wizard utility is not avilable for Windows NT. Moving the GA311 to a Different Slot in Windows Vista, XP, 2000, Me, or 98SE Windows automatically detects the installation and removal of hardware. To move a GA311 Gigabit Ethernet Adapter to a different slot in the same system, you need to do the following: 1. Shut down the system and remove the card from the PCI slot. 2. Install the card in its new PCI slot. 3. When the system is powered on, reinstall the driver software. See "Basic Installation Instructions" on page 2-3 for more information. 2-12 v1.0, February 2007
-
 1
1 -
2
-
3
-
4
-
5
-
6
-
7
-
8
-
9
-
10
-
11
-
12
-
13
-
14
-
15
-
16
-
17
-
18
-
 19
19 -
 20
20 -
 21
21 -
 22
22 -
 23
23 -
 24
24 -
 25
25 -
 26
26 -
 27
27 -
 28
28 -
 29
29 -
30
-
31
-
32
-
33
-
34
-
35
-
36
-
37
-
38
-
39
-
40
-
41
-
42
-
43
-
44
-
45
-
46
-
47
-
48
-
49
-
50
-
51
-
52
 |
 |