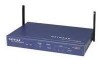
Netgear HR314 HR314 Reference Manual - Page 30
Configuring Windows 95
 |
UPC - 606449024241
View all Netgear HR314 manuals
Add to My Manuals
Save this manual to your list of manuals |
Page 30 highlights
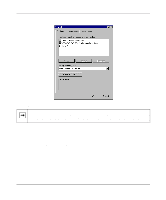
Reference Manual for the Model HR314 802.11a Hi-Speed Wireless Router • All versions of UNIX or Linux include TCP/IP components. Follow the instructions provided with your operating system or networking software to install TCP/IP on your computer.. In your TCP/IP network, each computer and the router must be assigned a unique IP addresses. Each computer must also have other TCP/IP configuration information such as a subnet mask, a domain name server (DNS) address, and a default gateway address. In most cases, you should install TCP/IP so that the computer obtains its network configuration information automatically from a DHCP server during bootup. For a detailed explanation of the meaning and purpose of these configuration items, refer to "Appendix B, "Networks, Routing, and Firewall Basics." The HR314 is shipped preconfigured as a DHCP server. The router assigns the following TCP/IP configuration information automatically when the computers are rebooted: • PC, Macintosh, or workstation IP addresses-192.168.0.3 through 192.168.0.254 • Subnet mask-255.255.255.0 • Gateway address (the router)-192.168.0.1 These addresses are part of the IETF-designated private address range for use in private networks. Configuring Windows 95, 98, and ME for TCP/IP Networking As part of the PC preparation process, you need to manually install and configure TCP/IP on each networked PC. Before starting, locate your Windows CD; you may need to insert it during the TCP/IP installation process. Installing or Verifying Windows Networking Components To install or verify the necessary components for IP networking: 1. On the Windows taskbar, click the Start button, point to Settings, and then click Control Panel. 2. Double-click the Network icon. 3-2 Preparing Your Network
-
 1
1 -
2
-
3
-
4
-
5
-
6
-
7
-
8
-
9
-
10
-
11
-
12
-
13
-
14
-
15
-
16
-
17
-
18
-
19
-
20
-
21
-
22
-
23
-
24
-
 25
25 -
 26
26 -
 27
27 -
 28
28 -
 29
29 -
 30
30 -
 31
31 -
 32
32 -
 33
33 -
 34
34 -
 35
35 -
36
-
37
-
38
-
39
-
40
-
41
-
42
-
43
-
44
-
45
-
46
-
47
-
48
-
49
-
50
-
51
-
52
-
53
-
54
-
55
-
56
-
57
-
58
-
59
-
60
-
61
-
62
-
63
-
64
-
65
-
66
-
67
-
68
-
69
-
70
-
71
-
72
-
73
-
74
-
75
-
76
-
77
-
78
-
79
-
80
-
81
-
82
-
83
-
84
-
85
-
86
-
87
-
88
-
89
-
90
-
91
-
92
-
93
-
94
-
95
-
96
-
97
-
98
-
99
-
100
-
101
-
102
-
103
-
104
-
105
-
106
-
107
-
108
-
109
-
110
-
111
-
112
-
113
-
114
-
115
-
116
-
117
-
118
-
119
-
120
-
121
-
122
-
123
 |
 |
