Oki C942 C911dn/C931dn/C931DP/C941dn/C941DP/C942 Basic Users Guide - English - Page 69
Setup Flow, Using EtherTalk, EtherTalk, Bonjour, Rendezvous
 |
View all Oki C942 manuals
Add to My Manuals
Save this manual to your list of manuals |
Page 69 highlights
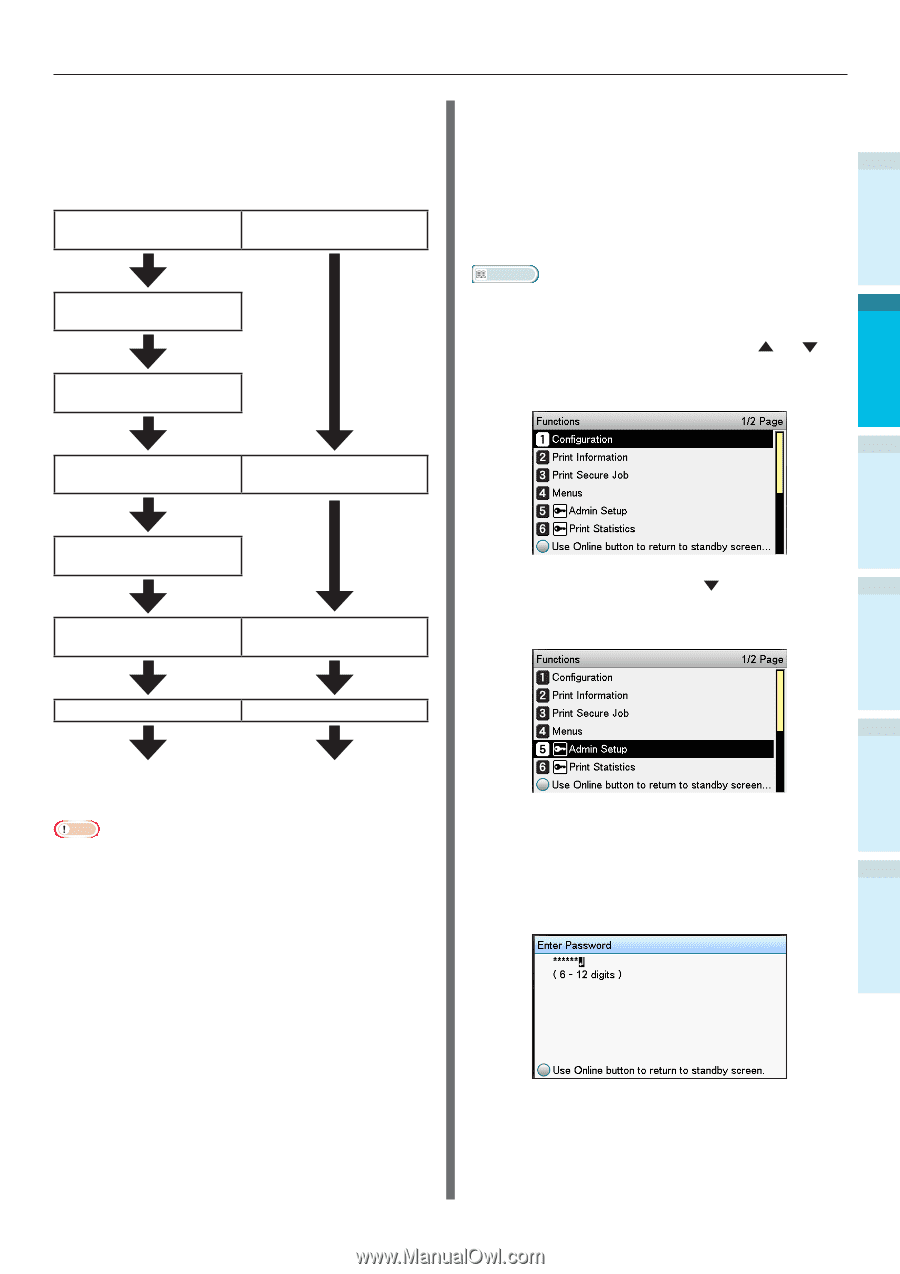
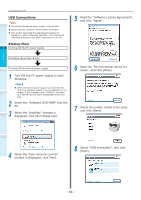
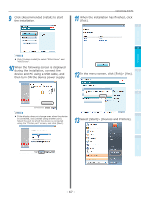
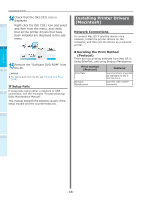
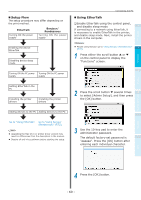
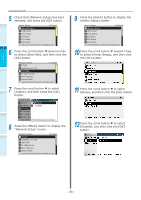
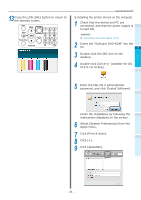
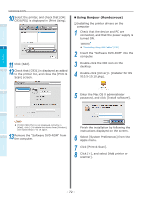
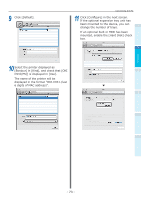
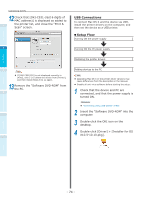
„„Setup Flow The setup procedure may differ depending on the print method. EtherTalk Turning ON the power supply Bonjour/ Rendezvous Turning ON the power supply Enabling the device EtherTalk Disabling device sleep mode Turning ON the PC power Turning ON the PC power supply supply Connecting the PC „„Using EtherTalk ‰‰Enable EtherTalk using the control panel, and disable sleep mode 1 If connecting to a network using EtherTalk, it is necessary to enable EtherTalk in the printer, and disable sleep mode. Next, install the printer drivers in the computer. Before use Reference People using Bonjour go to "Using Bonjour (Rendezvous)" (P.72). 2 Setting Up 1 Press either the scroll button or on the control panel to display the "Functions" screen. 3 Printing Setting EtherTalk in the PC Installing the printer drivers Installing the printer drivers 2 Press the scroll button several times to select [Admin Setup], and then press 4 the [OK] button. Basic Device Operations Adding devices to the PC Adding devices to the PC Appendix Go to "Using EtherTalk". Go to "Using Bonjour (Rendezvous)" (P.72). Note Upgrading the Mac OS X or printer driver version may result in differences from the description in the manual. Disable all anti-virus software before starting the setup. 3 Use the 10-key pad to enter the administrator password. The default factory-set password is "aaaaaa". Press the [OK] button after entering each individual character. Index 4 Press the [OK] button. - 69 -
-
 1
1 -
2
-
3
-
4
-
5
-
6
-
7
-
8
-
9
-
10
-
11
-
12
-
13
-
14
-
15
-
16
-
17
-
18
-
19
-
20
-
21
-
22
-
23
-
24
-
25
-
26
-
27
-
28
-
29
-
30
-
31
-
32
-
33
-
34
-
35
-
36
-
37
-
38
-
39
-
40
-
41
-
42
-
43
-
44
-
45
-
46
-
47
-
48
-
49
-
50
-
51
-
52
-
53
-
54
-
55
-
56
-
57
-
58
-
59
-
60
-
61
-
62
-
63
-
 64
64 -
 65
65 -
 66
66 -
 67
67 -
 68
68 -
 69
69 -
 70
70 -
 71
71 -
 72
72 -
 73
73 -
 74
74 -
75
-
76
-
77
-
78
-
79
-
80
-
81
-
82
-
83
-
84
-
85
-
86
-
87
-
88
-
89
-
90
-
91
-
92
-
93
-
94
-
95
-
96
-
97
-
98
-
99
-
100
-
101
-
102
-
103
-
104
-
105
-
106
-
107
-
108
-
109
-
110
-
111
-
112
-
113
-
114
-
115
-
116
-
117
-
118
-
119
-
120
-
121
-
122
-
123
-
124
-
125
-
126
-
127
-
128
-
129
-
130
-
131
-
132
-
133
-
134
-
135
-
136
-
137
-
138
-
139
-
140
-
141
 |
 |