Oki ML8480FB ML8480FB User's Guide - Page 11
Combined Switches, With the Printer Powered Up and Off Line
 |
View all Oki ML8480FB manuals
Add to My Manuals
Save this manual to your list of manuals |
Page 11 highlights
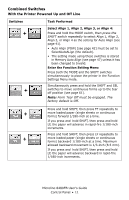
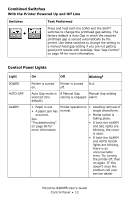
Combined Switches With the Printer Powered Up and Off Line Switches + MODE.jpg SHIFT.jpg Memory Auto ALign Cross Ref + SEL.jpg SHIFT.jpg + SHIFT.jpg FF.jpg + SHIFT.jpg LF.jpg Task Performed Select Align 1, Align 2, Align 3, or Align 4: Press and hold the MODE switch, then press the SHIFT switch repeatedly to select Align 1, Align 2, Align 3, or Align 4 as the setting for Auto Align (see page 41). • Auto Align (POW) [see page 42] must be set to SelectAutoALign (the default). • The setting made using these switches is stored in Memory Auto Align (see page 47) unless it has been changed to Invalid. Enter the Function Setting Menu: Press both the MODE and the SHIFT switches simultaneously to place the printer in the Function Settings Menu mode. Simultaneously press and hold the SHIFT and SEL switches to move continuous forms up to the tear off position (see page 61). Note: Form Tear Off must be engaged. The factory default is Off. Press and hold SHIFT, then press FF repeatedly to move loaded paper (single sheets or continuous forms) forward 1/180-inch at a time. If you press and hold SHIFT, then press and hold LF, the paper will advance in rapid-fire 1/180-inch increments. Press and hold SHIFT, then press LF repeatedly to move loaded paper (single sheets or continuous forms) backward 1/180-inch at a time. Maximum allowed backward movement is 1/3-inch (8.5 mm). If you press and hold SHIFT, then press and hold LF, the paper will advance backward in rapid-fire 1/180-inch increments. Microline 8480FB User's Guide Control Panel • 11
-
 1
1 -
2
-
3
-
4
-
5
-
 6
6 -
 7
7 -
 8
8 -
 9
9 -
 10
10 -
 11
11 -
 12
12 -
 13
13 -
 14
14 -
 15
15 -
 16
16 -
17
-
18
-
19
-
20
-
21
-
22
-
23
-
24
-
25
-
26
-
27
-
28
-
29
-
30
-
31
-
32
-
33
-
34
-
35
-
36
-
37
-
38
-
39
-
40
-
41
-
42
-
43
-
44
-
45
-
46
-
47
-
48
-
49
-
50
-
51
-
52
-
53
-
54
-
55
-
56
-
57
-
58
-
59
-
60
-
61
-
62
-
63
-
64
-
65
-
66
-
67
-
68
-
69
-
70
-
71
-
72
-
73
-
74
-
75
-
76
-
77
-
78
-
79
-
80
-
81
-
82
-
83
-
84
-
85
-
86
-
87
-
88
-
89
-
90
-
91
-
92
-
93
-
94
-
95
-
96
-
97
-
98
-
99
-
100
-
101
-
102
-
103
-
104
 |
 |
