Oki ML8480FB ML8480FB User's Guide - Page 20
shaped hole, mark on the gauge
 |
View all Oki ML8480FB manuals
Add to My Manuals
Save this manual to your list of manuals |
Page 20 highlights
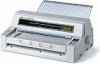
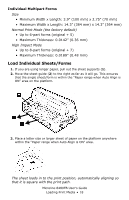
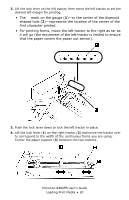
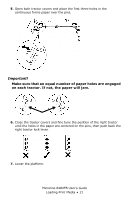
2. Lift the lock lever on the left tractor, then move the left tractor to set the desired left margin for printing. • The ▼ mark on the gauge (1)-or the center of the diamond shaped hole (2)-represents the location of the center of the first character printed. • For printing forms, move the left tractor to the right as far as it will go (the movement of the left tractor is limited to ensure that the paper covers the paper out sensor). F5-04a.JPG 8480_2_crop.JPG 3. Push the lock lever down to lock the left tractor in place. 4. Lift the lock lever (1) on the right tractor (2) and move the tractor over to correspond to the width of the continuous forms you are using. Center the paper support (3) between the two tractors. F5-05a.JPG Microline 8480FB User's Guide Loading Print Media • 20
-
 1
1 -
2
-
3
-
4
-
5
-
6
-
7
-
8
-
9
-
10
-
11
-
12
-
13
-
14
-
 15
15 -
 16
16 -
 17
17 -
 18
18 -
 19
19 -
 20
20 -
 21
21 -
 22
22 -
 23
23 -
 24
24 -
 25
25 -
26
-
27
-
28
-
29
-
30
-
31
-
32
-
33
-
34
-
35
-
36
-
37
-
38
-
39
-
40
-
41
-
42
-
43
-
44
-
45
-
46
-
47
-
48
-
49
-
50
-
51
-
52
-
53
-
54
-
55
-
56
-
57
-
58
-
59
-
60
-
61
-
62
-
63
-
64
-
65
-
66
-
67
-
68
-
69
-
70
-
71
-
72
-
73
-
74
-
75
-
76
-
77
-
78
-
79
-
80
-
81
-
82
-
83
-
84
-
85
-
86
-
87
-
88
-
89
-
90
-
91
-
92
-
93
-
94
-
95
-
96
-
97
-
98
-
99
-
100
-
101
-
102
-
103
-
104
 |
 |
